Design Details
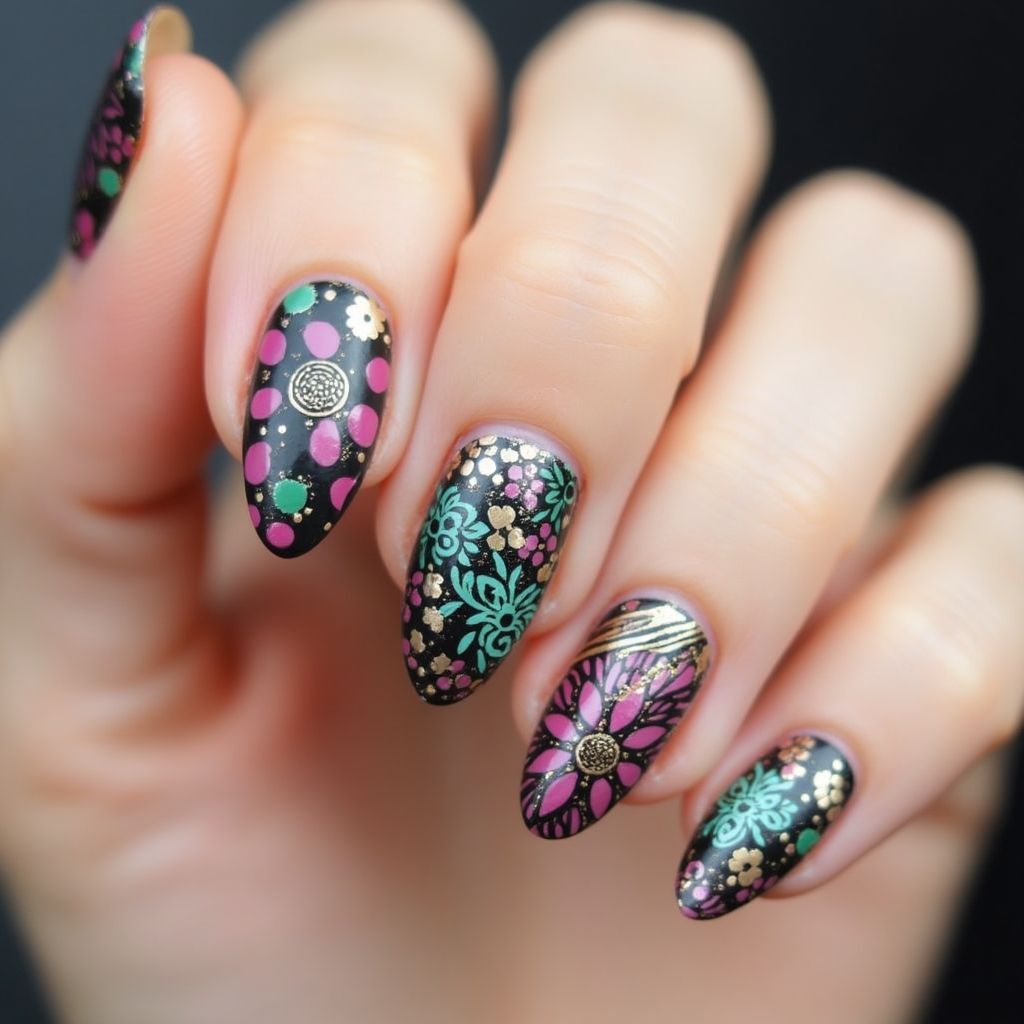
- 1The overall design features a mix of vibrant floral and geometric patterns on a dark base, creating a striking contrast.
- 2Colors used include black, pink, green, and gold, which add depth and visual interest.
- 3Nails are stylishly elongated with a pointed shape, enhancing the overall elegance of the design.
- 4The use of matte and glossy finishes throughout adds texture and dimension to the nail art.
Items Needed for this Design
Nail Preparation
- Nail file
- Cuticle oil
- Base coat
- Top coat
Nail Polish Colors
- Black nail polish
- Pink nail polish
- Green nail polish
- Gold nail polish
Nail Art Tools
- Dotting tools
- Striping brush
- Stencils or nail stickers
Cleanup
- Nail polish remover
- Cotton pads
- Clean-up brush
Step by Step DIY(Do It Yourself) Guide
1
Prepare your nails.
- File your nails to your desired shape.
- Apply cuticle oil to soften the cuticles.
- Push back the cuticles gently and clean the nails.
2
Apply base coat.
- Apply a thin layer of base coat to protect your nails.
- Allow it to dry completely before proceeding.
3
Paint the base color.
- Apply two coats of black nail polish, allowing each coat to dry.
- Ensure even coverage with no streaks.
4
Create floral and geometric patterns.
- Using a dotting tool, create pink and green dots on selected nails.
- Using a striping brush, draw floral designs in green and gold.
- Add gold accents for additional flair.
5
Finish with top coat.
- Once all designs are dry, apply a top coat to seal the artwork.
- Allow the top coat to dry completely.
6
Clean up.
- Use nail polish remover and a clean-up brush to tidy any mistakes around the edges.
- Wash your hands to remove any excess polish.
Pro Tips
Use a good quality base and top coat for longer-lasting results.
Allow each layer of polish to dry thoroughly to avoid smudging.
Practice your designs on a nail wheel before applying them to your nails.
If you're new to nail art, start with simpler designs to build confidence.