Design Details
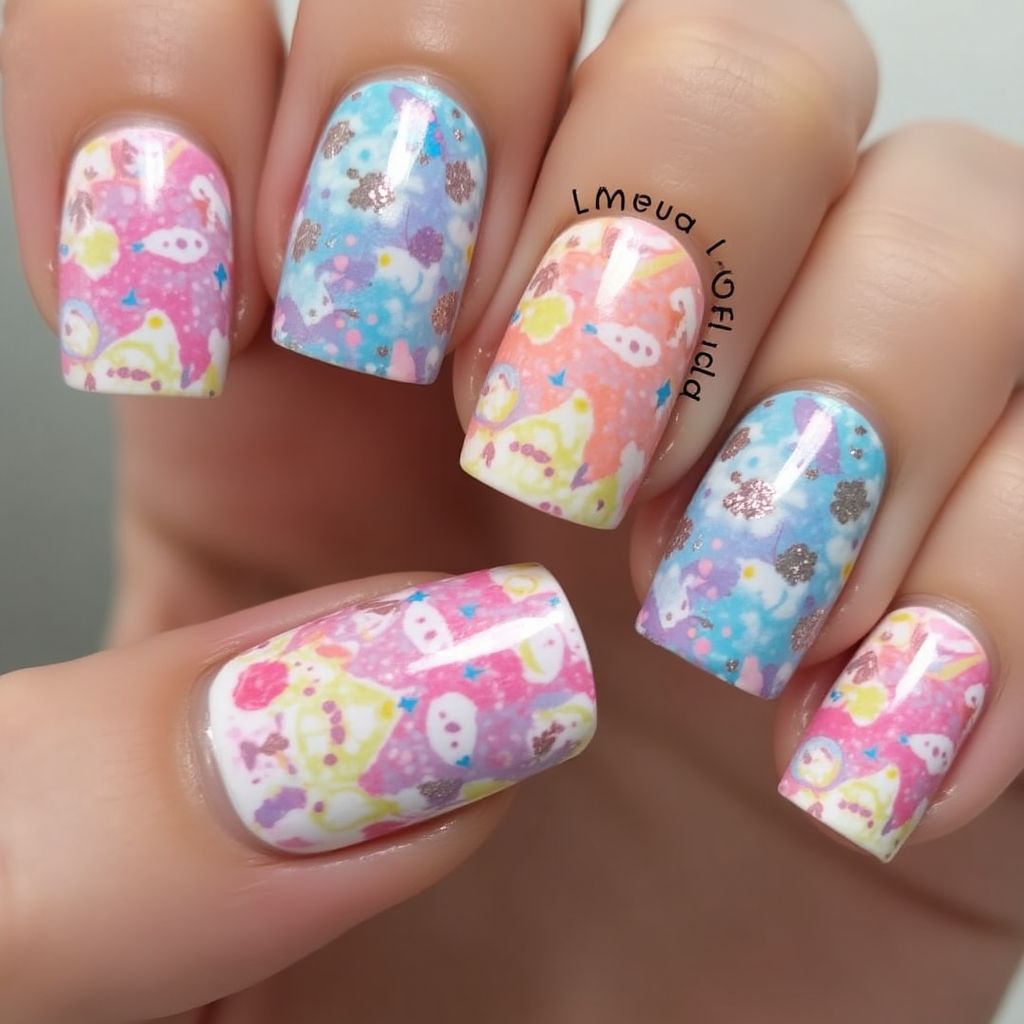
- 1The nail design features a pastel color scheme with a mix of pink, blue, and peach backgrounds, creating a soft and whimsical look.
- 2Each nail is adorned with playful patterns, including bears, balloons, and stars, adding a cute and playful element to the design.
- 3The motifs are created using a stamping technique, allowing for crisp, detailed images that stand out against the pastel base.
- 4The overall effect is fun and charming, perfect for a cheerful, youthful vibe.
Items Needed for this Design
Nail Preparation
- Base coat
- Top coat
- Nail file
- Cuticle pusher
Nail Polish Colors
- Pastel pink
- Pastel blue
- Pastel peach
- White
Nail Art Tools
- Stamping plates with playful designs
- Stamping tool
- Nail brush
Cleanup
- Nail polish remover
- Cotton swabs
- Small cleanup brush
Step by Step DIY(Do It Yourself) Guide
1
Prepare your nails.
- Start with clean, dry nails.
- Shape your nails with a file and gently push back the cuticles.
- Apply a base coat and let it dry completely.
2
Apply the background colors.
- Apply pastel pink on the thumb and ring finger.
- Apply pastel blue on the index and pinky finger.
- Apply pastel peach on the middle finger.
- Allow the polish to dry fully between layers if needed.
3
Create the stamped designs.
- Select playful patterns from the stamping plate.
- Apply white polish to the stamping plate and scrape off excess.
- Use the stamping tool to pick up the design.
- Transfer the design onto your nails, centering it as desired.
4
Finalize the look.
- Apply a top coat to seal the design and add shine.
- Clean any excess polish from around the nails using a small brush dipped in remover.
Pro Tips
Ensure each layer of polish is dry before proceeding to the next step to avoid smudging.
Practice the stamping technique on a plastic sheet before applying to the nails for optimal results.
Use thin coats of polish to avoid a bulky finish and achieve a neater look.
If you make a mistake, use a cotton swab dipped in remover to gently correct the area.