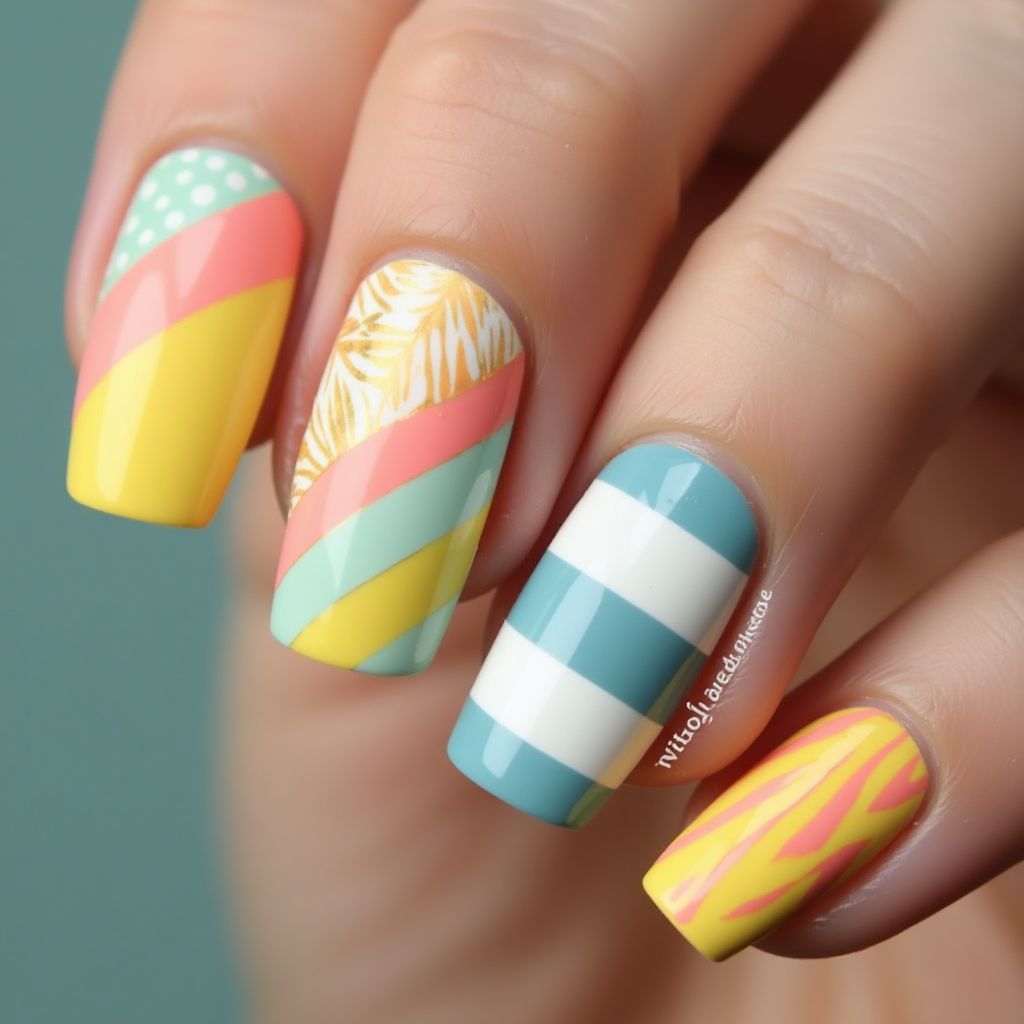
Design Details
- 1The nail design features a vibrant summer theme with a mix of stripes, chevrons, and floral patterns.
- 2Colors used include pastel shades like mint green, coral, yellow, and a bright blue, creating a playful and fresh look.
- 3Each nail has a unique design element, with some nails showcasing diagonal stripes and others with detailed patterns, contributing to a cohesive yet diverse overall appearance.
Items Needed for this Design
Nail Preparation
- Nail buffer
- Cuticle oil
- Base coat
Nail Polish Colors
- Mint green
- Coral pink
- Bright yellow
- Pastel blue
- White
- Gold (for the floral pattern)
Nail Art Tools
- Striping tape
- Dotting tool
- Thin nail art brush
- Top coat
Cleanup
- Nail polish remover
- Cotton pads
- Small brush for precision cleaning
Step by Step DIY(Do It Yourself) Guide
1
Prepare your nails.
- Buff the surface of your nails to create a smooth canvas.
- Apply cuticle oil and push back cuticles gently.
- Apply a base coat to protect your nails.
2
Apply the base colors.
- Choose three different colors for the base and paint each nail, allowing drying time in between layers.
- Use mint green on the first nail, coral pink on the second, and bright yellow on the third.
- For the fourth nail, apply the pastel blue and leave the fifth nail with a color of your choice.
3
Create patterns using striping tape.
- Once the base colors are dry, apply striping tape to create diagonal sections on the nails.
- Paint the sections with complementary colors, such as white and gold, to create dynamic patterns.
- Remove the tape carefully while the polish is still wet for clean lines.
4
Add details to specific nails.
- For the floral design, use a thin brush and gold polish to create delicate leaf patterns.
- On one of the nails, create stripes using the dotting tool or thin brush with white polish.
5
Seal the design.
- Once everything is dry, apply a top coat to add shine and protect your design.
- Wait for a few minutes for the top coat to dry completely.
6
Cleanup.
- Use a brush and nail polish remover to clean up any excess polish around the cuticles.
- Ensure your nails look neat and well-finished.
Pro Tips
Always allow each layer of polish to dry completely before moving on to the next step.
If you're not confident with freehand patterns, practice on a nail wheel first.
Use a light touch when applying the top coat to avoid smudging your design.