Design Details
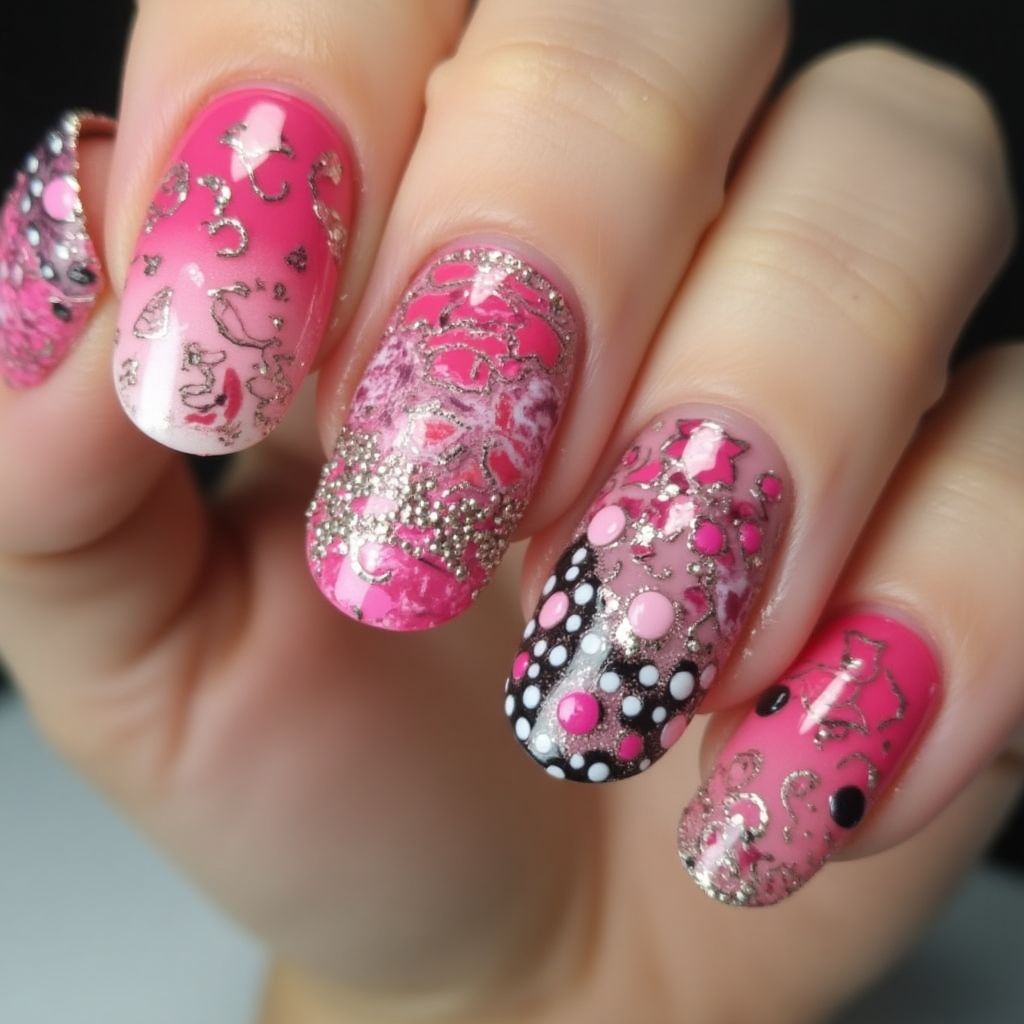
- 1This nail design features a vibrant pink color palette with various artistic elements across each nail.
- 2The design incorporates intricate gold patterns that create a chic and elegant look, alongside bold black and white polka dots for contrast.
- 3Textural variations are achieved through the use of 3D elements, such as beads and glossy finishes, enhancing the overall dimensionality of the nails.
Items Needed for this Design
Nail Preparation
- Nail file
- Base coat
- Top coat
Nail Polish Colors
- Pink (light and dark shades)
- White
- Black
- Gold (metallic)
Nail Art Tools
- Dotting tool
- Nail art brush
- Sponge (for gradient)
Cleanup
- Nail polish remover
- Cotton pads
- Scotch tape (for edges)
Step by Step DIY(Do It Yourself) Guide
1
Prepare your nails.
- File and shape your nails to your desired length.
- Push back cuticles and apply a base coat.
2
Apply the base color.
- Paint all nails with a coat of light pink polish and let dry.
- Use darker shades of pink on the tips for an ombre effect, applying it with a sponge.
3
Add details.
- Create patterns with gold polish using the nail art brush.
- Use a dotting tool to apply pink and black dots on selected nails.
4
Incorporate embellishments.
- Apply 3D beads on select areas for extra texture.
- Seal the design with a top coat, ensuring all elements are secured.
5
Clean up.
- Use nail polish remover and cotton pads to clean around the edges of the nails.
- Apply cuticle oil to nourish the nails.
Pro Tips
Always use a base coat to protect your natural nails and enhance color vibrancy.
Allow each layer to dry thoroughly before applying the next to prevent smudging.
Experiment with different sizes of dotting tools for varied sized polka dots.
If you're new to nail art, practice your designs on a nail wheel before applying to your nails.