Design Details
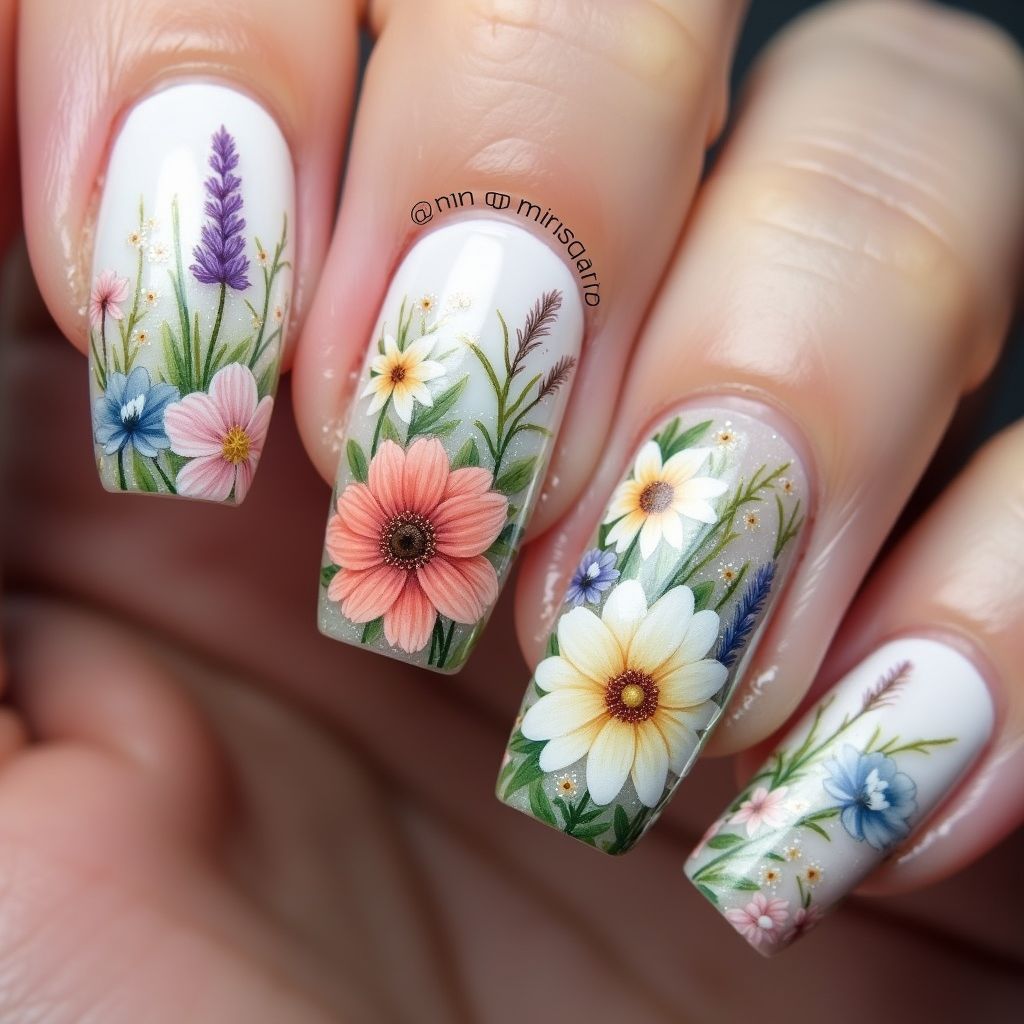
- 1This nail art design features delicate and intricate floral patterns, reminiscent of a blooming meadow.
- 2Each nail showcases a unique arrangement of various flowers, including daisies, lavender, and other wildflowers, set against a soft, milky white background.
- 3The design incorporates fine details like tiny buds, leafy stems, and subtle shading to add depth and realism, giving the nails a sophisticated, hand-painted look.
- 4A sheer, glittery top coat adds a touch of sparkle, enhancing the overall charm of the floral composition.
Items Needed for this Design
Nail Preparation
- Nail file
- Cuticle pusher
- Cuticle nipper (optional)
- Nail buffer
- Cleansing alcohol
Nail Polish Colors
- Milky white base polish
- Light green (for leaves and stems)
- Coral (for gerbera)
- White (for daisies)
- Yellow (for flower centers)
- Blue (for small flowers)
- Pink (for small flowers)
- Purple (for lavender)
- Brown (for flower centers and reeds)
- Sheer glitter top coat
- Matte top coat (optional)
Nail Art Tools
- Thin nail art brushes (various sizes)
- Dotting tool
- Palette or mixing surface
Cleanup
- Nail polish remover
- Small brush for cleanup
- Cotton swabs
Step by Step DIY(Do It Yourself) Guide
1
Prepare your nails.
- File your nails into the desired shape.
- Gently push back and trim the cuticles.
- Buff the nail surface lightly to create a smooth base.
- Cleanse the nails with alcohol to remove any oils or debris.
2
Apply base coat.
- Apply a thin coat of milky white polish as the base color to all nails.
- Allow the base coat to dry completely. Apply a second coat if needed for full opacity.
- Apply a matte top coat and let it dry for a subdued look, this step is optional.
3
Paint the large flowers.
- Using a thin brush and coral polish, paint the outline of gerbera petals on one or two nails.
- Fill in the petals with the coral polish, creating soft shading towards the center.
- With a brown polish and a dotting tool, add the flower center to the gerbera.
- On another nail, paint the outline of white daisy petals using a thin brush and white polish.
- Fill in the petals with white polish, then add a yellow dot in the center with a dotting tool.
4
Add smaller flowers and foliage.
- Use a thin brush and light green polish to paint delicate stems and leaves around the larger flowers.
- With the dotting tool and thin brushes, add small blue, pink, and white flowers to fill in the spaces between the large flowers and stems.
- Paint lavender sprigs using purple polish and a fine brush.
- Add brown reeds for a more realistic feel.
5
Apply glitter top coat.
- Apply a thin coat of sheer glitter top coat over the entire design.
- This will add a subtle sparkle and seal in the design.
6
Clean up the edges and finish.
- Clean any polish smudges around the cuticles with a small brush dipped in nail polish remover.
- Apply cuticle oil to moisturize the skin around your nails.
Pro Tips
Practice the floral designs on a piece of paper before applying them to your nails to refine your technique.
Use very thin layers of polish to prevent smudging and allow for better layering of colors.
Clean your nail art brushes frequently with nail polish remover to maintain fine lines and details.
Consider using nail art stickers or stamping plates as an alternative for creating the floral patterns if you're not comfortable with freehand painting.
To ensure longevity, reapply a thin layer of top coat every 2-3 days.