Design Details
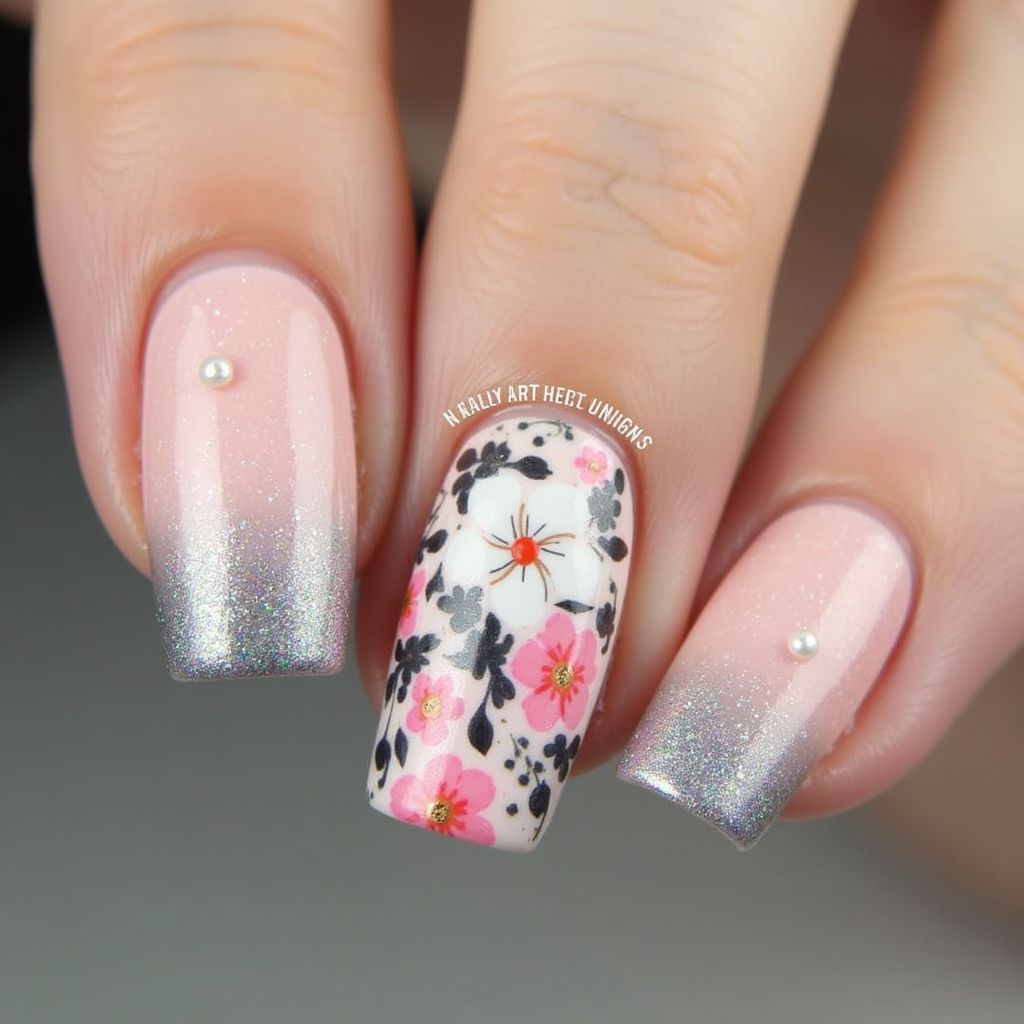
- 1This nail art design features a delicate floral pattern on one nail and a sparkling gradient effect on the others.
- 2The floral nail showcases white, pink, black, and gray flowers with small golden accents, creating a detailed and eye-catching centerpiece.
- 3The other nails have a soft pink base that fades into a glittery silver at the tips, enhanced with a small pearl embellishment near the cuticle for an elegant touch.
- 4Overall, the design combines natural and glamorous elements for a sophisticated look.
Items Needed for this Design
Nail Preparation
- Nail file
- Cuticle pusher
- Base coat
Nail Polish Colors
- Soft pink nail polish
- Silver glitter nail polish
- White nail polish
- Pink nail polish
- Black nail polish
- Gray nail polish
- Gold nail polish
Nail Art Tools
- Small nail art brush or dotting tool
- Sponge for gradient effect (optional)
- Tweezers (for placing pearls)
Cleanup
- Nail polish remover
- Small cleanup brush
- Top coat
- Nail glue (for pearls)
- Small pearls
Step by Step DIY(Do It Yourself) Guide
1
Prepare Your Nails
- File and shape your nails to your desired shape. Square or squoval shape work well with this design.
- Gently push back your cuticles.
- Apply a thin layer of base coat and let it dry completely.
2
Create the Gradient Nails
- Apply two coats of soft pink nail polish to the nails that will feature the gradient effect, allowing each coat to dry.
- Using a sponge, gently dab silver glitter polish onto the tips of the nails to create a gradient effect. You may need to repeat this step to achieve desired opacity.
- Let the glitter gradient dry completely.
3
Paint the Floral Design
- Apply a base coat of soft pink or a similar light shade to the nail designated for the floral design and let it dry.
- Using a fine nail art brush or dotting tool, paint the white flowers. Start with the basic shape and add details gradually.
- Add pink flowers around the white flower using a similar technique.
- Use black and gray nail polish to create leaf and branch details around the flowers.
- With the gold nail polish and a fine brush, add small accents to the center of the flowers.
- Allow the floral design to dry completely.
4
Add Pearl Embellishments
- Apply a tiny dot of nail glue near the cuticle area of the gradient nails.
- Using tweezers, carefully place a small pearl onto the glue.
- Let the glue dry completely.
5
Finish with Top Coat
- Apply a generous layer of top coat over all nails to seal the design and add shine.
- Ensure the top coat is fully dry to prevent smudging.
6
Clean Up
- Dip a small brush in nail polish remover and carefully clean up any mistakes around the edges of your nails.
- Allow to dry completely.
Pro Tips
For the gradient effect, apply thin layers of glitter polish to avoid a bulky finish.
Use a clear stamper and stamping plates for the floral design if freehand painting is difficult.
Protect your skin around the nails with liquid latex before starting to paint to make clean-up easier.
Allow each layer of polish to dry completely to prevent smudging and ensure longevity of the design.
Apply cuticle oil daily to keep your nails and cuticles moisturized.