Design Details
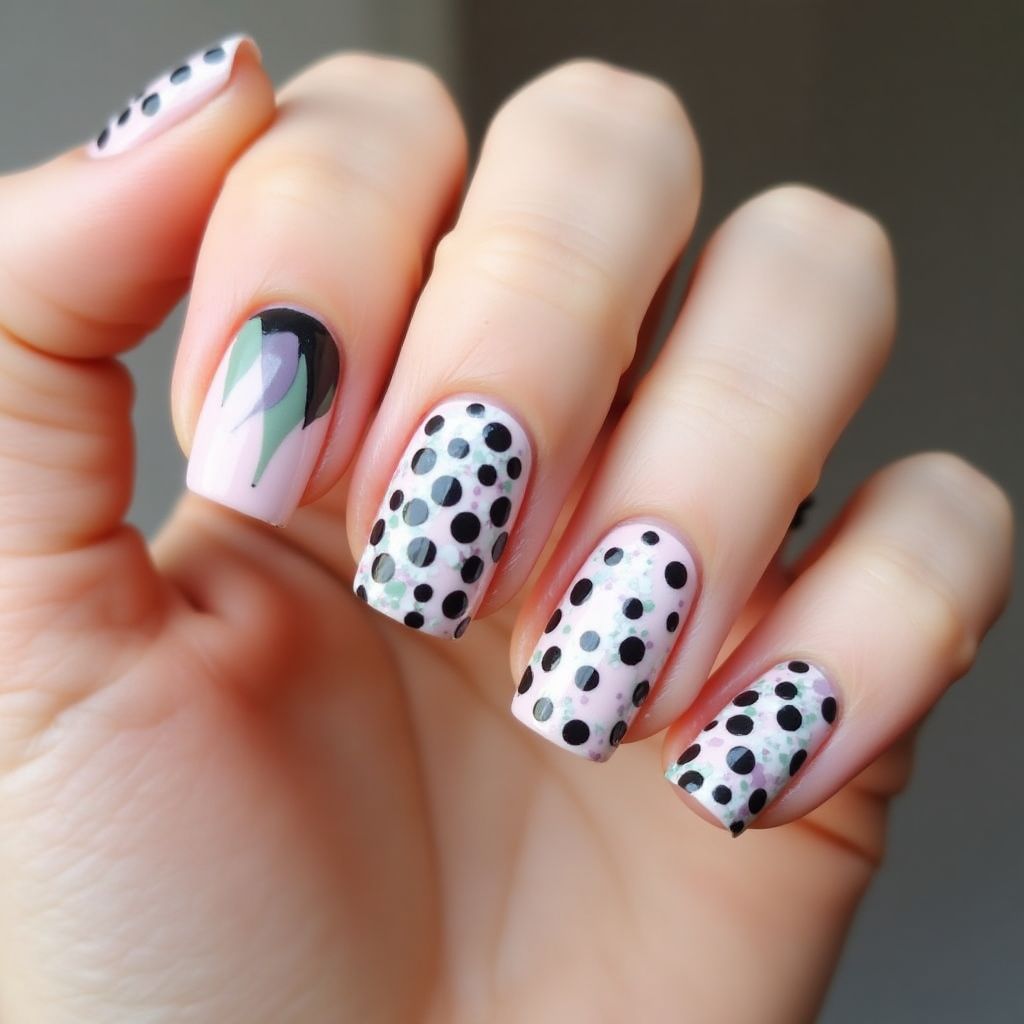
- 1The nail design features a combination of pastel pink, black, and green colors, creating a modern and playful look.
- 2Each nail is decorated with varying patterns, including polka dots, bold shapes, and contrasting designs.
- 3The use of large black polka dots against a pink background adds a pop of visual interest, while the accent nail introduces a stylish geometric element.
Items Needed for this Design
Nail Preparation
- Nail file
- Nail buffer
- Base coat
- Top coat
Nail Polish Colors
- Pastel pink
- Black
- Mint green
Nail Art Tools
- Dotting tool or toothpick
- Nail brushes for detailing
Cleanup
- Nail polish remover
- Cotton swabs
Step by Step DIY(Do It Yourself) Guide
1
Prepare your nails.
- File and shape your nails to your desired length.
- Buff the surface of your nails to create a smooth base.
- Apply a base coat and let it dry completely.
2
Apply the base color.
- Paint all nails with two coats of pastel pink polish, allowing each coat to dry in between.
3
Create the polka dot design.
- Using a dotting tool or toothpick, dip it into the black polish.
- Dab the tool onto the nail to create evenly spaced black polka dots on three nails.
- Allow the dots to dry completely.
4
Add the geometric design.
- On the accent nail, use a small brush to paint a black base at the tip of the nail.
- With the mint green polish, create overlapping shapes on the black base for a stylish effect.
- Let this design dry thoroughly.
5
Finish with a top coat.
- Apply a quick-drying top coat over all nails to seal in the design and add shine.
- Use a clean-up brush dipped in nail polish remover to tidy up the edges.
Pro Tips
Ensure each layer of polish is completely dry before applying the next to prevent smudging.
Practice the dotting technique on a piece of paper before applying to your nails for better control.
Use thin layers of polish to avoid a bulky look and ensure faster drying times.
Consider using a matte top coat for a trendy finish if shiny polish isn't preferred.