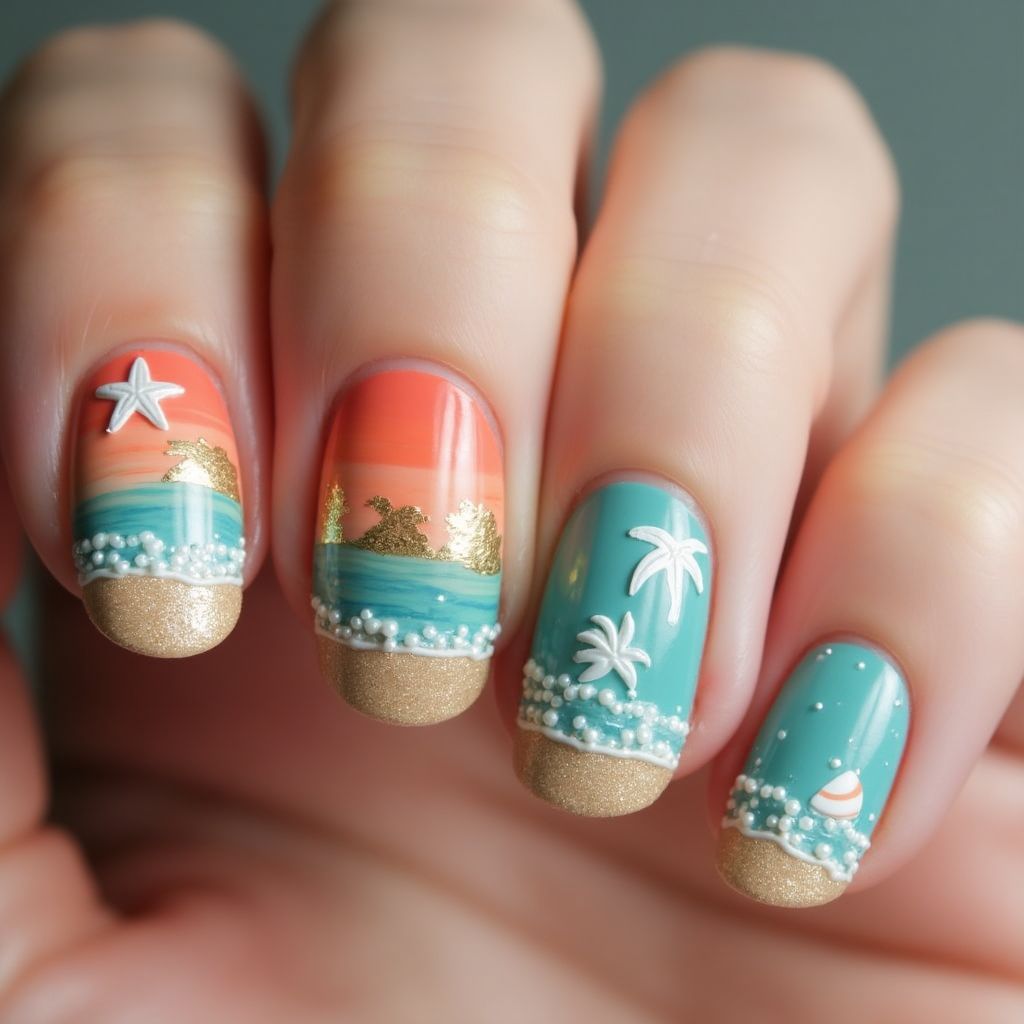
Beach Round Nail Design
Embrace the Essence of Summer with Whimsical Beach-Inspired Nail Art Designs

Design Details
- 1This nail design features a vibrant beach scene with shades of coral, turquoise, and gold, evoking a relaxing seaside vibe.
- 2The use of gradient techniques creates a sunset background, while detailed embellishments like starfish, palm trees, and pearl-like beads add texture.
- 3Each nail showcases a unique design element, aligning cohesively for a fun and summery aesthetic.
Items Needed for this Design
Nail Preparation
- Nail polish remover
- Base coat
- Top coat
Nail Polish Colors
- Coral
- Turquoise
- Gold
- White
Nail Art Tools
- Nail art brush
- Dotting tool
- Striping tape
Cleanup
- Cotton pads
- Nail file
- Small brush for detail work
Step by Step DIY(Do It Yourself) Guide
1
Prepare your nails.
- Remove any old polish using nail polish remover.
- Shape your nails with a nail file to your desired length.
- Apply a base coat to protect your nails.
2
Create the gradient background.
- Apply coral polish on the top half of each nail.
- Blend turquoise polish from the middle to the tip using a sponge.
- Use the gold polish to create a smooth top edge for a sunset effect.
3
Add ocean and beach elements.
- Use the nail art brush to paint small waves in turquoise at the bottom of each nail.
- Apply the gold polish at the tip for a sandy effect.
- Adhere pearl-like beads to the edge of each nail for added texture.
4
Decorate with embellishments.
- Use the dotting tool to add white palm trees on select nails.
- Create and place small starfish designs using the white polish.
- Add any additional beach-themed decorations as desired.
5
Seal and finish.
- Once all elements are dry, apply a top coat to seal the design.
- Carefully clean up around the nails with a cotton pad and brush dipped in polish remover.
- Allow to dry completely before showing off your new nails.
Pro Tips
Practice gradient techniques on a practice nail to perfect your blending skills.
Use striping tape for cleaner lines when creating waves or borders.
Be patient with embellishments; allow each layer to dry to prevent smudging.