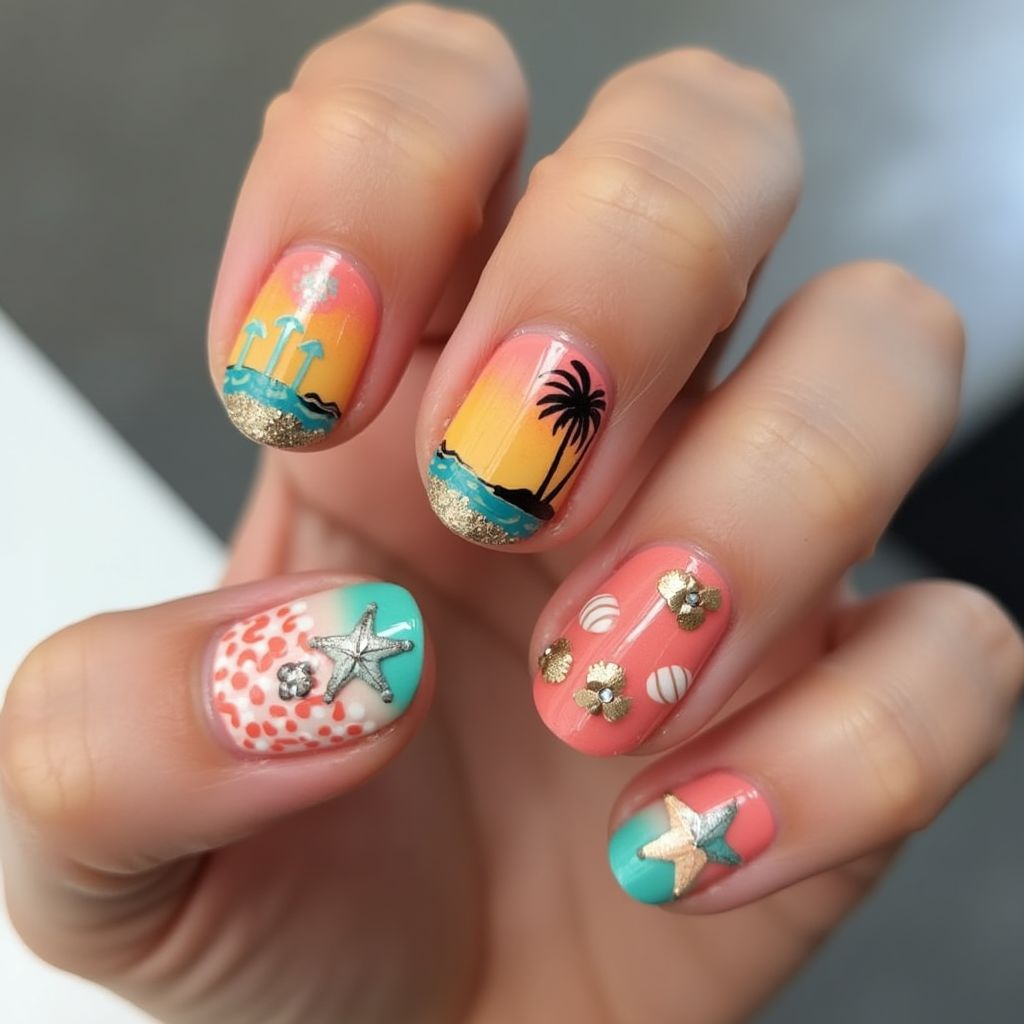
Vacation Round Nail Design
Escape to Paradise: Embrace Tropical Vibes with Stunning Sunset-Inspired Nail Art

Design Details
- 1This nail design features a vibrant sunset gradient in shades of coral, orange, and yellow on several nails.
- 2One nail showcases a beach scene with silhouettes of palm trees and water, while others highlight decorative accents including seashells, a starfish, and sparkly embellishments.
- 3The use of gold glitter at the nail tips adds an elegant touch, enhancing the summer theme.
Items Needed for this Design
Nail Preparation
- Nail file
- Nail buffer
- Base coat
- Top coat
Nail Polish Colors
- Coral polish
- Orange polish
- Yellow polish
- Teal polish
- White polish
Nail Art Tools
- Makeup sponge (for gradient)
- Detailing brush
- Dotting tool
- Nail gems and stickers
Cleanup
- Acetone or nail polish remover
- Cotton pads
Step by Step DIY(Do It Yourself) Guide
1
Prepare your nails.
- File and shape your nails to your desired length.
- Buff the surface to create a smooth base.
2
Apply the base coat.
- Apply a thin layer of base coat to protect your nails.
- Allow it to dry completely.
3
Create the sunset gradient.
- Using a makeup sponge, apply coral, orange, and yellow polish in stripes.
- Dab the sponge onto the nail, blending the colors for a gradient effect.
- Repeat for each nail, ensuring even coverage.
4
Paint beach scene and accents.
- Use a detailing brush to paint palm trees and water on one nail.
- On other nails, use a dotting tool to create seashell patterns.
- Attach nail gems and stickers for additional decoration.
5
Add glitter.
- Dab a small amount of gold glitter at the nail tips.
- Seal it with a top coat.
6
Finish with top coat.
- Once all polish is dry, apply a top coat to give shine and protect the design.
- Let it dry completely.
Pro Tips
Make sure to let each layer of polish dry before applying the next to avoid smudging.
Practice the gradient technique on a piece of paper before applying to your nails.
Use a small amount of nail polish remover on a clean brush to correct any mistakes.