Design Details
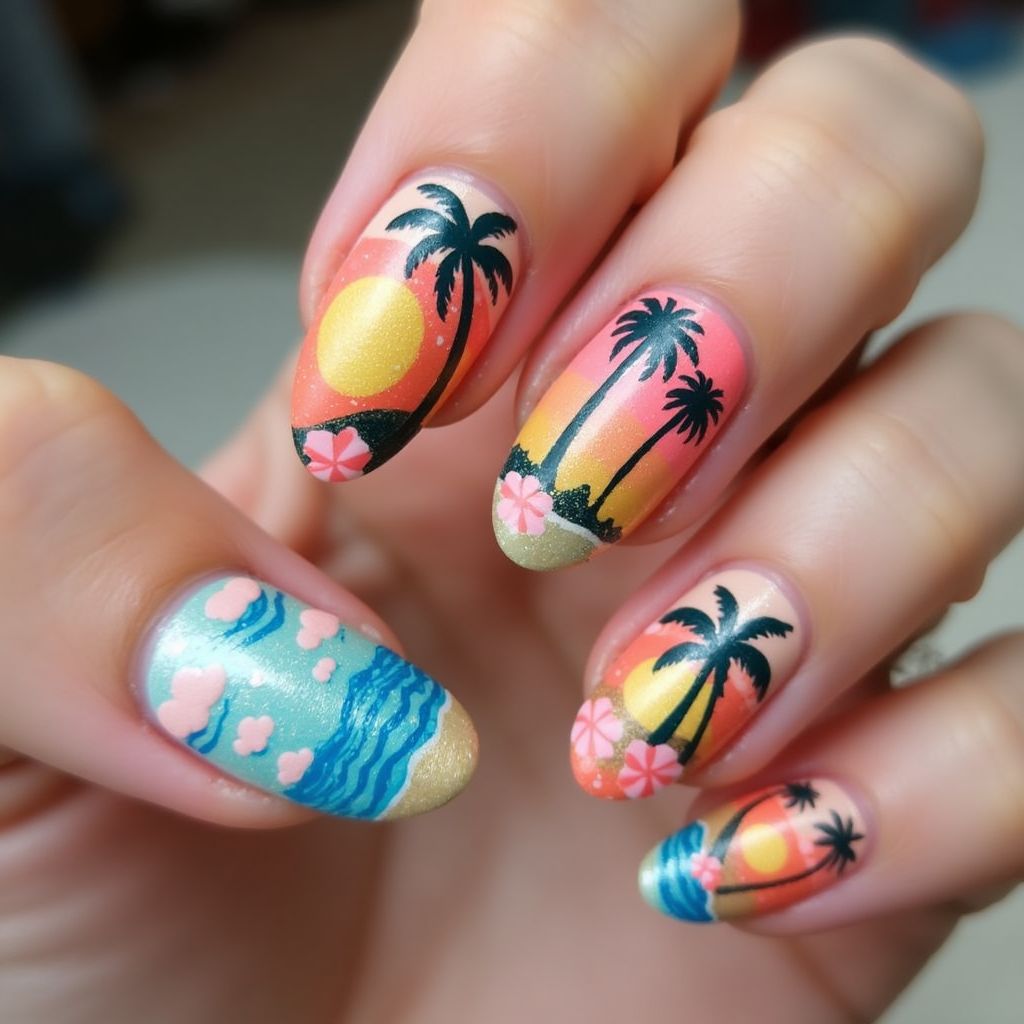
- 1The design features a vibrant tropical theme with sunsets and palm trees on a gradient background transitioning from pink to yellow.
- 2Palm trees are prominently featured as silhouettes against the sunset on most nails, while one nail depicts a sea wave design with pink clouds and a shimmering effect.
- 3Small pink flowers add a cute, tropical accent to the overall nail design, enhancing the beach vibe.
- 4The nails exhibit a mix of artistic elements, combining detailed line work and soft color transitions.
Items Needed for this Design
Nail Preparation
- Base coat
- Top coat
Nail Polish Colors
- Pink
- Yellow
- Orange
- Black
- Blue
- White
- Shimmery Gold
Nail Art Tools
- Nail art brushes
- Dotting tool
- Sponge for gradients
- Striping brush
Cleanup
- Nail polish remover
- Cotton swabs
- Clean-up brush
Step by Step DIY(Do It Yourself) Guide
1
Begin with nail preparation.
- Apply a base coat to protect your nails and allow it to dry completely.
2
Create the gradient backgrounds.
- Using a sponge, apply pink, orange, and yellow polishes in horizontal stripes.
- Dab the sponge onto the nail to blend the colors softly, forming a sunset gradient.
- Let it dry completely.
3
Add the palm tree silhouettes.
- Using a small nail art brush and black polish, paint thin lines for trunks.
- Add curved lines for fronds at the top of each trunk.
4
Create the sea wave nail design.
- Paint the nail with a shimmery gold base.
- Use blue polish and a striping brush to draw wavy lines for the sea.
- Add small white cloud shapes using a dotting tool or brush.
5
Add flower accents.
- Using a dotting tool, create small pink flowers by placing five dots in a circle.
6
Seal the design.
- Apply a top coat over all nails to add shine and protect the art.
- Allow the nails to dry thoroughly.
Pro Tips
Use a small brush for precision when painting the palm trees and clouds.
For a smoother gradient, apply multiple light dabs rather than pressing too hard with the sponge.
Clean your tools between uses to avoid color mixing.
Let each layer dry completely to prevent smudging.