Design Details
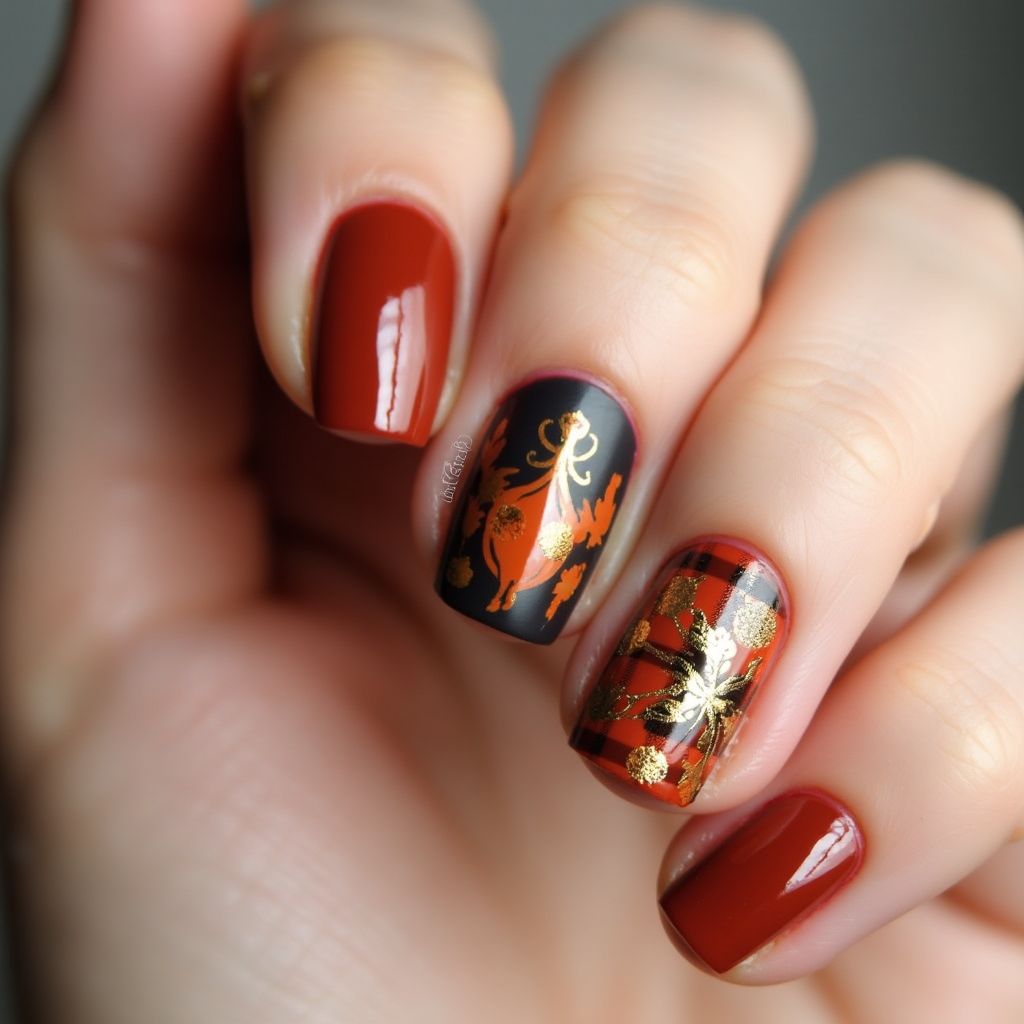
- 1The nail design features a combination of rich, autumnal colors with intricate gold detailing.
- 2Two nails have a solid, warm rust color, while the accent nails sport a black base with gold and orange designs.
- 3One accent nail showcases a matte black finish with elegant gold floral patterns, and another features a plaid pattern with gold highlights on an orange and red base.
- 4The overall look is sophisticated and perfect for the fall season, incorporating classic motifs with a modern twist.
Items Needed for this Design
Nail Preparation
- nail file
- buffer
- cuticle pusher
- base coat
- top coat
Nail Polish Colors
- rust red polish
- matte black polish
- orange polish
- gold polish
Nail Art Tools
- thin nail art brush
- striping tape
- dotting tool
- floral stamping plate (optional)
Cleanup
- cotton swabs
- nail polish remover
Step by Step DIY(Do It Yourself) Guide
1
Prepare your nails
- File your nails to the desired shape and length.
- Buff the surface gently to remove any shine.
- Push back cuticles and clean the nail bed.
- Apply a thin layer of base coat to protect your nails.
2
Apply the base colors
- Apply rust red polish on the thumb, index, and pinky fingers.
- Paint the middle nail with matte black polish.
- Paint the ring nail with orange polish.
3
Create the accent designs
- For the middle nail, use a gold polish and a thin nail art brush to paint floral patterns over the black base. Optionally, use a stamping plate for more detailed designs.
- On the ring finger, use striping tape to create a plaid pattern with black polish over the orange base, then highlight with a gold polish for accents.
4
Finish and clean up
- Apply a high-quality top coat on all nails except the matte nail to ensure longevity and shine on the rest.
- Use a cotton swab dipped in nail polish remover to clean around the edges of the nails for a tidy finish.
Pro Tips
Ensure the base coat is completely dry before applying polish to prevent smudging.
Use a fast-drying top coat to speed up the process and avoid smudges.
If you're new to stamping, practice on a sheet of paper before applying it to your nail.
For a cleaner plaid pattern, make sure the striping tape is pressed firmly onto the nail before painting over it.