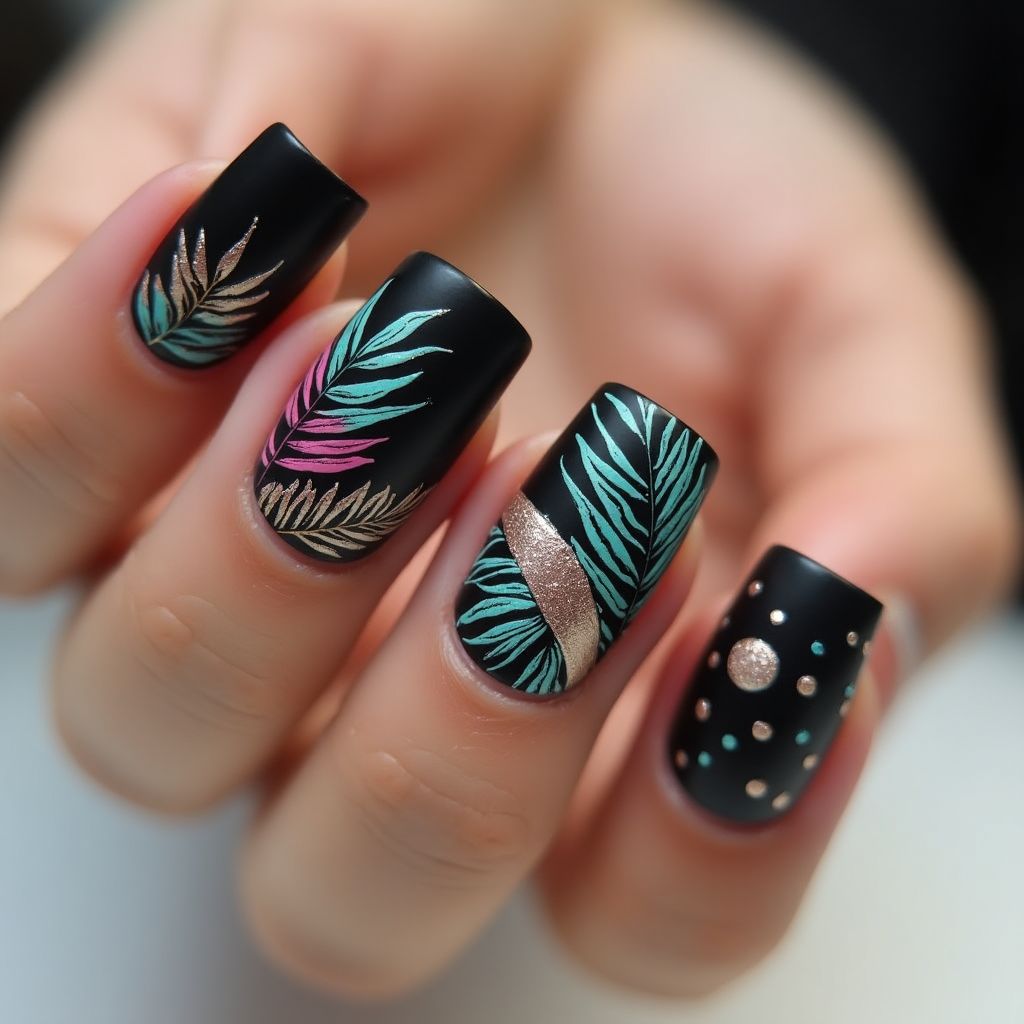
Design Details
- 1This nail design features a bold black base that creates a striking contrast with vibrant, colorful leaf motifs in teal, pink, and gold.
- 2Each nail showcases a unique combination of patterns, including detailed leaf designs, a metallic stripe, and dotted embellishments for added visual interest.
- 3The design employs a matte finish, enhancing the elegance of the color palette while providing a contemporary touch.
Items Needed for this Design
Nail Preparation
- Nail file
- Nail buffer
- Base coat
- Top coat
Nail Polish Colors
- Matte black polish
- Teal nail polish
- Pink nail polish
- Gold nail polish
- Metallic nude or champagne polish
Nail Art Tools
- Detailing brush or nail art pen
- Dotting tool
- Tape for striping
Cleanup
- Nail polish remover
- Cotton balls or pads
- Clean-up brush
Step by Step DIY(Do It Yourself) Guide
1
Prepare the nails.
- File and shape the nails to desired length.
- Buff the nail surface for a smooth finish.
- Apply a base coat to protect the nails.
2
Apply the base color.
- Paint each nail with a matte black polish.
- Allow the base coat to dry completely.
3
Create the leaf designs.
- Using a detailing brush or nail art pen, draw leaf shapes with teal polish on select nails.
- Add pink and gold accents to some leaves for variation.
- Let the designs dry before proceeding.
4
Add metallic and dotted details.
- On one nail, apply a metallic stripe using tape to guide the paint.
- Use a dotting tool to create various-sized dots with teal and gold polish.
- Ensure the designs are fully dry.
5
Finish with top coat.
- Apply a matte top coat over the entire design to seal the artwork.
- Allow to dry completely.
Pro Tips
Take your time with the leaf designs to ensure precision and fluidity.
If you're new to nail art, practice your designs on a nail wheel before applying to your nails.
Use tape to create clean lines for the metallic stripe and dots.
Experiment with color placement to find what works best for your style.
Always apply a top coat to enhance durability and shine.