Design Details
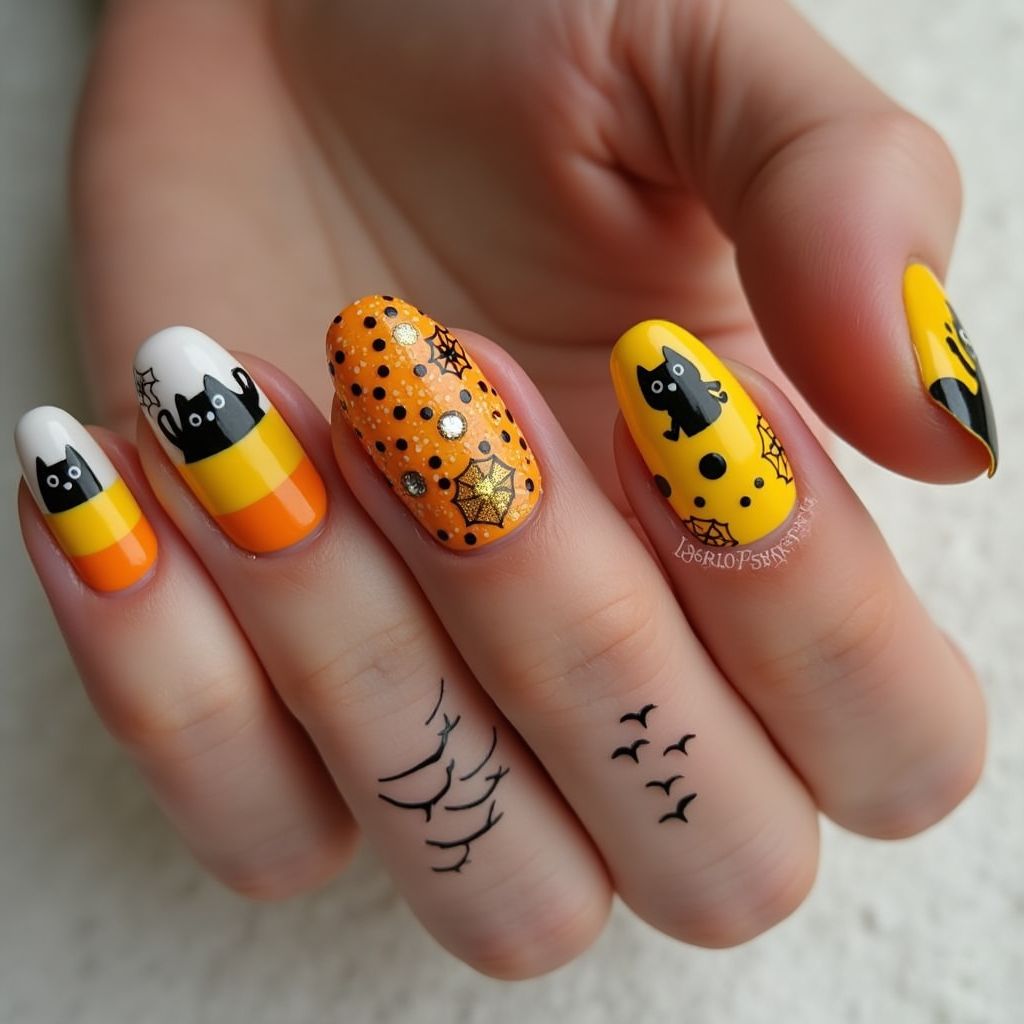
- 1The nail design features a Halloween-themed appearance with a combination of orange, black, yellow, and white.
- 2Some nails have a candy corn striped pattern with black cat silhouettes, while others have a solid yellow or orange base with black cat and spider web accents.
- 3One nail showcases a full orange base with black polka dots and gold star embellishments.
- 4This playful design combines classic Halloween symbols and colors for a festive look.
Items Needed for this Design
Nail Preparation
- nail file
- base coat
- top coat
Nail Polish Colors
- white polish
- orange polish
- yellow polish
- black polish
Nail Art Tools
- thin nail art brush
- dotting tool or toothpick
- black and white nail stickers or decals for cats and spider webs
- gold star decals
Cleanup
- cotton swabs
- nail polish remover
Step by Step DIY(Do It Yourself) Guide
1
Prepare the nails
- File your nails to your desired shape.
- Apply a base coat to protect your natural nails.
2
Create the striped candy corn nails
- Paint two nails with white polish as the base.
- Add orange and yellow stripes, alternating on each nail.
- Use a thin brush to apply the colors neatly.
3
Add the black cat silhouettes
- Use black nail stickers or a thin brush to create black cat silhouettes on the striped nails.
- Ensure the designs are centered on the nails.
4
Decorate the orange and yellow nails
- Paint one nail with orange and another with yellow polish.
- Use a black polish and a dotting tool to add polka dots on the orange nail.
- Place the gold star decals randomly on the polka-dotted nail.
5
Finish with top coat
- Seal your design with a clear top coat for a lasting finish.
Pro Tips
Let each layer of polish dry completely before adding the next to prevent smudging.
Use peel-off tape around your nails to ensure a clean edge while painting.
If using freehand techniques, practice on a piece of paper first to steady your hand.
For detailed designs like cats or webs, use decals if you're not confident in freehand painting.