Design Details
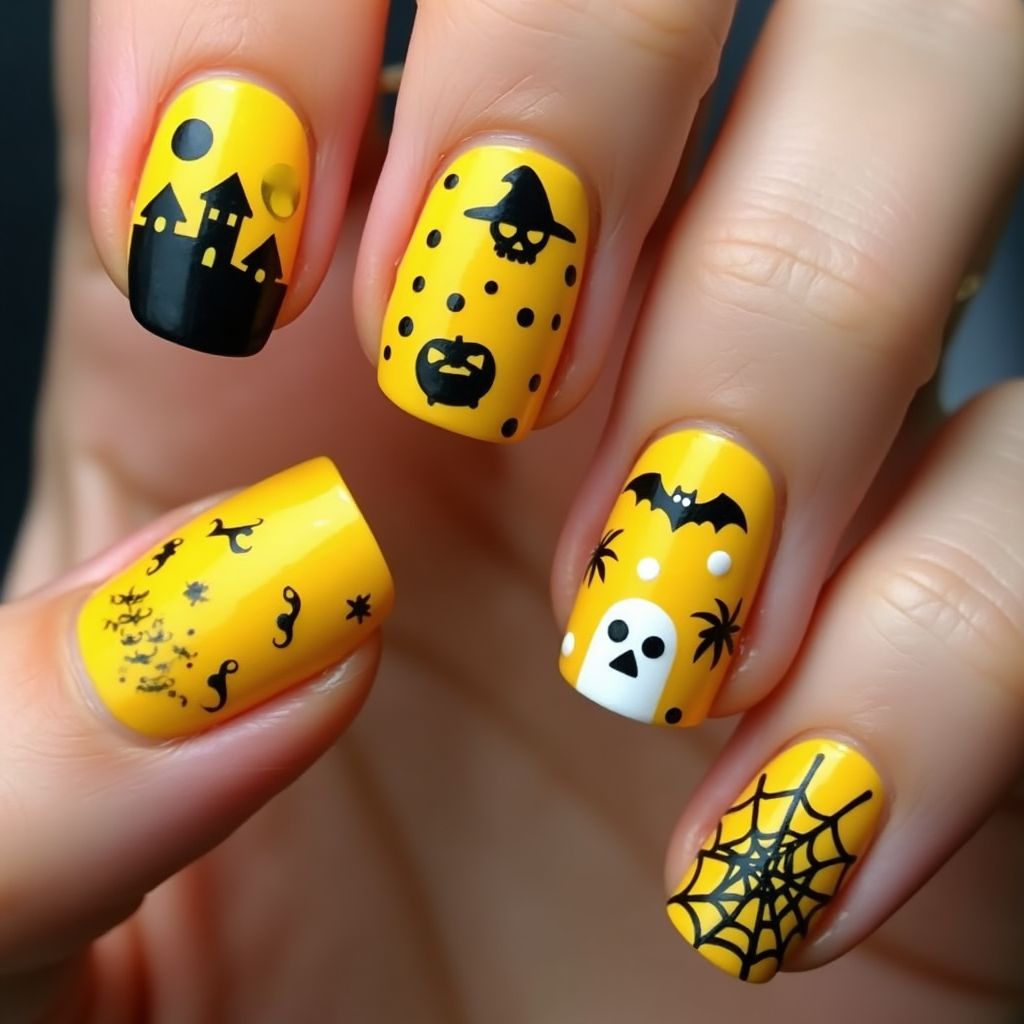
- 1The nail design features a bright yellow base with black Halloween-themed illustrations, including a haunted house, skull, bat, spiderweb, and jack-o'-lantern.
- 2Each nail has a unique design, creating a varied and creative theme across the hand.
- 3The use of black silhouettes on a vibrant yellow background makes the details stand out vividly.
- 4The overall design is festive and perfect for Halloween celebrations.
Items Needed for this Design
Nail Preparation
- nail file
- cuticle pusher
- nail buffer
- base coat
Nail Polish Colors
- bright yellow polish
- black polish
Nail Art Tools
- thin nail art brush
- dotting tool
- black nail art pen
Cleanup
- cotton swabs
- nail polish remover
Step by Step DIY(Do It Yourself) Guide
1
Prepare your nails.
- File your nails to the desired shape.
- Push back and trim the cuticles.
- Buff the surface of the nails for smoothness.
- Apply a base coat to protect the nails and let it dry.
2
Apply the base color.
- Paint all nails with the bright yellow nail polish.
- Apply a second coat for opacity and let it fully dry.
3
Create the designs.
- Use the black nail art pen or thin brush to draw a haunted house on one nail.
- On another nail, draw a skull and dot pattern with the dotting tool.
- Add a bat and palm trees effect on another nail using the same tools.
- Draw a jack-o'-lantern and scattered dots on another nail.
- Finally, create a spiderweb design on the last nail.
4
Finalize the look.
- Allow all designs to dry completely.
- Apply a top coat to seal the designs and add shine.
Pro Tips
Use a steady hand and practice on paper first if you're new to nail art.
Make sure each layer of polish is completely dry before adding details.
Clean up any mistakes with a cotton swab dipped in nail polish remover.
Consider using nail stickers for intricate designs if the hand-painted look is challenging.