Design Details
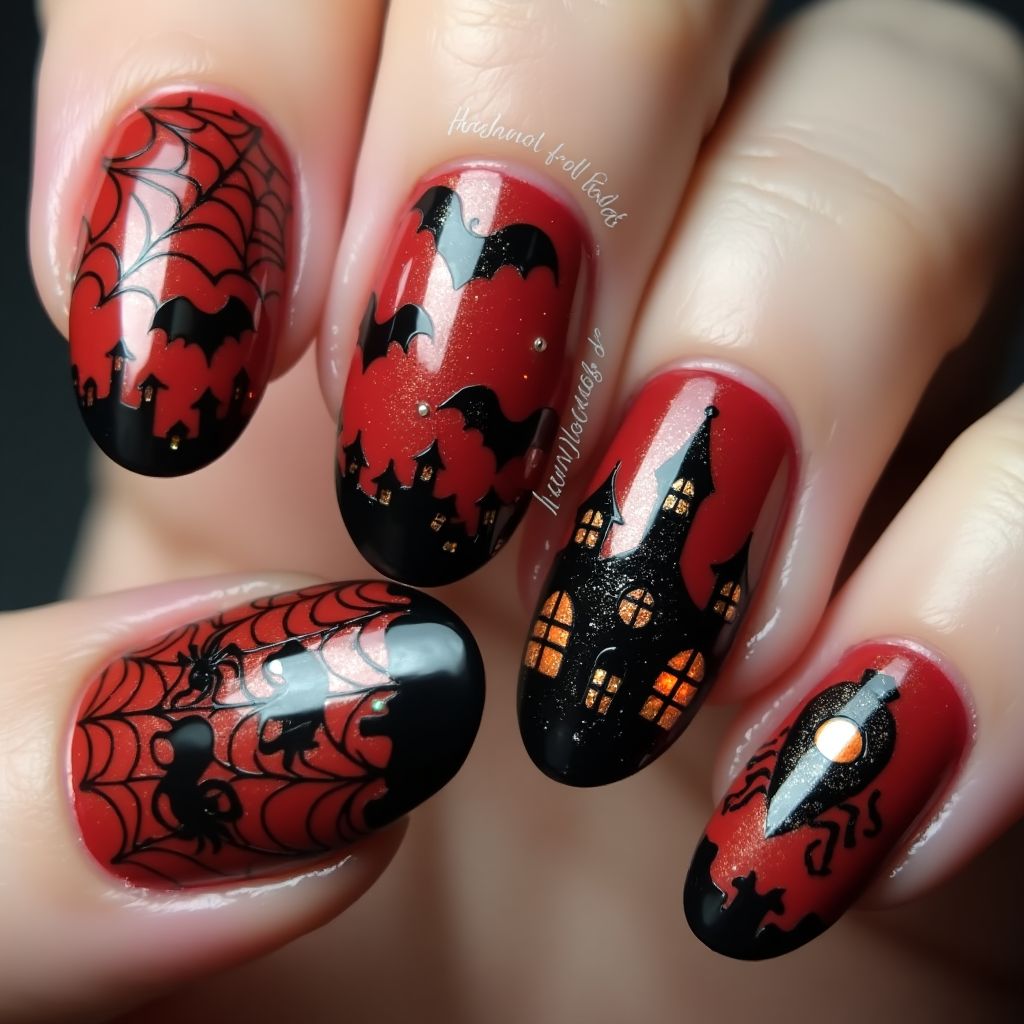
- 1The design features a spooky Halloween theme with a red base color and intricate black silhouettes of bats, spider webs, spiders, and a haunted house.
- 2There is a gradient effect with black at the tips, creating a night scene with golden highlights in the haunted house windows.
- 3The nails exude a mysterious, eerie vibe perfect for Halloween with fine details like tiny stars and detailed silhouettes.
- 4The use of contrasting colors enhances the visual appeal, making the design captivating and thematic.
Items Needed for this Design
Nail Preparation
- nail file
- buffer
- cuticle pusher
Nail Polish Colors
- red nail polish
- black nail polish
- gold nail polish
Nail Art Tools
- fine nail art brush
- dotting tool
- nail stamping plate with Halloween designs
- top coat
Cleanup
- nail polish remover
- cotton swabs
Step by Step DIY(Do It Yourself) Guide
1
Prepare your nails.
- File your nails to the desired shape.
- Buff the surface gently to remove any shine.
- Push back your cuticles.
2
Apply the base color.
- Apply a base coat to protect your nails.
- Once dry, apply two coats of red nail polish.
3
Create the design.
- Using a fine brush, paint a crescent of black polish at the tips for the night sky effect.
- Stamp or paint black bats, spider webs, and the haunted house using the nail art brush or stamping plate.
- Add golden highlights in the windows with a dotting tool.
4
Finishing touches.
- Allow the design to dry completely.
- Apply a generous layer of top coat to seal the design.
- Clean up any excess polish around the edges with a cotton swab dipped in nail polish remover.
Pro Tips
Ensure each layer of polish is completely dry before proceeding to the next step.
Use a thin-bristled brush for detailed work to achieve clean, sharp lines.
Practice the stamping technique on paper before applying it to your nails for precision.