Design Details
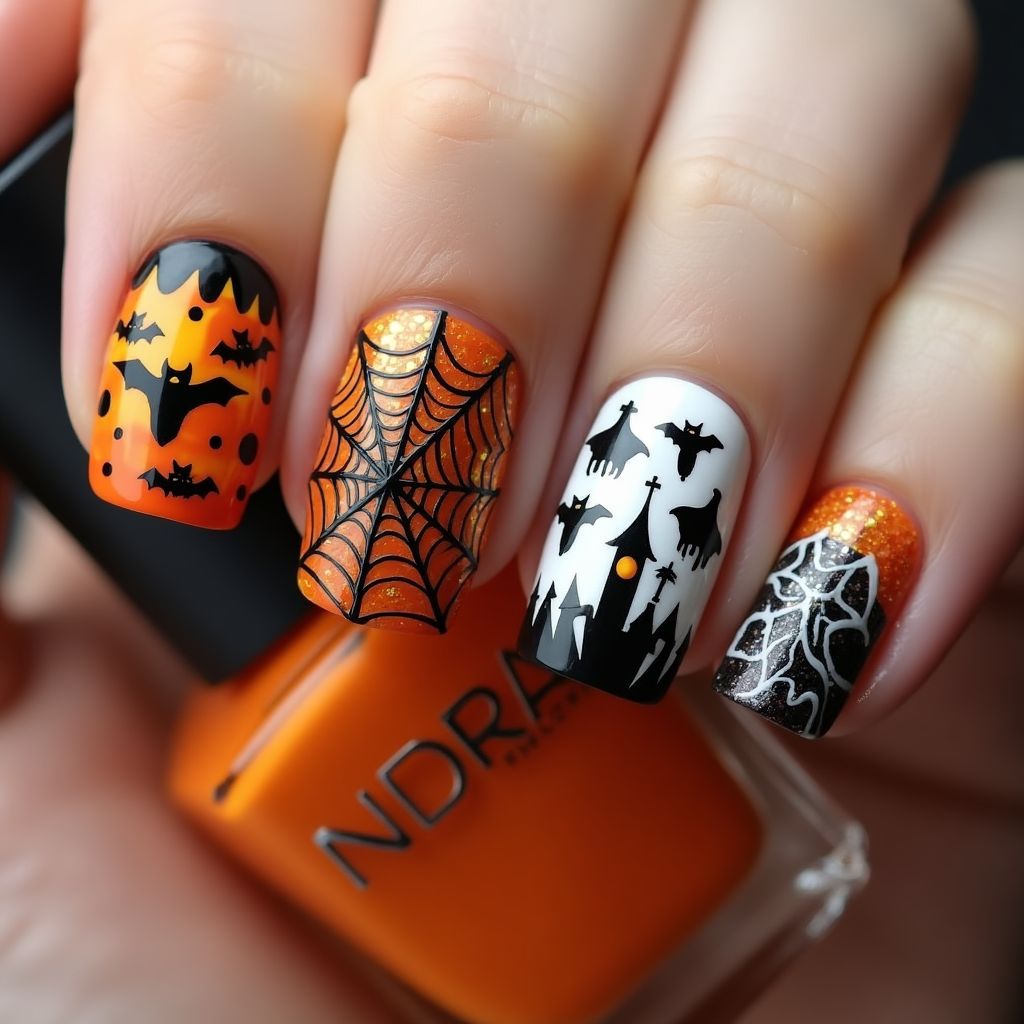
- 1The design features a Halloween theme with black silhouettes of bats, a haunted castle, and spider webs over vibrant orange and classic white backgrounds.
- 2One nail showcases an intricate spider web pattern with glittery orange polish, creating an eye-catching effect.
- 3The combination of matte and glitter finishes adds depth and dimension to the design.
- 4Overall, this design captures a spooky yet playful Halloween vibe with its contrasting colors and detailed artwork.
Items Needed for this Design
Nail Preparation
- nail file
- cuticle pusher
- nail buffer
- base coat
Nail Polish Colors
- orange
- black
- white
- clear glitter top coat
Nail Art Tools
- thin nail art brush
- dotting tool
- nail stickers or stencils for bats and castles
Cleanup
- cotton swabs
- nail polish remover
- small brush
Step by Step DIY(Do It Yourself) Guide
1
Prepare the nails.
- File your nails to the desired shape.
- Gently push back the cuticles.
- Buff the nails to create a smooth surface.
- Apply a base coat to protect the nails.
2
Apply the base colors.
- Paint two nails with orange polish and allow to dry.
- Paint another two nails with white polish and let them dry completely.
3
Create the Halloween designs.
- Use a thin nail art brush to paint bats and drips on one orange nail using black polish.
- On another orange nail, draw a spider web using the black polish and thin brush.
- For a white nail, use black polish and stickers or stencils to create a haunted castle and bats.
- On the remaining orange nail, use a dotting tool and white polish to add web-like patterns.
4
Add finishing touches.
- Apply a clear glitter top coat to enhance the sparkle and protect the design.
- Carefully clean up any excess polish around the edges with a cotton swab dipped in nail polish remover.
Pro Tips
Ensure each layer of polish is fully dry before adding another to prevent smudging.
For a more vibrant look, apply two coats of the base colors.
Use a steady hand or support your arm on a flat surface when painting intricate details.
Experiment with different stencil designs to personalize the theme.