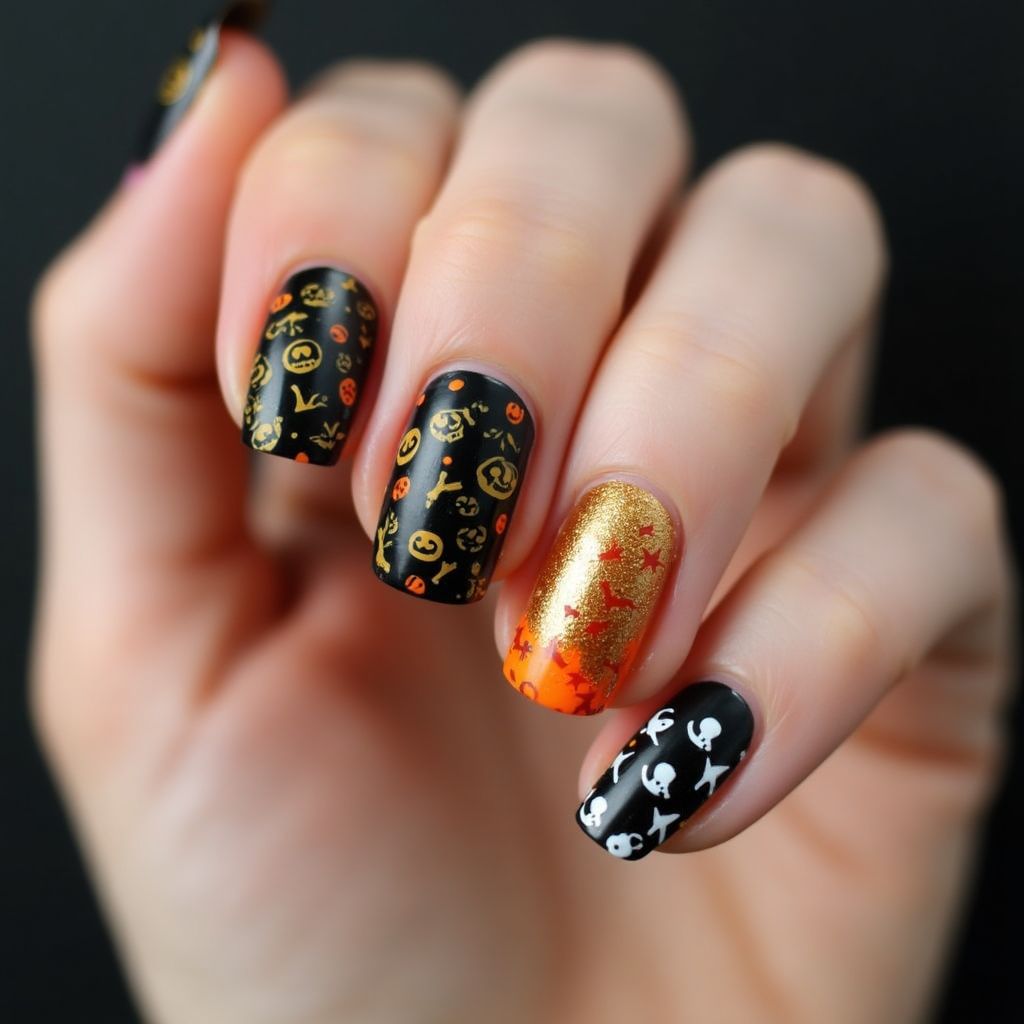
1The nail design features a Halloween theme with a matte black base on most nails decorated with gold and orange pumpkin and skeleton motifs.
2The accent nail has a shimmering gradient effect starting with gold at the cuticle fading to a bright orange at the tip, adorned with red star embellishments.
3The use of contrasting colors such as gold, orange, and white against black makes the motifs stand out, creating a festive and dramatic effect.
4The varied motifs across the nails provide a playful yet cohesive look consistent with the Halloween theme.
Items Needed for this Design
Nail Preparation
Nail buffer
Nail file
Cuticle pusher
Base coat
Top coat
Nail Polish Colors
Matte black polish
Gold shimmer polish
Bright orange polish
White polish
Nail Art Tools
Small nail art brush
Dotting tool
Fine detail brush
Nail stamping kit with Halloween patterns
Cleanup
Nail polish remover
Cotton swabs or pads
Small angled brush
Step by Step DIY(Do It Yourself) Guide
1
Prep your nails.
File and shape your nails to the desired length.
Gently push back the cuticles using a cuticle pusher.
Buff the surface of your nails lightly to remove any oil or residue.
Apply a thin layer of base coat to all nails and allow it to dry completely.
2
Apply the base color.
Paint all nails with matte black polish and let them dry.
On the accent nail, apply the gold shimmer polish from the cuticle to about halfway down the nail.
Finish the accent nail with bright orange polish from the halfway point to the tip, blending where they meet to create a gradient effect.
3
Add nail art designs.
Use the nail stamping kit with Halloween patterns to apply gold and orange motifs on the matte black nails.
On the accent nail, use a fine detail brush to apply red stars along the gradient transition.
For black nails, use a dotting tool to create small white bones and skulls.
4
Finish with top coat and clean up.
Once all designs are dry, seal each nail with a top coat for extra protection and shine.
Clean any polish on your skin or cuticles using a small angled brush dipped in nail polish remover.
Pro Tips
Ensure each layer of polish is completely dry before applying the next.
Use a peel-off latex barrier around your nails to make cleanup easier.
For a crisper stamp, use the rolling motion to transfer the design.
Experiment with different layering of colors to see which combination looks best with your skin tone.