Design Details
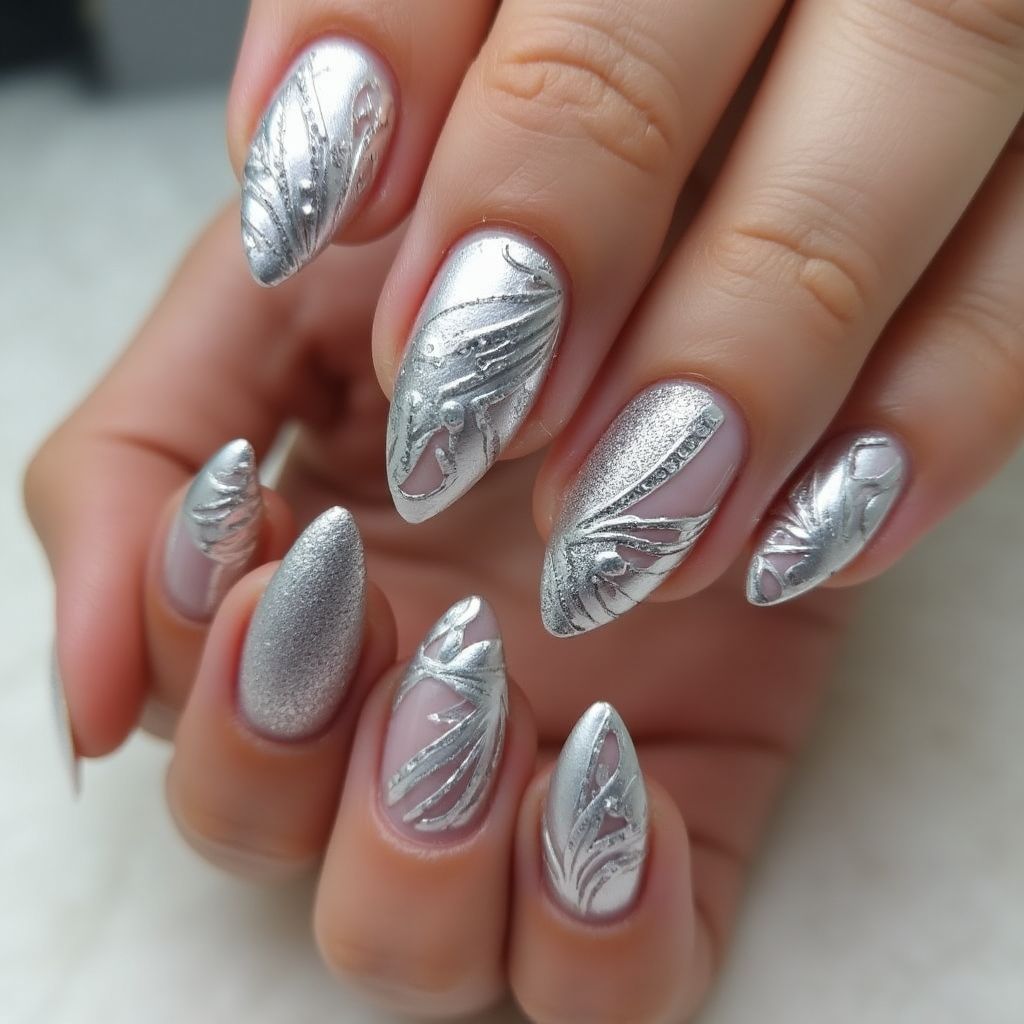
- 1This nail design features a stunning metallic silver color with intricate patterns and textures.
- 2The design combines a glossy silver finish with detailed nail art techniques such as etching or stamping.
- 3The nails are elongated, giving a dramatic and elegant appearance, with some nails fully covered in silver and others featuring designs that expose the natural nail.
- 4Overall, this design is sophisticated and perfect for special occasions or events.
Items Needed for this Design
Nail Preparation
- Nail file
- Buffer
- Cuticle oil
- Base coat
Nail Polish Colors
- Metallic silver nail polish
- Light nude or pink nail polish
Nail Art Tools
- Nail art brush
- Stamping plate
- Stamper
- Dotting tool
Cleanup
- Acetone or nail polish remover
- Cotton pads
- Top coat
Step by Step DIY(Do It Yourself) Guide
1
Prepare your nails.
- File and shape your nails to the desired length.
- Buff the surface to create a smooth base.
- Apply cuticle oil and gently push back your cuticles.
- Finish with a base coat to protect your nails.
2
Apply the base color.
- Apply two coats of the light nude or pink color, allowing each coat to dry completely.
3
Create the metallic design.
- Apply metallic silver polish to the nails scheduled for design.
- Using a stamping plate and stamper, transfer the desired designs onto the nails.
- If desired, use a nail art brush for extra detailing with silver polish.
4
Add texture and detail.
- Use a dotting tool to add small details or embellishments in silver polish.
- Allow all designs to dry thoroughly.
5
Finish your nails.
- Apply a top coat to seal the design and add shine.
- Clean up any excess polish around the nails with acetone and cotton pads.
Pro Tips
Make sure to seal the design with a high-quality top coat for longevity.
Practice your stamping technique on a practice sheet before applying to your nails.
Use a thin layer of metallic polish to avoid thick builds that can lead to smudging.
Keep your tools clean to ensure crisp designs.
Take your time with each step to ensure precision and avoid mistakes.