Design Details
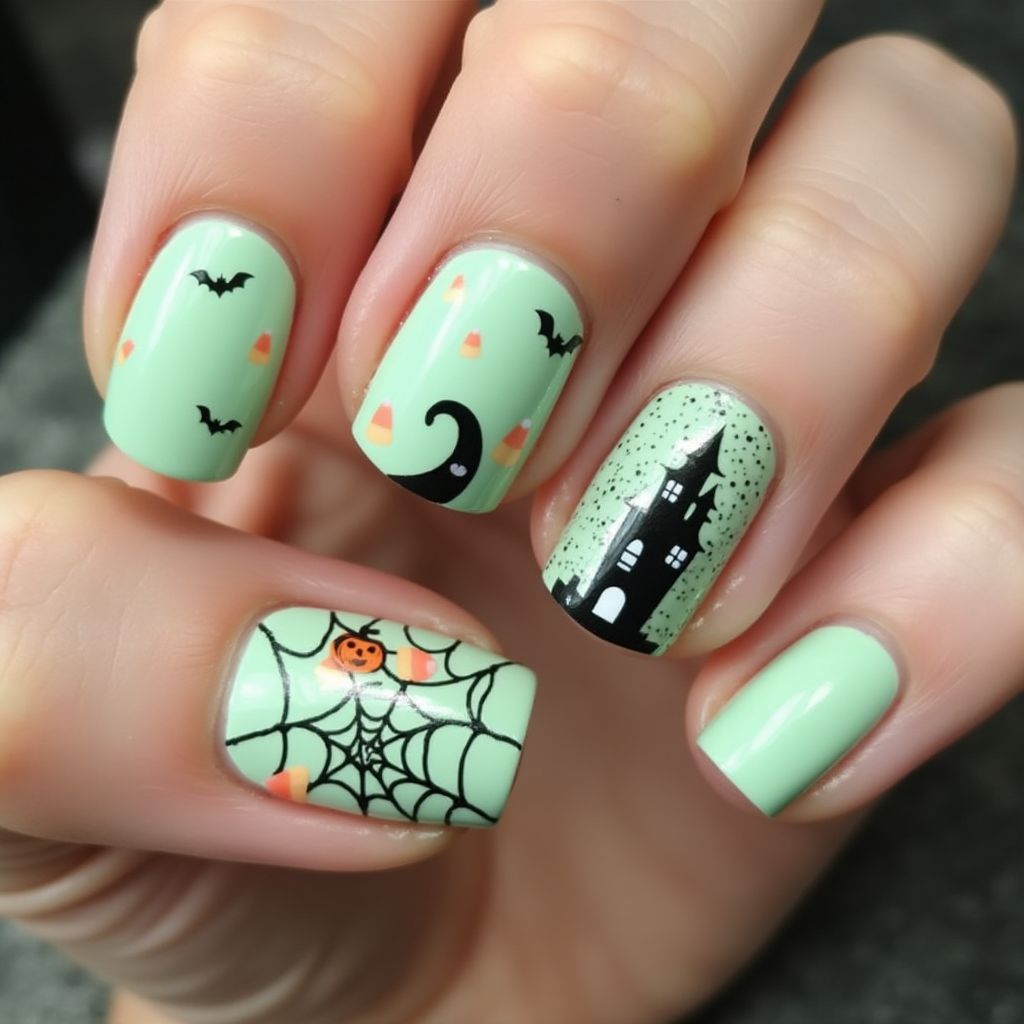
- 1The nail design features a Halloween theme with elements such as bats, a haunted house silhouette, candy corn, and a spider web with a pumpkin detail.
- 2The base color is a light mint green, creating a subtle yet festive background for the Halloween motifs.
- 3Each nail has unique detailing, with the haunted house being the focal point on one nail, while another highlights the spider web and pumpkin.
- 4The design incorporates black for the outlines and details, with orange and yellow accents for the candy corns and pumpkin.
Items Needed for this Design
Nail Preparation
- nail file
- cuticle pusher
- nail buffer
- base coat
- top coat
Nail Polish Colors
- light mint green
- black
- orange
- yellow
Nail Art Tools
- fine nail art brush
- dotting tool
- nail stickers or decals for intricate designs
Cleanup
- nail polish remover
- cotton swabs
- small brush
Step by Step DIY(Do It Yourself) Guide
1
Prepare your nails.
- File your nails to the desired shape.
- Push back your cuticles gently.
- Buff the surface of your nails lightly.
- Apply a base coat to all nails.
2
Apply the base color.
- Paint all nails with light mint green polish.
- Apply two coats for opacity, allowing each coat to dry.
3
Create the Halloween motifs.
- Use the fine brush to paint a haunted house silhouette on one nail with black polish.
- Draw small bats on multiple nails using the fine brush and black polish.
- Use orange and yellow polish to paint candy corn shapes with the dotting tool.
- Create a spider web on one nail using black polish and a fine brush.
4
Add finishing details.
- Paint or place a small pumpkin detail using orange polish or a sticker on top of the spider web.
- Allow the designs to dry completely.
5
Seal the design.
- Apply a top coat over all nails to protect the design and add shine.
- Clean up any excess polish around the nails with a small brush dipped in polish remover.
Pro Tips
Ensure each layer of polish is dry before proceeding to the next step to prevent smudging.
Use a quick-dry top coat to speed up the drying process and protect your design.
If new to nail art, use decals or stickers for the more intricate details.
Practice the design on a piece of paper first to get a feel for the brush strokes.