Design Details
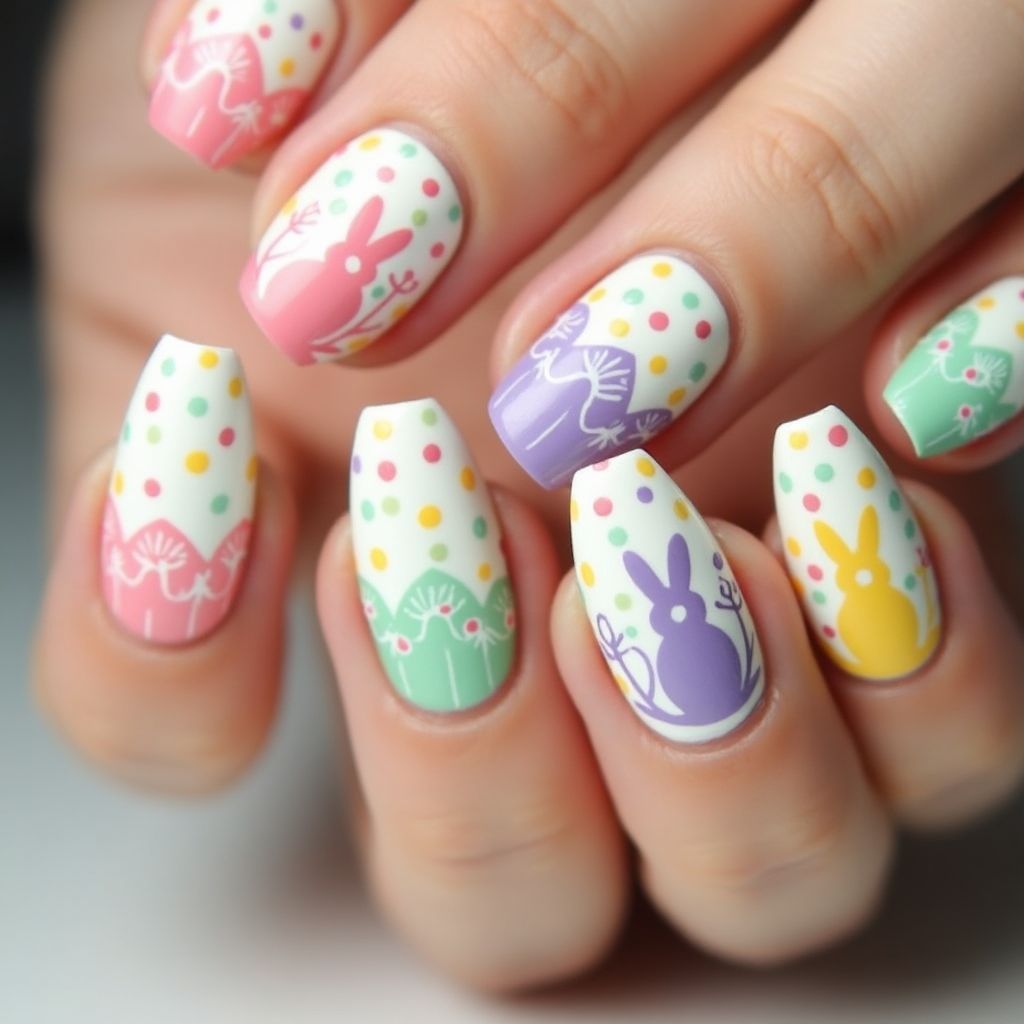
- 1The design features playful pastel bunnies and polka dots on a white background, perfect for a spring or Easter theme.
- 2Each nail sports different pastel colors with cute bunny silhouettes and colorful dots throughout.
- 3The nail tips have contrasting pastel shades to enhance the whimsical and vibrant feel of the overall look.
- 4The design is both fun and sophisticated, suitable for festive occasions or a casual day out.
Items Needed for this Design
Nail Preparation
- Nail file
- Nail buffer
- Cuticle pusher
- Base coat
- Top coat
Nail Polish Colors
- White
- Pastel pink
- Pastel yellow
- Pastel green
- Pastel purple
Nail Art Tools
- Thin detail brush
- Dotting tool
- Bunny nail stickers or stencils
Cleanup
- Cotton swabs
- Nail polish remover
Step by Step DIY(Do It Yourself) Guide
1
Prep your nails.
- File your nails to your desired shape.
- Buff the surface gently to ensure smoothness.
- Push back your cuticles to create a clean base.
- Apply a base coat to protect your natural nails.
2
Create the base.
- Apply two coats of white nail polish for an opaque finish.
- Allow the polish to dry completely.
3
Add bunny designs and dots.
- Use bunny nail stickers or stencils for accuracy.
- Apply pastel pink on one nail, pastel yellow on another, and so on, alternating the pastel colors for each nail.
- Use the dotting tool to add colorful dots around the bunnies with contrasting pastel colors.
4
Finish the look.
- Apply a top coat to seal the design and add shine.
- Clean up any excess polish with cotton swabs dipped in remover.
Pro Tips
Ensure each layer of polish is completely dry before proceeding to the next step.
For a steadier hand, rest your pinky finger on a flat surface while painting.
If you don't have stickers or stencils, you can freehand the designs using a detail brush.
Consider practicing the bunny design on a piece of paper before applying it to your nails.