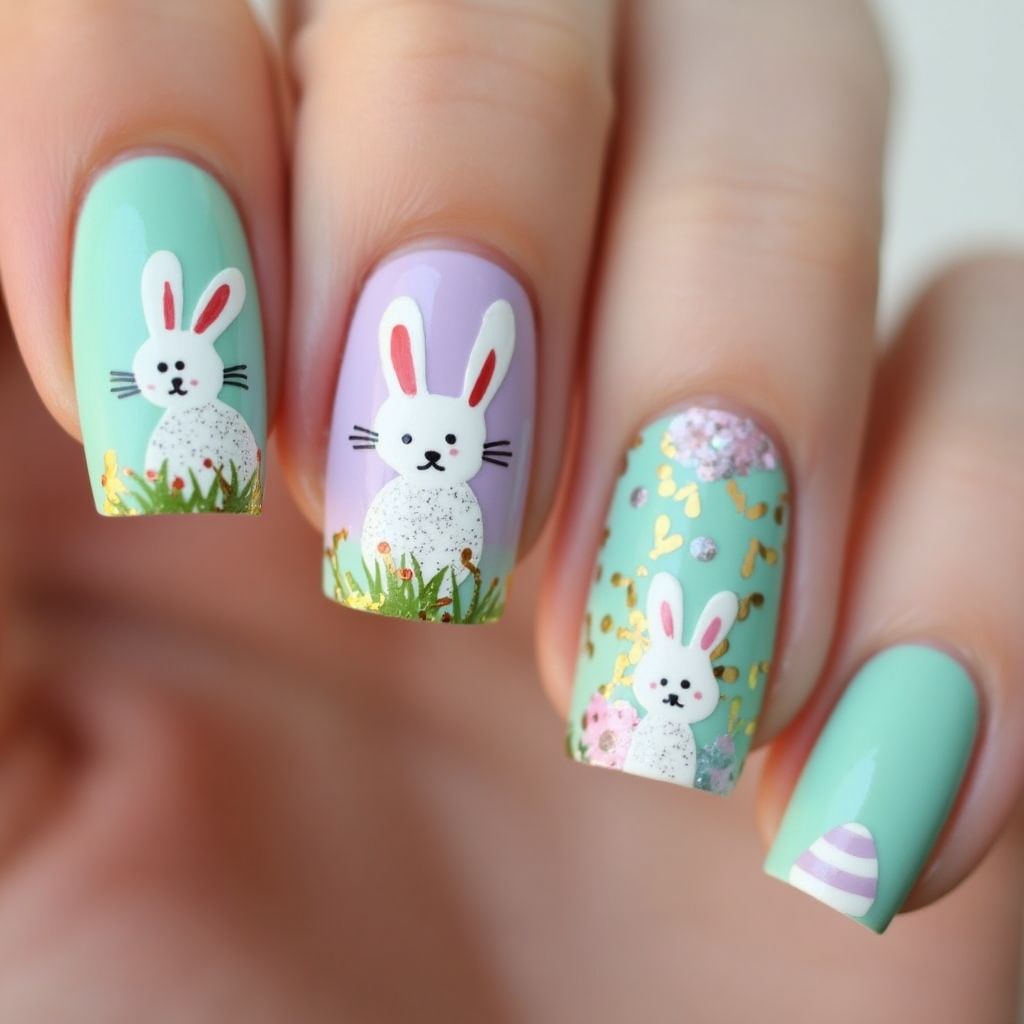
Easter Chrome Powder Nail Design
Celebrate Easter with Whimsical Chrome Nail Art: Pastel Hues and Playful Designs!

Design Details
- 1The nail design features a playful Easter theme with a combination of pastel colors, adorable white bunny figures, and a touch of floral accents.
- 2The base colors include mint green and lavender, with intricate decorations such as grass, small flowers, and gold embellishments enhancing the design.
- 3Each nail contains a unique element, like Easter eggs, bunnies with distinct positions, and decorative gold flakes.
- 4The overall effect is cheerful and festive, perfect for celebrating the spring season.
Items Needed for this Design
Nail Preparation
- nail file
- nail buffer
- cuticle pusher
- base coat
- top coat
Nail Polish Colors
- mint green
- lavender
- white
- pink
- gold
Nail Art Tools
- fine detail brush
- dotting tool
- bunny nail stickers
- flower nail decals
Cleanup
- nail polish remover
- cotton swabs
- small brush
Step by Step DIY(Do It Yourself) Guide
1
Prepare your nails.
- File your nails to your desired shape.
- Buff the surface gently to smooth.
- Push back the cuticles with a pusher.
2
Apply the base colors.
- Apply a base coat and let it dry completely.
- Paint half of your nails with mint green and the other half with lavender.
- Allow the polish to dry thoroughly.
3
Create the bunny design.
- Use the fine detail brush and white polish to paint a bunny shape on the nails.
- Apply bunny stickers if available for more precision.
- Use a dotting tool for the bunny's eyes and details in black.
4
Add decorative elements.
- Paint small flowers and grass details using the fine brush with pink and green polishes.
- Apply flower decals for added effect.
- Add gold embellishments with either polish or decals.
5
Finish with top coat.
- Seal your design with a clear top coat for shine and protection.
- Clean up any excess polish around the nails using remover and a small brush.
Pro Tips
Ensure each layer of polish is fully dry before applying the next.
Use a thin brush for detailed designs to maintain precision.
Practice the bunny design on a piece of paper first if you’re creating it freehand.
Work in a well-lit area to see all details clearly.