Specialty powders Freehand art Nail Design
Elevate Your Nail Game with Intricate Freehand Art and Stunning Textured Designs

Design Details
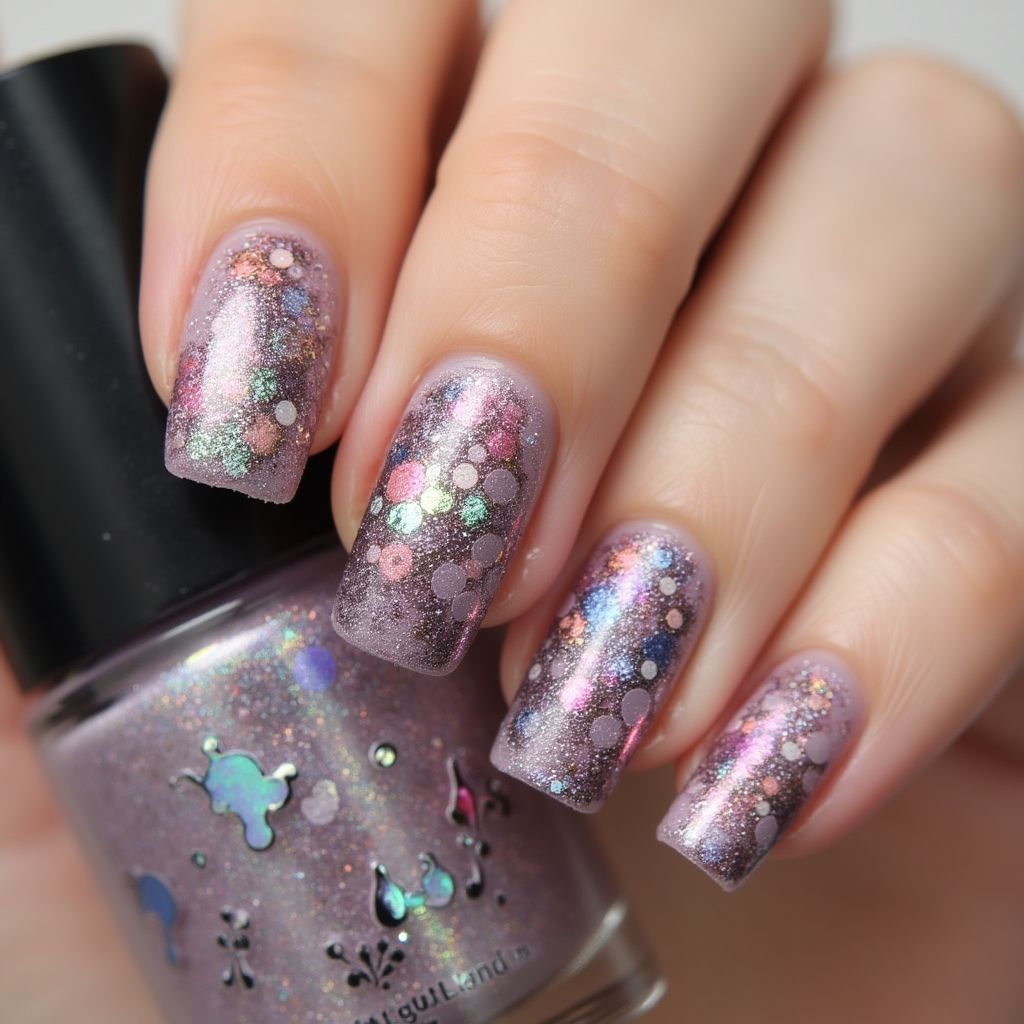
- 1The nail design features a soft lilac base with a gradient effect transitioning from a sheer finish at the cuticle to a more opaque finish towards the tips.
- 2Colorful circular glitter in various sizes, including pink, green, and blue, is sprinkled across the nails, adding a playful touch.
- 3The design uses a holographic polish that reflects light, creating a sparkling effect that enhances the overall charm of the nails.
Items Needed for this Design
Nail Preparation
- Nail file
- Nail buffer
- Base coat
- Top coat
Nail Polish Colors
- Lilac sheer polish
- Holographic polish
- Glitter polish (with colorful circular glitter)
Nail Art Tools
- Dotting tool or toothpick
- Nail art brush
Cleanup
- Nail polish remover
- Cotton balls or pads
Step by Step DIY(Do It Yourself) Guide
1
Prepare the nails.
- File and shape the nails to your desired length.
- Buff the surface of the nails to create a smooth base.
2
Apply base coat.
- Apply a thin layer of base coat to protect the natural nail.
- Allow it to dry completely.
3
Paint the base color.
- Apply one or two coats of the lilac sheer polish, letting each coat dry before applying the next.
- Ensure an even coverage without streaks.
4
Create the gradient effect.
- Using a makeup sponge, apply the holographic polish to create a gradient effect from the cuticle to the tip.
- Dab the sponge gently on the nail, building up the opacity as desired.
5
Add the glitter.
- Using a dotting tool or toothpick, pick up the colorful circular glitter.
- Place the glitter randomly on the nails, ensuring an even distribution.
6
Finish with a top coat.
- Once the glitter is in place, apply a layer of top coat over the entire nail to seal the design.
- Allow to dry thoroughly.
Pro Tips
For a more dimensional look, consider layering different sizes of glitter.
Ensure each layer is completely dry before applying the next to avoid smudging.
Use a clean-up brush dipped in nail polish remover to tidy up around the nails for a professional finish.