Design Details
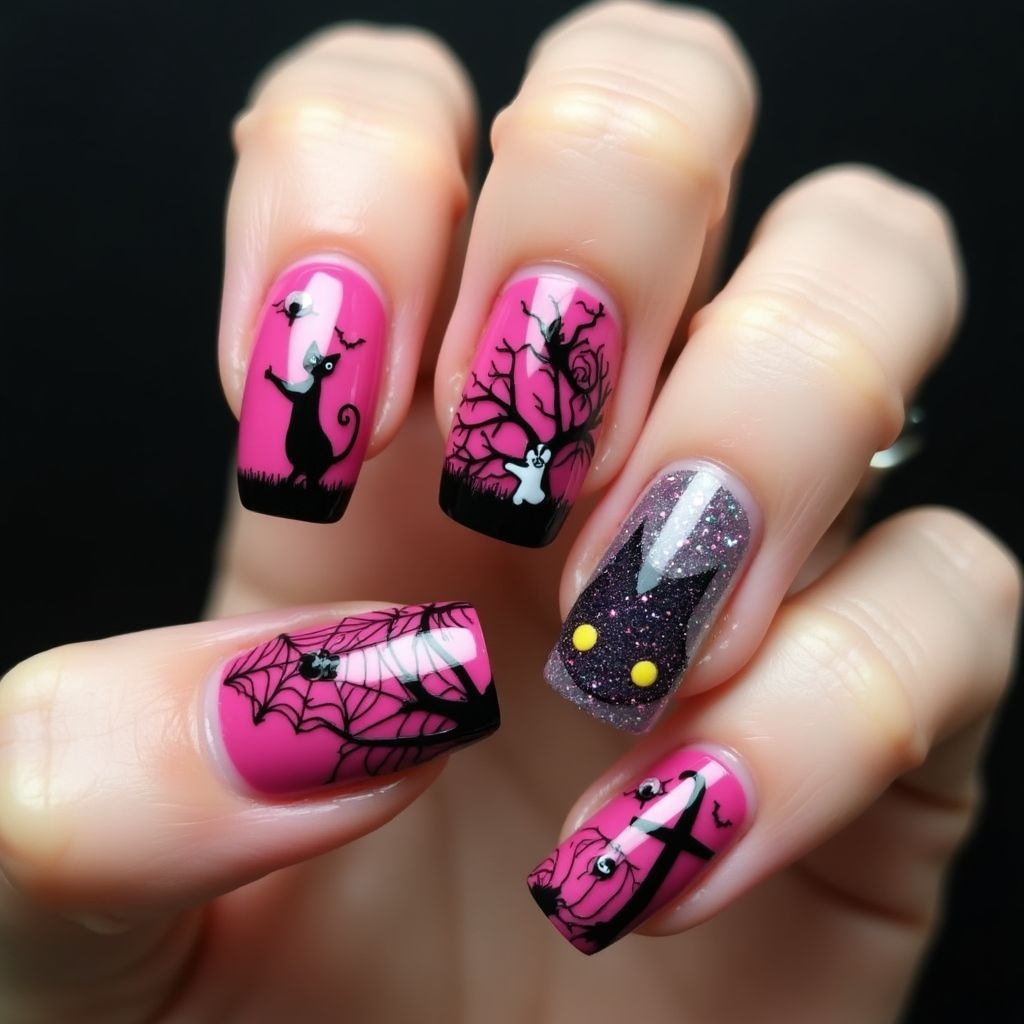
- 1The design features a Halloween-themed nail art with a vibrant pink background.
- 2On each nail, there are different black silhouettes, including a cat, spider web, spooky trees, and bats, paired with accents like ghosts and yellow eyes.
- 3One nail stands out with a glittery black base, enhancing the nocturnal theme of the overall design.
- 4The combination of bright background and dark silhouettes creates a striking contrast suitable for a festive look.
Items Needed for this Design
Nail Preparation
- nail file
- cuticle pusher
- base coat
- top coat
Nail Polish Colors
- pink nail polish
- black nail polish
- clear glitter polish
- yellow nail polish
Nail Art Tools
- fine detail nail art brush
- dotting tool
- stamping plates with Halloween designs (optional)
Cleanup
- nail polish remover
- cotton swabs
Step by Step DIY(Do It Yourself) Guide
1
Prepare and prime your nails.
- File your nails to the desired shape and push back the cuticles.
- Apply a base coat to protect your nails and let it dry completely.
2
Apply the base colors.
- Paint all nails with the pink nail polish except one accent nail with clear glitter polish.
- Let the polish dry thoroughly.
3
Create the Halloween designs.
- Using a black polish and a fine detail brush, paint the silhouettes of a cat, spider webs, trees, and bats on the pink nails.
- On the glitter nail, paint a silhouette of cat ears at the top, leaving space for the eyes.
- Add the eyes using a dotting tool and yellow polish on the glitter nail.
4
Apply top coat.
- Once all designs are dry, apply a top coat to seal in the art and add shine.
Pro Tips
Make sure each coat of polish is completely dry before adding top coat to prevent smudging.
Use a cleanup brush dipped in nail polish remover to clean up the edges for a professional finish.
Experiment with stamping plates for more intricate designs if you have them.
Be patient and steady, especially while drawing detailed elements like the spider webs.