Design Details
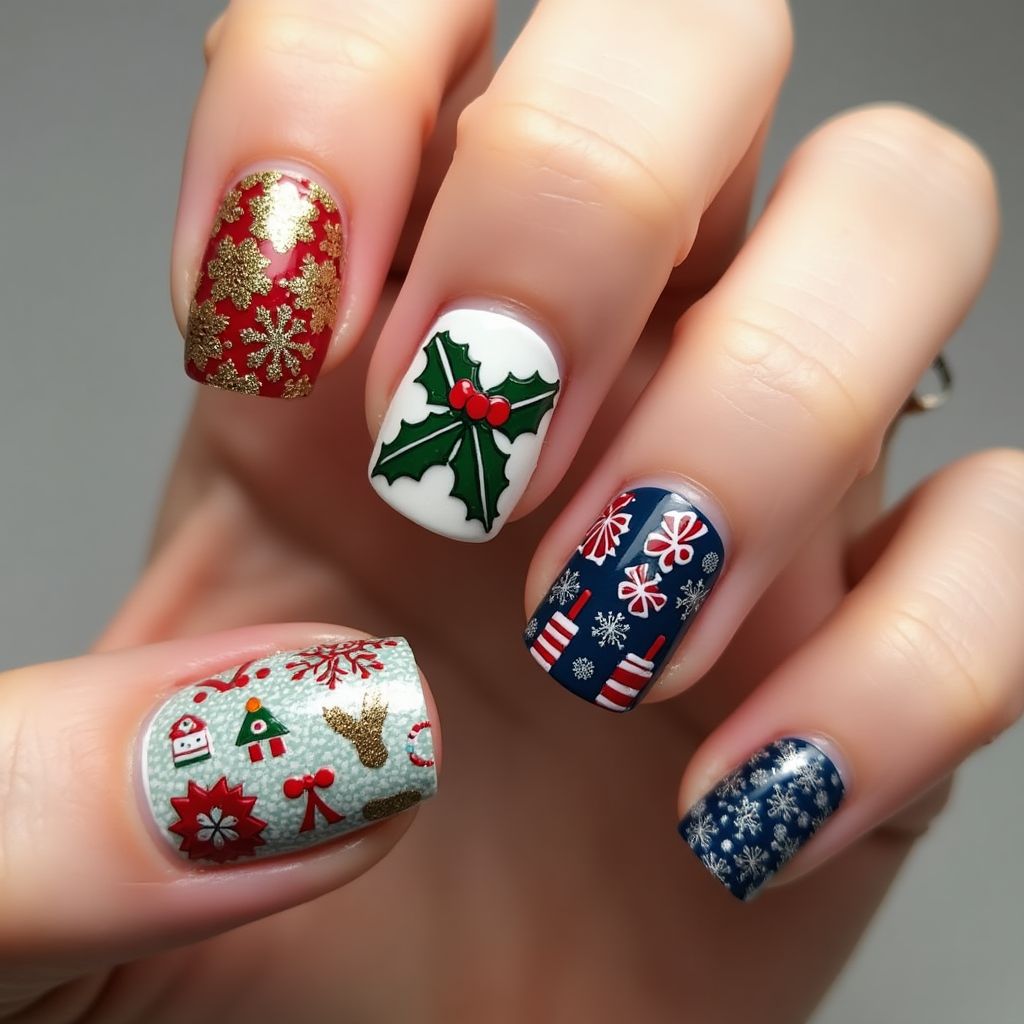
- 1This festive nail design showcases a variety of holiday-themed elements across the fingers.
- 2One nail features a bold red base with gold snowflake patterns, while another displays a classic white nail adorned with a green holly design and red berries.
- 3The design incorporates a mix of navy blue with candy canes and snowflakes, along with a light grey base decorated with Christmas motifs.
- 4Overall, the combination of colors and patterns creates a cheerful and vibrant representation of the holiday season.
Items Needed for this Design
Nail Preparation
- Base coat
- Top coat
- Nail file
- Cuticle oil
Nail Polish Colors
- Red
- White
- Green
- Navy blue
- Light grey
- Gold
Nail Art Tools
- Detailing brush
- Dotting tool
- Nail stickers or stamps
Cleanup
- Nail polish remover
- Cotton pads
- Brush for precise cleaning
Step by Step DIY(Do It Yourself) Guide
1
Prepare your nails
- File your nails to your desired shape.
- Apply cuticle oil and push back cuticles.
- Apply a base coat to protect your natural nail.
2
Apply base colors
- Paint one nail with red polish and allow it to dry.
- Paint another nail white for the holly design.
- Use navy blue for the next nail and light grey for the one with patterns.
3
Create patterns
- For the red nail, use a detailing brush to add gold snowflakes.
- On the white nail, paint green leaves and red berries to form holly.
- On the navy nail, use a dotting tool to create candy canes and snowflakes.
- On the grey nail, apply nail stickers or stamps with Christmas motifs.
4
Finish the manicure
- Once all designs are dry, apply a top coat to seal and add shine.
- Clean up any excess polish around the nails with nail polish remover and a brush.
- Moisturize your fingers with cuticle oil.
Pro Tips
Ensure each layer is completely dry before applying the next to avoid smudging.
Use a steady hand while painting intricate details to achieve clean designs.
Experiment with color placements and patterns for a personalized touch.
Keep nail tools clean for the best results and longevity.