Design Details
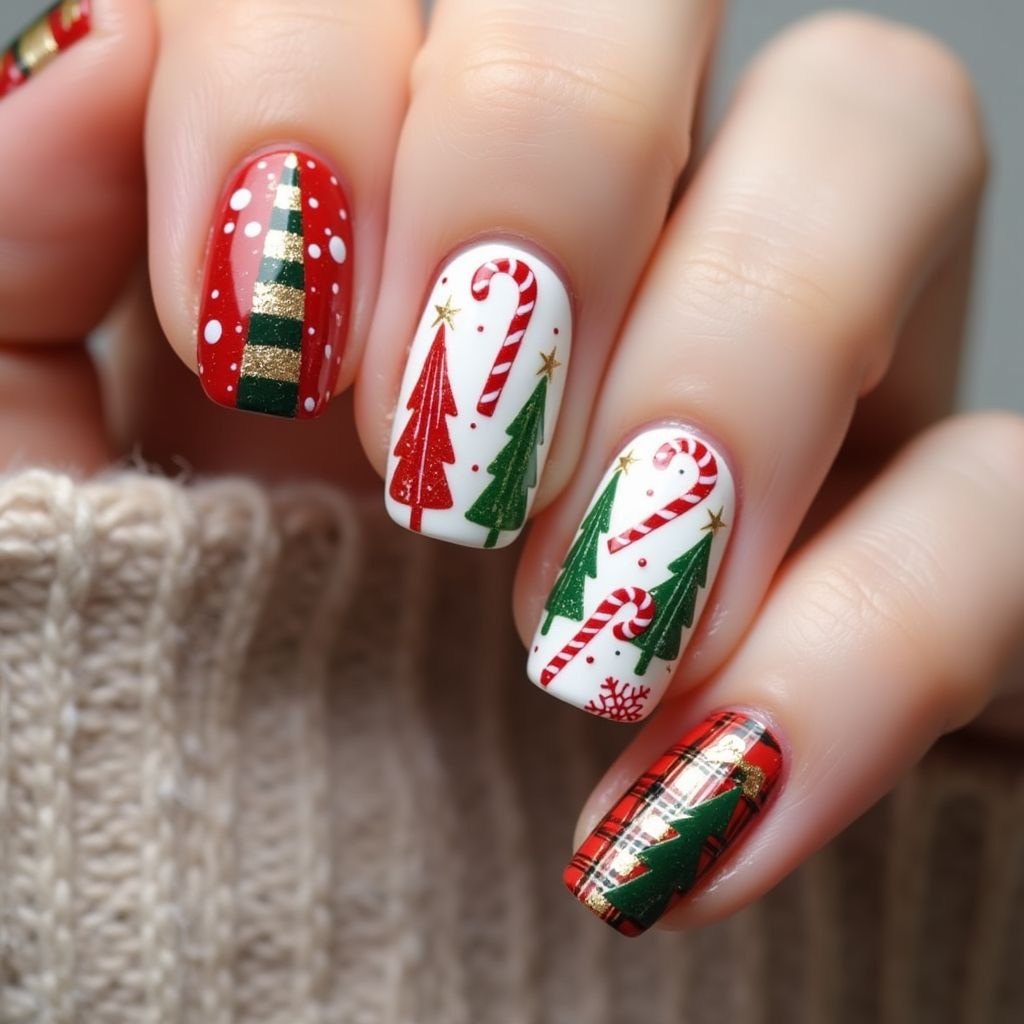
- 1The nail design features a festive Christmas theme with elements like candy canes, Christmas trees, and plaid patterns.
- 2Colors prominently used are red, white, green, and gold, adding a traditional holiday feel.
- 3Each nail features different designs, such as polka dots on red with a striped gold and green tree, candy canes layered over white, and intricate plaid details.
- 4This design is intricate, combining both freehand painting and the use of stickers or decals for precision.
Items Needed for this Design
Nail Preparation
- nail file
- buffer
- cuticle pusher
- base coat
- top coat
Nail Polish Colors
- red
- white
- green
- gold
Nail Art Tools
- thin nail art brush
- dotting tool
- nail striping tape
- nail decals or stickers (candy canes, trees)
Cleanup
- q-tips
- nail polish remover
Step by Step DIY(Do It Yourself) Guide
1
Start with nail prep.
- File and shape your nails to the desired length.
- Buff the surface gently to ensure smoothness.
- Push back cuticles carefully.
- Apply a base coat to protect your nails.
2
Apply base colors.
- Paint red on the thumb, middle, and pinky fingers.
- Paint white on the index and ring fingers.
- Let them dry completely.
3
Create detailed designs.
- Use the nail striping tape on the red nails to create sections for the gold and green stripes.
- Paint within stripes on one nail, alternating between gold and green.
- On the white nails, use decals or freehand paint candy canes and small Christmas trees with red and green polish.
- For the plaid on the pinky finger, use a thin brush to create criss-cross red, green, and gold lines.
4
Finishing touches.
- Add small dots with a dotting tool to mimic snow on the red nails.
- Seal all nails with a top coat for shine and protection.
- Clean up any excess polish on skin with a q-tip dipped in remover.
Pro Tips
Use decals for a precise finish if freehand drawing is challenging.
Ensure each layer of polish is completely dry before applying the next to avoid smudging.
Apply two coats of top coat for extra durability during the holiday season.