Design Details
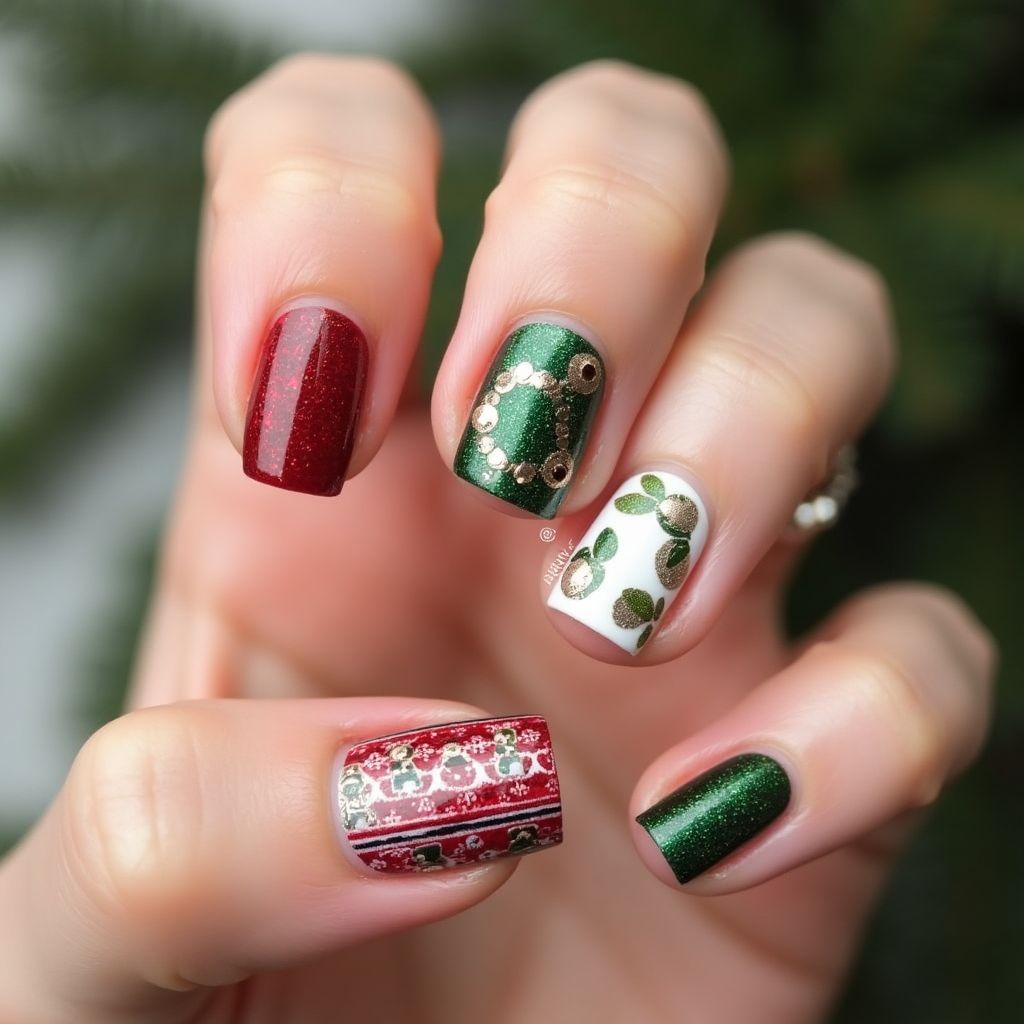
- 1The nail design features a festive theme with a combination of rich red and green hues, enhanced with gold elements for a holiday feel.
- 2Each nail showcases a unique design: a glittery red for a classic touch, a green nail with gold sequins forming a wreath, and a white nail with gold leaf patterns.
- 3One nail has an intricate red and white pattern resembling a Christmas sweater, adding a cozy seasonal vibe.
- 4The overall look is completed with a smooth glossy topcoat for a polished finish.
Items Needed for this Design
Nail Preparation
- nail file
- buffer
- cuticle pusher
- base coat
Nail Polish Colors
- glittery red polish
- glittery green polish
- white polish
- gold polish
Nail Art Tools
- dotting tool
- striping brush
- gold sequins
Cleanup
- small cleanup brush
- nail polish remover
Step by Step DIY(Do It Yourself) Guide
1
Prepare your nails.
- File and shape your nails to your desired length.
- Gently push back cuticles using a cuticle pusher.
- Buff the surface of your nails to smooth out any ridges.
- Apply a base coat to protect your natural nails.
2
Apply the base colors.
- Paint the thumb and pinky nails with glittery red polish.
- Cover the index and pinky nails with glittery green polish.
- Paint the middle finger nail with white polish.
3
Create festive designs.
- Using a striping brush and gold polish, create a leaf pattern on the white nail.
- Use a dotting tool to form a wreath shape with gold sequins on the green nail.
- On another red nail, use a fine brush to draw a sweater-like pattern using white and gold polishes.
4
Finish with a topcoat.
- Once the designs are dry, apply a glossy topcoat to seal in your art.
- Clean up any excess polish around the nails with a small brush dipped in remover.
Pro Tips
Make sure each layer of polish is completely dry before moving on to the next step.
Using a fast-drying topcoat will help preserve the intricate designs.
If gold sequins are not available, gold polish dots can be a great alternative.
Practice the sweater pattern on paper or a practice nail tip before applying to your nail.