Design Details
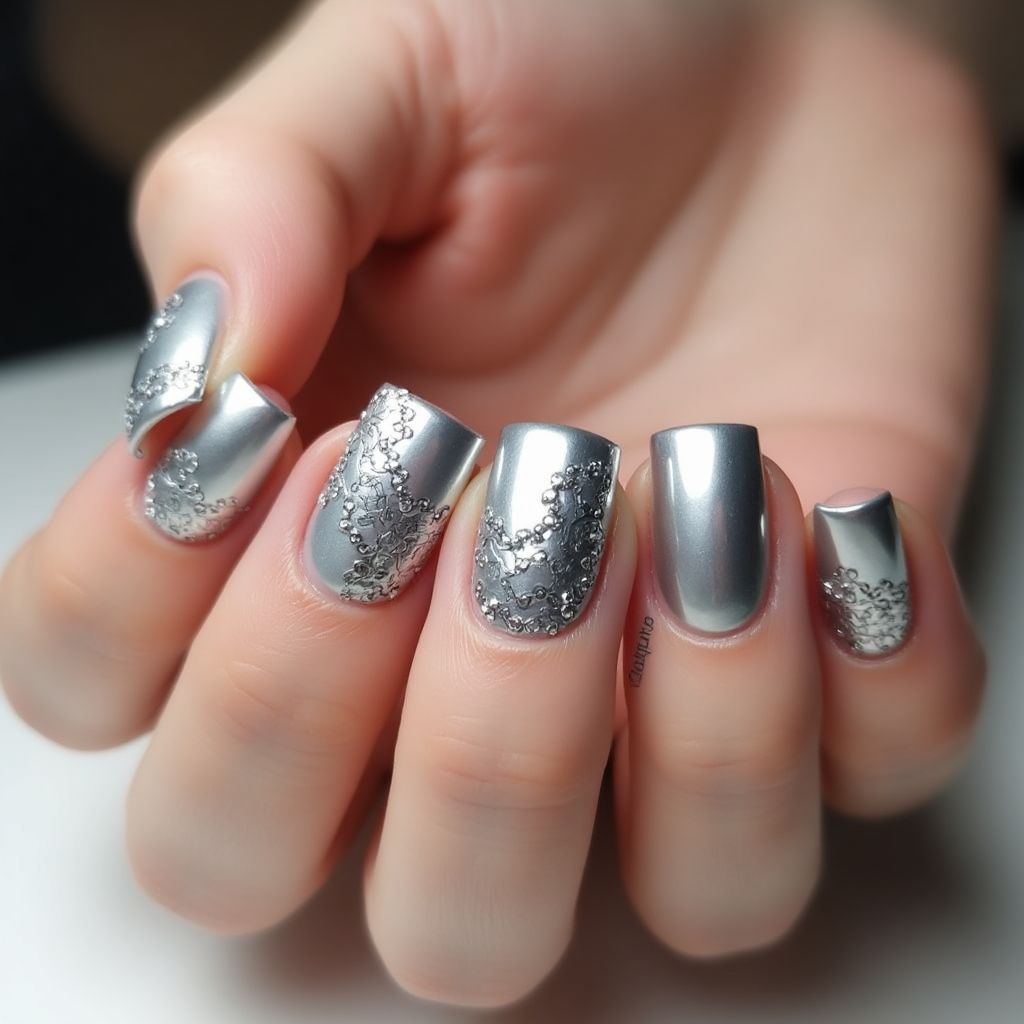
- 1This nail design features a sleek silver metallic base complemented by intricate silver lace patterns.
- 2The combination of a glossy metallic finish with delicate detailing creates a sophisticated and elegant appearance.
- 3The design alternates between fully coated silver nails and those adorned with the lace pattern, providing visual interest while maintaining a cohesive look.
Items Needed for this Design
Nail Preparation
- Nail file
- Nail buffer
- Cuticle remover
- Base coat
Nail Polish Colors
- Metallic silver nail polish
- Silver nail art polish or detailing paint
Nail Art Tools
- Fine nail art brush
- Dotting tool or toothpick
Cleanup
- Nail polish remover
- Cotton pads or swabs
Step by Step DIY(Do It Yourself) Guide
1
Prep your nails.
- Shape and file your nails to your desired length.
- Gently push back cuticles using a cuticle pusher and apply cuticle remover.
2
Apply base coat.
- Apply a thin layer of base coat to protect your nails.
- Allow the base coat to dry completely.
3
Apply metallic silver polish.
- Apply one to two coats of metallic silver nail polish, allowing each coat to dry before applying the next.
- Ensure an even coverage for a glossy finish.
4
Create lace design.
- Using a fine nail art brush or dotting tool, dab silver detailing paint to create lace patterns on selected nails.
- Start at the base and create a wave-like pattern, adding dots and swirls for detail.
5
Seal your design.
- Once the lace design is dry, apply a top coat for shine and durability.
- Allow it to dry completely.
6
Clean up edges.
- Use a cotton swab dipped in nail polish remover to clean any excess polish around the nails.
- Make sure the area around the cuticles looks neat.
Pro Tips
Practice the lace technique on a piece of paper before applying it to your nails.
Use thin layers of polish to avoid bubbling and ensure quick drying.
For added durability, consider a gel top coat instead of a regular one.