Design Details
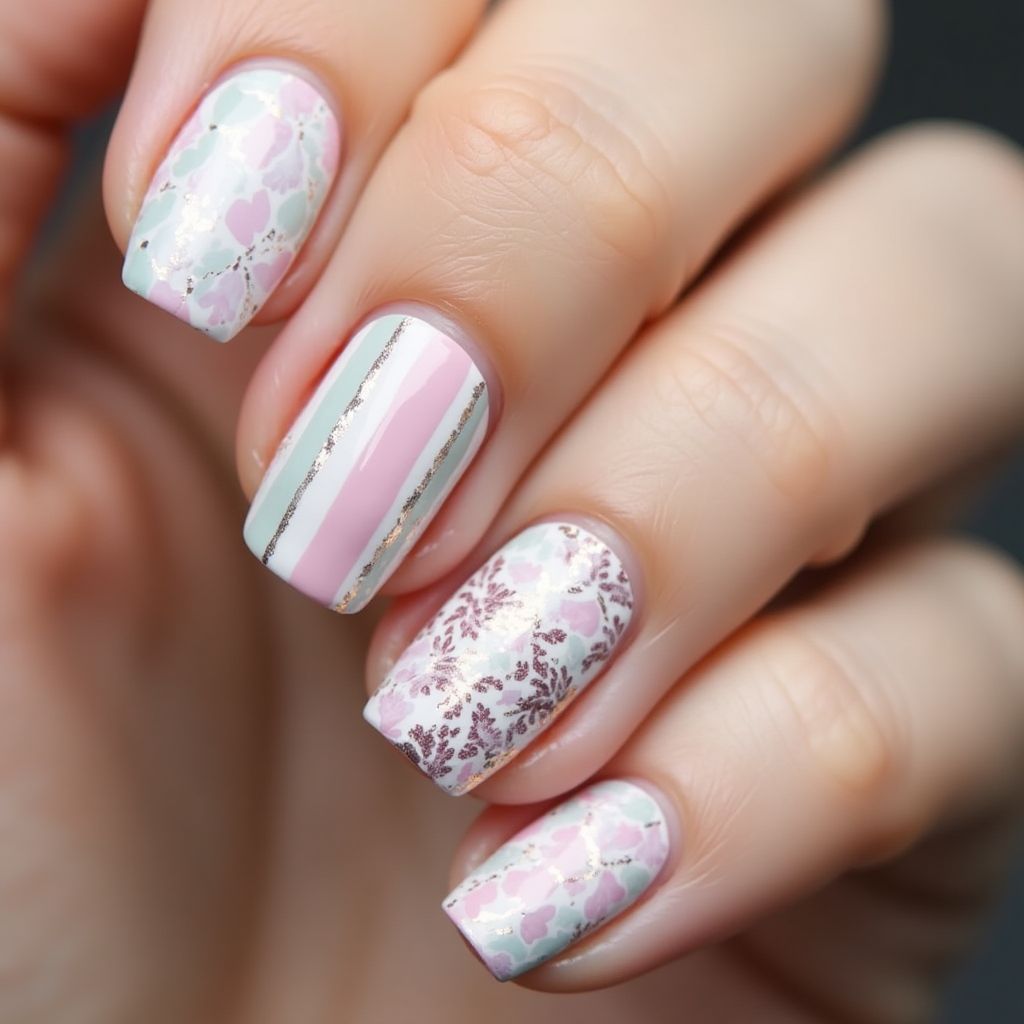
- 1The nail design features a soft pastel color palette with pink, mint green, and white as the primary colors.
- 2There are intricate lace-like floral patterns and stripes accentuated by metallic silver lines.
- 3Each nail has a unique combination of the patterns, with some showcasing floral designs and others featuring vertical stripes.
- 4The overall look is delicate and sophisticated, perfect for a spring or romantic occasion.
Items Needed for this Design
Nail Preparation
- nail file
- cuticle pusher
- base coat
- top coat
Nail Polish Colors
- pastel pink
- mint green
- white
- metallic silver
Nail Art Tools
- thin nail art brush
- small detail brush
- floral nail stamping plate
- striping tape
Cleanup
- cotton swabs
- nail polish remover
- small angled cleanup brush
Step by Step DIY(Do It Yourself) Guide
1
Prepare your nails.
- File your nails to your desired shape.
- Gently push back the cuticles.
- Apply a base coat to protect your nails.
2
Create the base colors.
- Apply pastel pink nail polish to half of your nails and mint green to the other half.
- Apply a second coat for full opacity, if necessary.
- Allow the nail polish to dry completely.
3
Add floral and stripe patterns.
- Use a floral stamping plate to apply white floral designs over the mint green nails.
- For the pastel pink nails, place striping tape vertically and paint white stripes.
- Accent the stripes with metallic silver lines between them using a thin brush.
4
Finalize the design.
- Remove any striping tape carefully while the polish is still tacky.
- Clean up any excess polish around the nails with a cotton swab and nail polish remover.
- Apply a top coat to seal the design and add shine.
Pro Tips
Ensure each layer of polish is dry before applying the next to prevent smudging.
Use a quick-dry top coat for added durability.
Practice using the striping tape on a surface other than your nails to get the technique right.
Use a steady hand and rest your arm on a flat surface for more precision with the brush.