Design Details
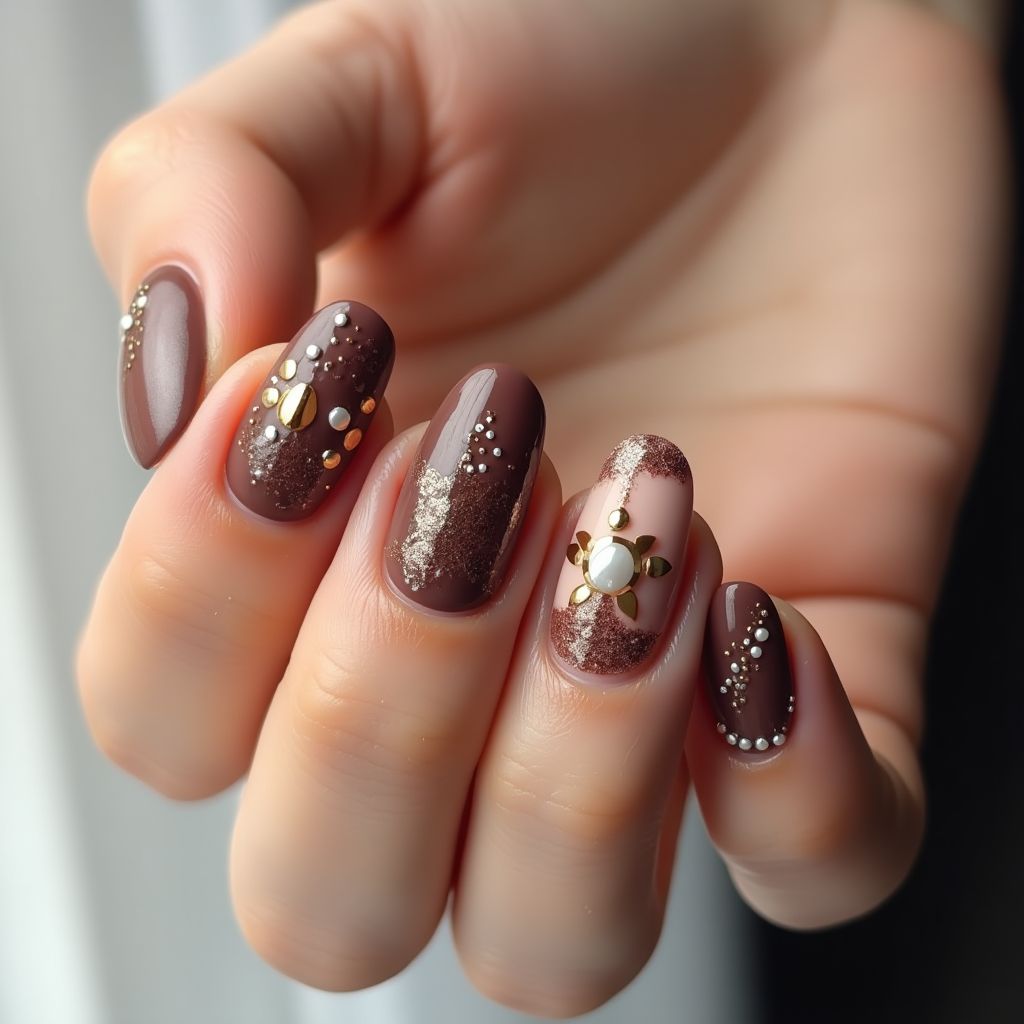
- 1The nail design features a rich brown color palette complemented by gold and white embellishments.
- 2Textures are introduced with gradients and sparkles on select nails, creating a visually dynamic appearance.
- 3Pearl and metallic accents enhance the elegance of the design, making it suitable for special occasions.
- 4The combination of matte and glitter finishes adds depth and sophistication to the overall look.
Items Needed for this Design
Nail Preparation
- Nail file
- Nail buffer
- Cuticle oil
- Base coat
Nail Polish Colors
- Dark brown nail polish
- Light beige or nude polish
- Gold glitter polish
- Top coat
Nail Art Tools
- Dotting tool
- Nail art brush
- Gemstone or pearl embellishments
- Nail glue (if needed)
Cleanup
- Nail polish remover
- Cotton swabs
- Acetone
Step by Step DIY(Do It Yourself) Guide
1
Prepare your nails for the design.
- File and shape your nails to your desired length and style.
- Buff the surface to create a smooth canvas.
- Apply cuticle oil to nourish the cuticles.
2
Apply the base coat.
- Evenly coat each nail with a base coat and allow it to dry completely.
3
Paint the primary color.
- Apply two coats of dark brown polish on the majority of the nails, allowing each coat to dry in between.
- On two nails, paint a gradient effect with the beige polish, blending it with the dark brown.
4
Add glitter and embellishments.
- On one dark brown nail, apply gold glitter polish towards the cuticle and fade it upwards.
- Using a dotting tool, arrange pearls and metallic studs on selected nails as desired.
5
Seal the design.
- Apply a top coat over all nails to protect the design and enhance shine.
- Clean up any excess polish around the cuticles with a cotton swab dipped in nail polish remover.
Pro Tips
Ensure your nails are clean and dry before starting to achieve better polish adherence.
Use a fine nail art brush for more precise application of embellishments.
Experiment with placement of gems and glitter before securing them to find your preferred design.
Don’t rush the drying process; waiting ensures vibrancy and longevity.