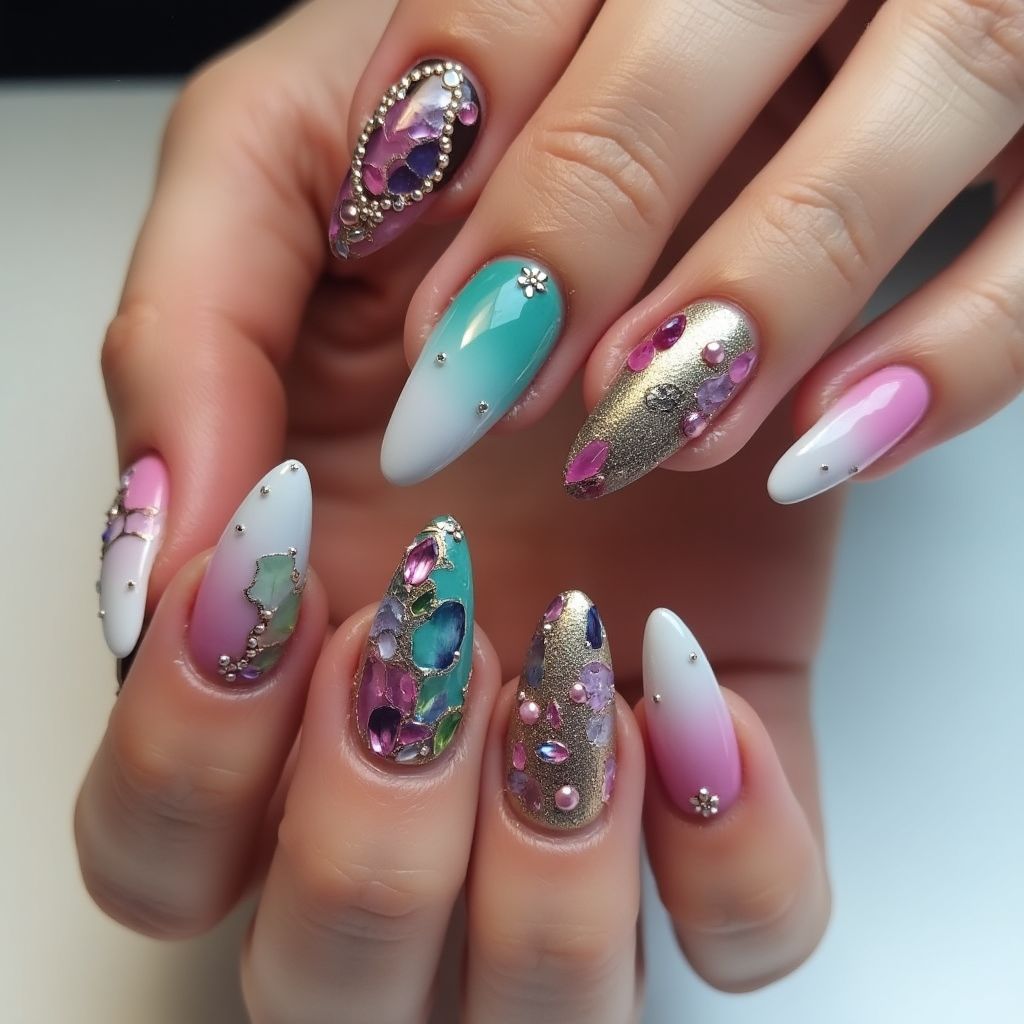
Design Details
- 1This nail design features a vibrant combination of colors and embellishments that create a luxurious and eye-catching look.
- 2The design includes a gradient effect with pink and white, turquoise accents, and a beautiful metallic gold nail that complements the jeweled embellishments.
- 3Gemstones and intricate details are used throughout, giving a 3D effect and a sense of elegance to the overall manicure.
- 4The use of various shapes and finishes adds a contemporary and trendy touch, making this design suitable for special occasions.
Items Needed for this Design
Nail Preparation
- Nail file
- Nail buffer
- Cuticle pusher
- Base coat
- Top coat
Nail Polish Colors
- Pale pink polish
- White polish
- Turquoise polish
- Gold polish
- Clear polish for sealing
Nail Art Tools
- Dotting tool
- Nail art brush
- Tweezers (for placing gems)
- Rhinestones and gems in various sizes
Cleanup
- Nail polish remover
- Cotton pads
- Small brush (for cleanup)
Step by Step DIY(Do It Yourself) Guide
1
Prepare the nails for polish application.
- Use a nail file to shape each nail to your desired length and shape.
- Buff the surface of the nails to create a smooth base.
- Push back cuticles gently using a cuticle pusher.
2
Apply a base coat.
- Apply a layer of base coat to protect the natural nails.
- Allow the base coat to dry completely.
3
Paint the base colors.
- Apply the pale pink polish to the first two nails.
- Use the white polish for the next two nails, creating a clean, even layer.
- Apply turquoise polish to the penultimate nail.
- Use the gold polish on the last nail, ensuring full coverage.
4
Create ombre effects.
- For a subtle ombre, use the pink and white polishes together on the assigned nails, lightly blending them.
- For the turquoise and white nails, use the dotting tool to create a gradient by adding dots of turquoise at the base and blending with the white.
5
Add gems and embellishments.
- Using tweezers, place rhinestones and gems onto the gold nail in an eye-catching design.
- Add smaller gems to some of the other nails for a cohesive look.
- Use a clear polish to seal the gems and prevent them from falling off.
6
Finish with a top coat.
- Apply a top coat over all nails to give a glossy finish and protect the design.
- Ensure the top coat covers the gems for added durability.
7
Clean up any mistakes.
- Dip a small brush in nail polish remover to carefully clean around the cuticles and edges.
- Make sure to remove any excess polish from the skin.
Pro Tips
Work in a well-lit area to see the colors accurately while painting.
Patience is key; allow each layer to dry completely before applying the next.
Experiment with different gem shapes and sizes to create a unique look.
If you're new to nail art, consider practicing on a nail wheel first.
Always apply a nourishing cuticle oil after completing your nails for healthy nails.