Design Details
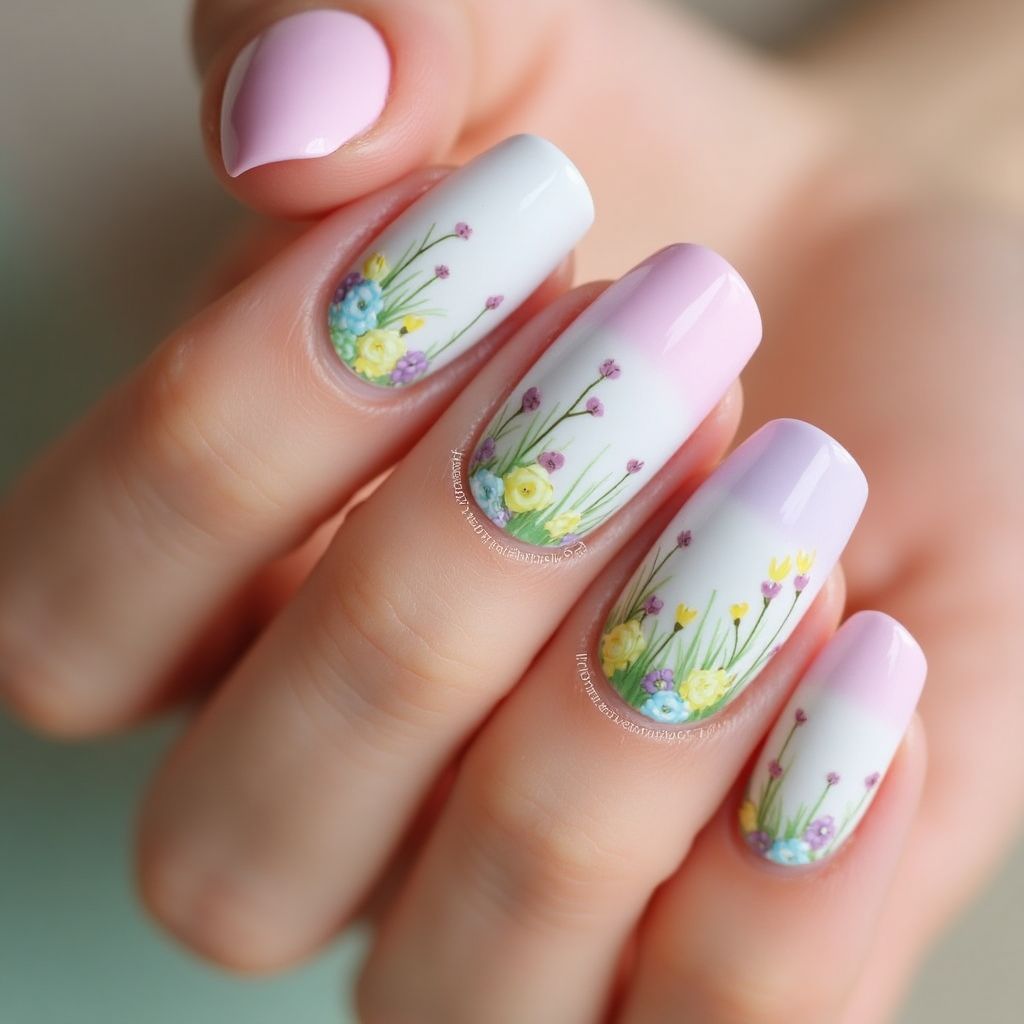
- 1This nail design features a soft pastel color palette, primarily using pink and white as the base colors.
- 2The artwork consists of delicate floral patterns with a mix of colorful flowers, including yellows, blues, and purples, set against a white background.
- 3The pink polish is used on the thumb and ring fingers, while the other fingers showcase intricate flower designs.
- 4The design embodies a fresh, springtime vibe, perfect for a cheerful and uplifting look.
Items Needed for this Design
Nail Preparation
- Nail file
- Cuticle pusher
- Base coat
Nail Polish Colors
- Pastel pink nail polish
- White nail polish
- Yellow nail polish
- Blue nail polish
- Purple nail polish
- Green nail polish
Nail Art Tools
- Fine nail art brushes
- Dotting tools
- Nail art palette
Cleanup
- Nail polish remover
- Cotton pads
Step by Step DIY(Do It Yourself) Guide
1
Prepare your nails
- File your nails to your desired shape.
- Gently push back cuticles and apply a base coat to protect your nails.
2
Apply base colors
- Apply two coats of pastel pink polish on the thumb and ring fingers for a solid base.
- On the remaining fingers, apply two coats of white polish as the backdrop for the floral design.
3
Create floral designs
- Using a fine nail art brush, dip into the yellow polish and paint small flower shapes on the white base.
- Repeat with blue and purple polish to add different colored flowers, creating a lush garden effect.
- Use green polish to paint delicate stems for the flowers.
4
Add finishing touches
- Once the floral art is dry, apply a top coat to seal the design and add shine.
- Clean up any excess polish around the nails with a cotton pad dipped in nail polish remover.
Pro Tips
Work in good lighting to see the details while painting the flowers.
If you make a mistake, use a small brush and nail polish remover to clean up the design before it dries.
Experiment with different flower shapes and sizes for a more personalized look.
Let each layer dry properly to avoid smudging the design.