Design Details
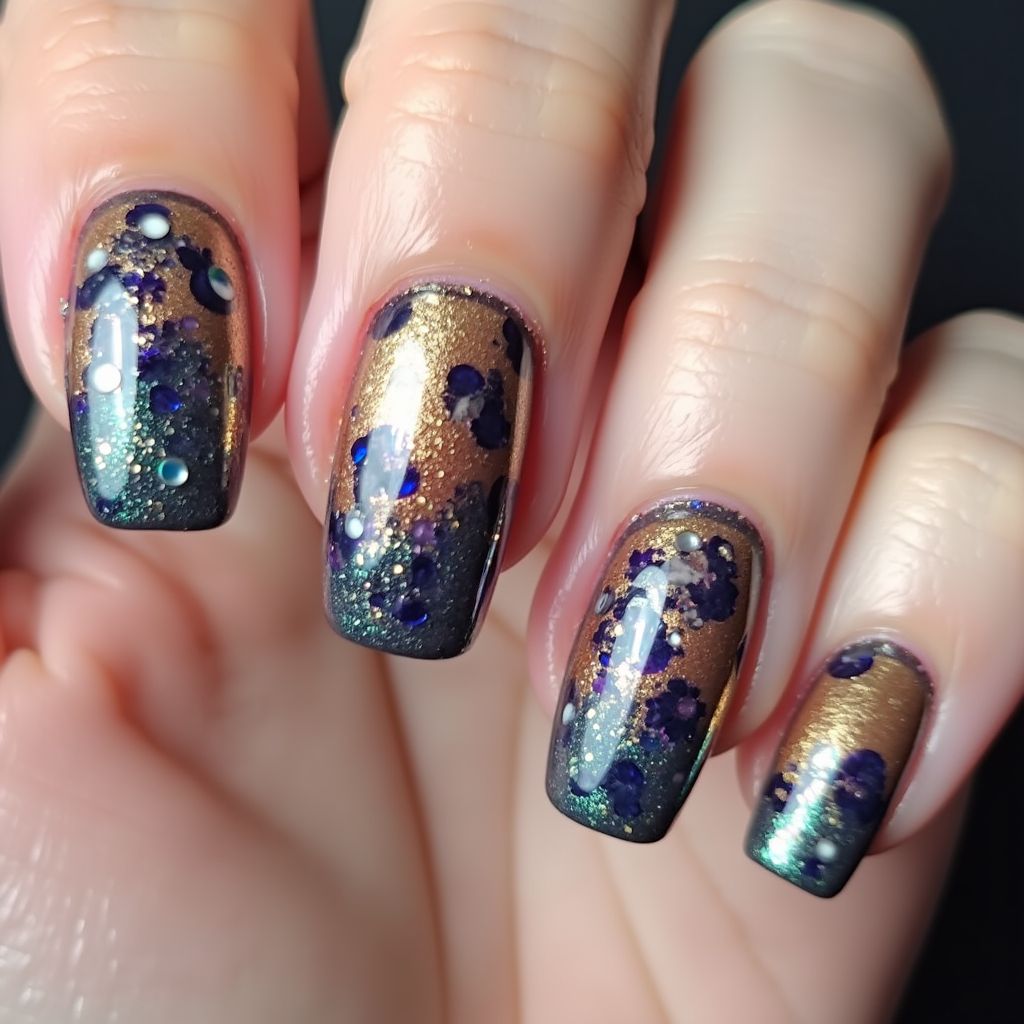
- 1This nail design features a beautiful gradient from a dark, shimmering green-blue at the base to a rich gold at the tips.
- 2The design is further embellished with dark blue floral accents, adding a touch of elegance and depth.
- 3Glitter and small round embellishments are scattered throughout, enhancing the overall texture and creating a captivating, dimensional effect.
Items Needed for this Design
Nail Preparation
- Nail file
- Buffer
- Cuticle pusher
- Cuticle oil
- Nail cleanser
Nail Polish Colors
- Dark shimmering green-blue nail polish
- Gold nail polish
- Dark blue nail polish
Nail Art Tools
- Small dotting tool
- Nail art brush (optional)
- Sponge or makeup wedge (for gradient)
Cleanup
- Nail polish remover
- Small brush or cotton swabs
Step by Step DIY(Do It Yourself) Guide
1
Prepare Your Nails
- File and shape your nails to your desired length and shape.
- Gently push back your cuticles and apply cuticle oil, massaging it in.
- Cleanse the nail surface with a nail cleanser to remove any oils or residue.
2
Apply Base Color (Green-Blue Gradient Base)
- Apply a thin layer of the dark shimmering green-blue polish to the lower half of your nails.
- Before it dries completely, apply the gold polish to the upper half of your nails.
- Use a sponge or makeup wedge to blend the two colors together creating a smooth gradient effect. Repeat for desired opacity.
- Let the gradient base dry completely.
3
Add Floral Accents
- Using a dotting tool, create small dark blue dots in a floral pattern on each nail. Create the dots in a scattered manner and avoid uniform arrangement.
- Vary the size of the dots for a more natural, organic look.
- Let the floral accents dry completely.
4
Incorporate Glitter and Embellishments
- Apply a thin layer of clear polish where you want the glitter to adhere.
- Sprinkle fine glitter over the gradient, concentrating it near the base of the green-blue gradient.
- Place small round embellishments randomly on each nail using a dotting tool or a small brush.
- Gently press down on each embellishment to ensure it adheres well.
5
Seal with Top Coat
- Apply a generous layer of top coat to seal in the design and add shine.
- Make sure to cover all embellishments and edges to prevent chipping.
- Allow the top coat to dry completely.
6
Clean Up
- Use a small brush or cotton swab dipped in nail polish remover to clean up any polish around the cuticles.
- Apply cuticle oil to hydrate the skin around your nails.
Pro Tips
For a smoother gradient, apply a quick-drying base coat before starting your nail art.
If you don't have a dotting tool, you can use a toothpick or the end of a bobby pin to create the floral dots.
To prevent the embellishments from falling off, use a strong adhesive or gel top coat.
Apply thin layers of each color to avoid smudging and ensure a smooth finish.
Be patient and allow each layer to dry completely before moving on to the next step.