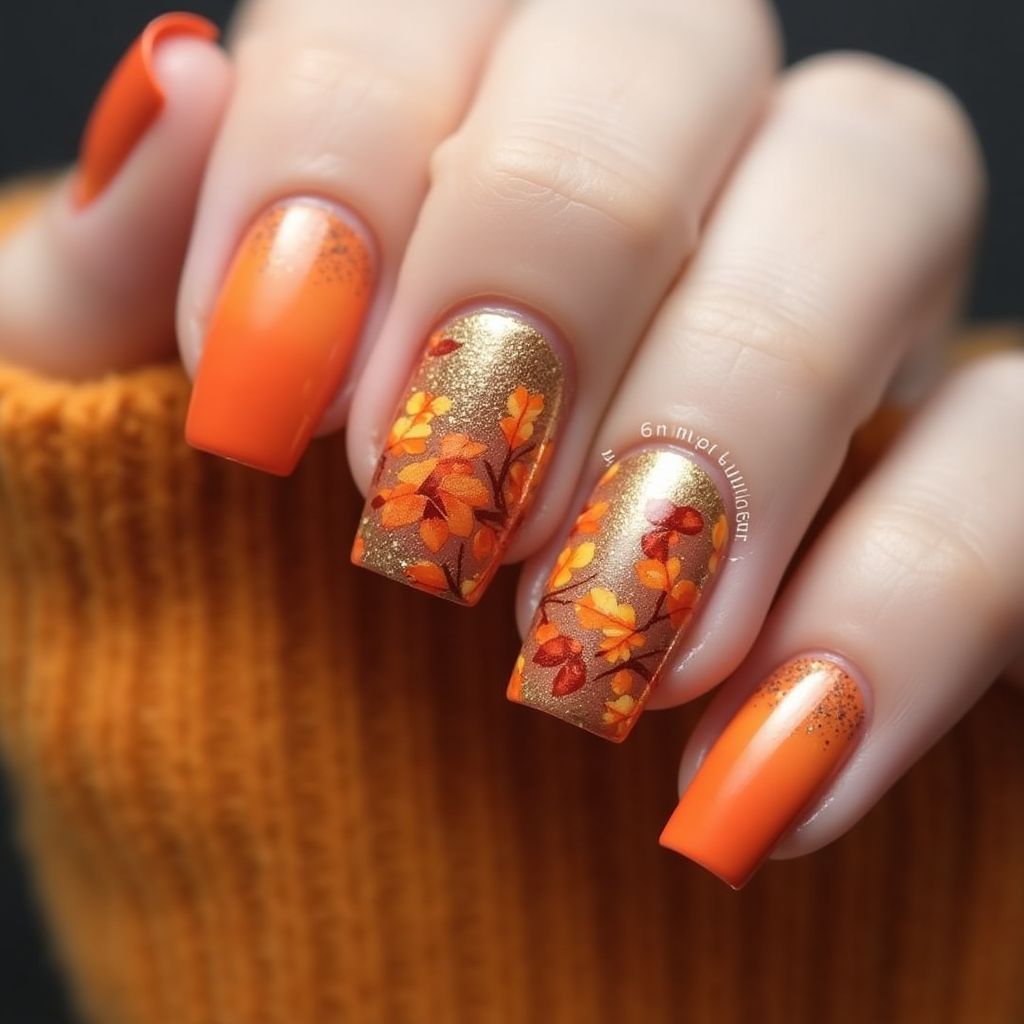
Orange Autumn Nail Design
Embrace Autumn's Charm: Whimsical Orange Gradient with Cozy Nature-Inspired Nail Art

Design Details
- 1The nail design features a vibrant autumn theme with a combination of orange and gold shades.
- 2Each nail has a different look, with some showcasing a solid orange color, while others display a sparkling gold base adorned with intricate leaf patterns.
- 3The use of warm colors and detailed artwork gives a cozy, seasonal vibe, perfect for fall.
Items Needed for this Design
Nail Preparation
- Nail file
- Nail buffer
- Cuticle remover
- Base coat
Nail Polish Colors
- Bright orange nail polish
- Gold glitter polish
- Dark orange for details
- Clear topcoat
Nail Art Tools
- Detail brush
- Dotting tool or small brush for leaves
- Stencil (optional)
Cleanup
- Nail polish remover
- Cotton pads or swabs
Step by Step DIY(Do It Yourself) Guide
1
Prep your nails
- File and shape your nails to the desired length.
- Buff the surface gently to create a smooth base.
- Apply cuticle remover and push back cuticles for a clean look.
- Finish with a layer of base coat and allow it to dry completely.
2
Apply the base colors
- For the two outer nails, apply two coats of bright orange polish, allowing each coat to dry.
- On the middle two nails, apply one coat of gold glitter polish as a base, ensuring full coverage.
3
Create the leaf design
- Use a detail brush and dark orange polish to paint small leaf shapes on the gold nails.
- Incorporate varying sizes and shapes to add interest and depth.
- Add tiny dots or dots around the leaves with the dotting tool to mimic falling leaves.
4
Finish the nails
- Seal the design with a clear topcoat to enhance shine and protect the artwork.
- Clean up any excess polish around the cuticles using a brush dipped in nail polish remover.
- Allow the topcoat to dry fully before using your hands.
Pro Tips
Use thin layers of polish to avoid smudging and to help each layer dry quickly.
Practice the leaf design on a piece of paper first if you're new to nail art.
Consider using nail stamping for a more detailed and quicker leaf design.
If you make a mistake, you can always use remover to correct it before the base coat dries.