Design Details
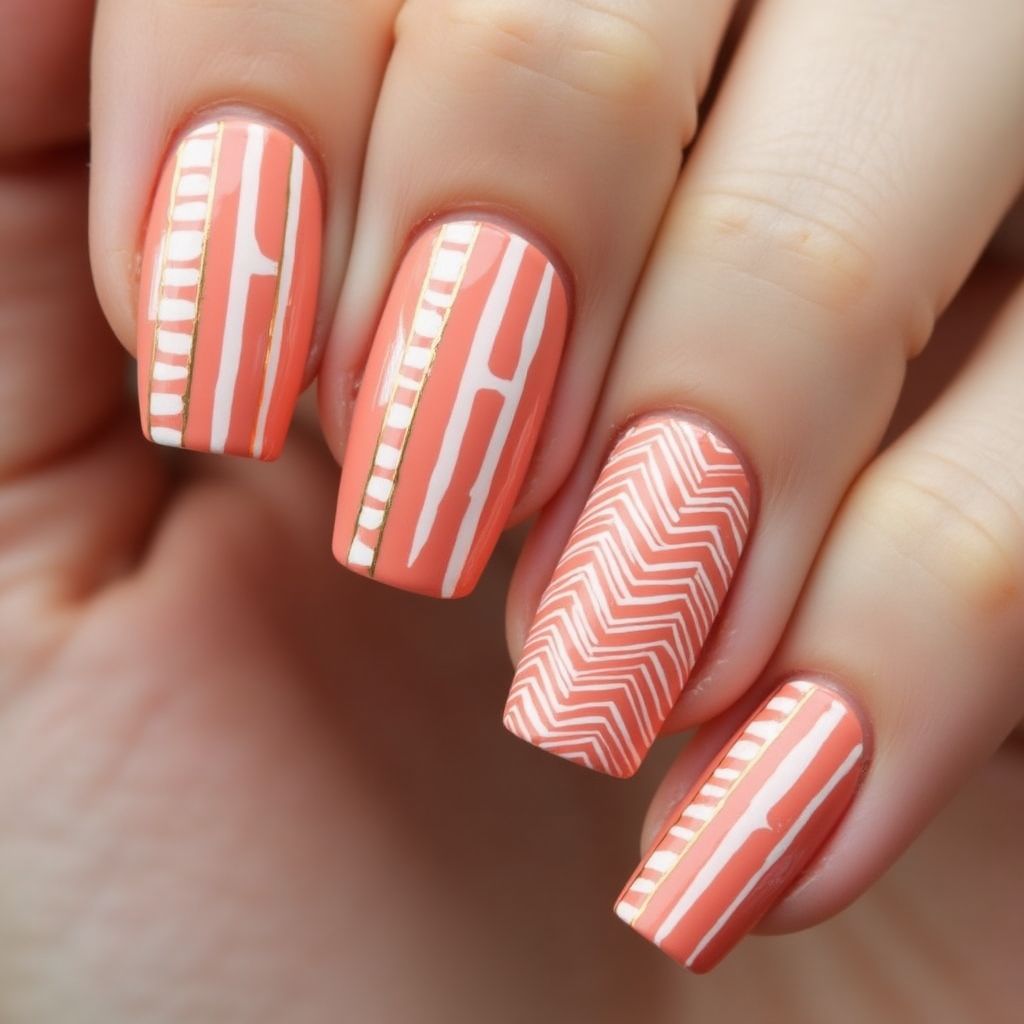
- 1The nail design features a vibrant coral base that adds a cheerful touch to the overall look.
- 2Three of the nails have variations of white linear patterns, including thick and thin stripes, alongside a chevron design which brings an element of texture.
- 3One nail is adorned with delicate gold striping, adding a touch of elegance to the playful design.
Items Needed for this Design
Nail Preparation
- Nail polish remover
- Base coat
- Top coat
- Nail file
- Cuticle oil
Nail Polish Colors
- Coral nail polish
- White nail polish
- Gold striping polish
Nail Art Tools
- Nail art brush or striper
- Dotting tool (optional)
Cleanup
- Cotton pads
- Nail polish remover
Step by Step DIY(Do It Yourself) Guide
1
Prepare your nails
- Remove any previous nail polish with remover.
- File your nails to the desired shape.
- Push back the cuticles and apply cuticle oil.
2
Apply the base coat
- Apply a thin layer of base coat to all nails and allow it to dry completely.
3
Apply the coral nail polish
- Paint all nails with two coats of coral nail polish, allowing each coat to dry before applying the next.
4
Create the nail art designs
- Using a nail art brush or striper, paint white lines on three nails in various widths.
- On one nail, create a chevron design with the white polish.
- For the accent nail, apply the gold striping polish as a delicate line next to the white patterns.
5
Finish with a top coat
- Once the designs are dry, apply a top coat to seal the design and add shine.
6
Clean up
- Use a small brush dipped in nail polish remover to clean any excess polish around the nails.
- Allow your nails to dry completely before engaging in activities.
Pro Tips
Ensure layers are thin to promote faster drying times.
Practice the designs on a piece of paper before applying them to your nails.
Keep your nail art tools clean to achieve crisp lines.
If using a steady hand is challenging, rest your hand on a flat surface while working.