Design Details
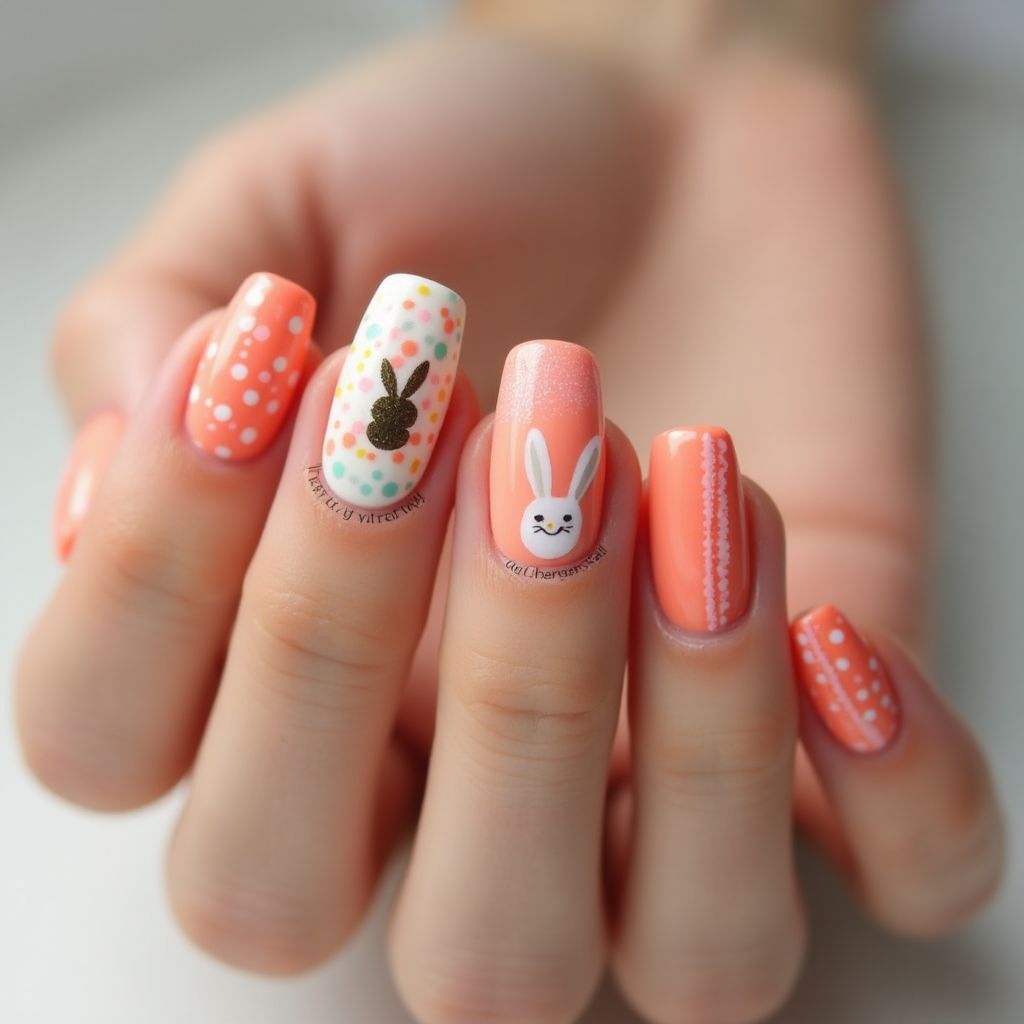
- 1The nail design features a playful Easter theme with a variety of accent nails.
- 2A soft peach color coats most of the nails, adorned with white polka dots.
- 3There are two accent nails: one with a white base and colorful dotted pattern featuring a brown bunny, and another with a white bunny face and pink base.
- 4This design combines cute cartoon elements and pastel colors, making it perfect for a festive, playful look.
Items Needed for this Design
Nail Preparation
- Nail file
- Cuticle pusher
- Base coat
- Top coat
Nail Polish Colors
- Peach
- White
- Brown
- Pink
- Assorted pastel colors
Nail Art Tools
- Dotting tool
- Thin nail art brush
Cleanup
- Nail polish remover
- Cotton swabs
Step by Step DIY(Do It Yourself) Guide
1
Prepare your nails.
- File your nails to the desired shape.
- Push back your cuticles gently.
- Apply a base coat to protect your nails and let it dry.
2
Apply the base color.
- Paint all nails with the peach polish, except for the accent nails.
- For the accent nails, apply a white polish on one nail and a pink polish on the other.
- Allow all nails to dry completely.
3
Create the polka dot pattern.
- Use the dotting tool to apply white polka dots on the peach nails.
- On the white accent nail, use assorted pastel colors to create a dotted background around the bunny.
4
Draw the bunny designs.
- With a thin nail art brush, paint a brown bunny shape on the white accent nail.
- On the pink nail, paint a white bunny face using the nail art brush.
- Add small details like the bunny faces using a finer brush or toothpick.
5
Finish the design.
- Apply a top coat over each nail to seal in the design and add shine.
- Clean up any excess polish around your nails with a cotton swab dipped in remover.
Pro Tips
Ensure each layer of polish is fully dry before proceeding to the next to prevent smudging.
Practice drawing the bunny shapes on paper before attempting on your nails.
Use quick, gentle strokes with the brush to maintain clean edges.