Design Details
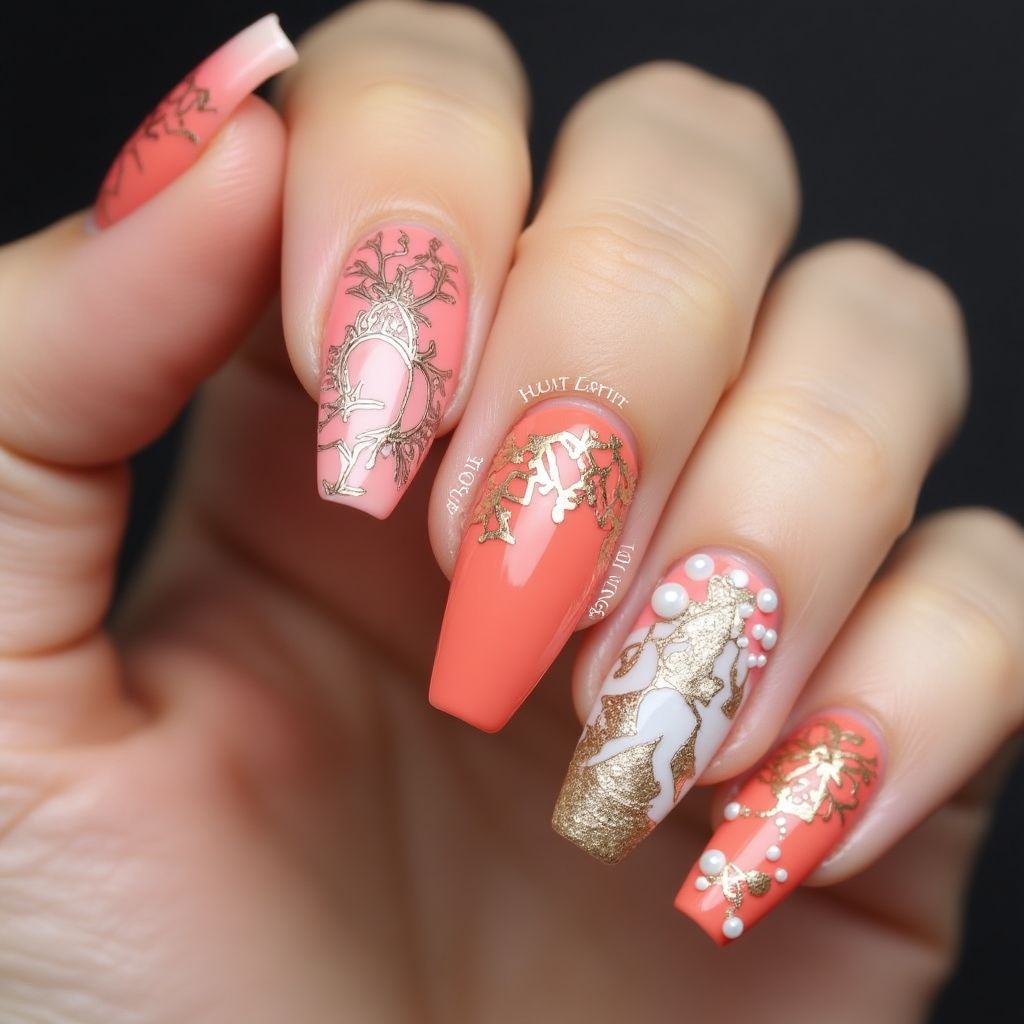
- 1This nail design features a trendy coral base color paired with intricate gold detailing, showcasing a beautiful combination of elegance and sophistication.
- 2Some nails display delicate tree-like patterns, while others incorporate textured embellishments such as pearls and metallic accents.
- 3The design uses a mix of matte and glossy finishes to create depth, ensuring that the golden artwork stands out against the coral background.
Items Needed for this Design
Nail Preparation
- Nail file
- Base coat
- Top coat
- Cuticle oil
Nail Polish Colors
- Coral nail polish
- Gold nail polish
- White nail polish
Nail Art Tools
- Nail art brush
- Dotting tool
- Stencils for patterns
- Nail tape
Cleanup
- Acetone or nail polish remover
- Cotton pads
Step by Step DIY(Do It Yourself) Guide
1
Prepare your nails
- Use a nail file to shape the nails to your desired length.
- Apply a base coat to protect the natural nail.
2
Apply the base color
- Choose coral nail polish and apply a thin coat on all nails.
- Let the first coat dry completely before applying a second coat for full coverage.
3
Create the nail art designs
- For tree designs, use a nail art brush with gold polish to draw delicate branches.
- On selected nails, use a dotting tool to apply pearls for added texture.
- For accent nails, paint a white base and then add golden designs.
4
Finish the design
- Once all art is dry, apply a top coat to seal the design and add shine.
- Carefully clean up any excess polish around the cuticles with nail polish remover.
5
Moisturize and hydrate
- Apply cuticle oil around the nails for hydration.
- Allow your nails to dry completely before resuming normal activities.
Pro Tips
Always allow each layer of polish to dry thoroughly to avoid smudging.
Practice your nail art designs on a nail wheel before applying them to your nails.
Use a fine detailing brush for more intricate patterns and designs.
If you make mistakes, don't worry—just use a small brush dipped in remover to correct them.
Experiment with different colors and patterns to match your personal style.