Design Details
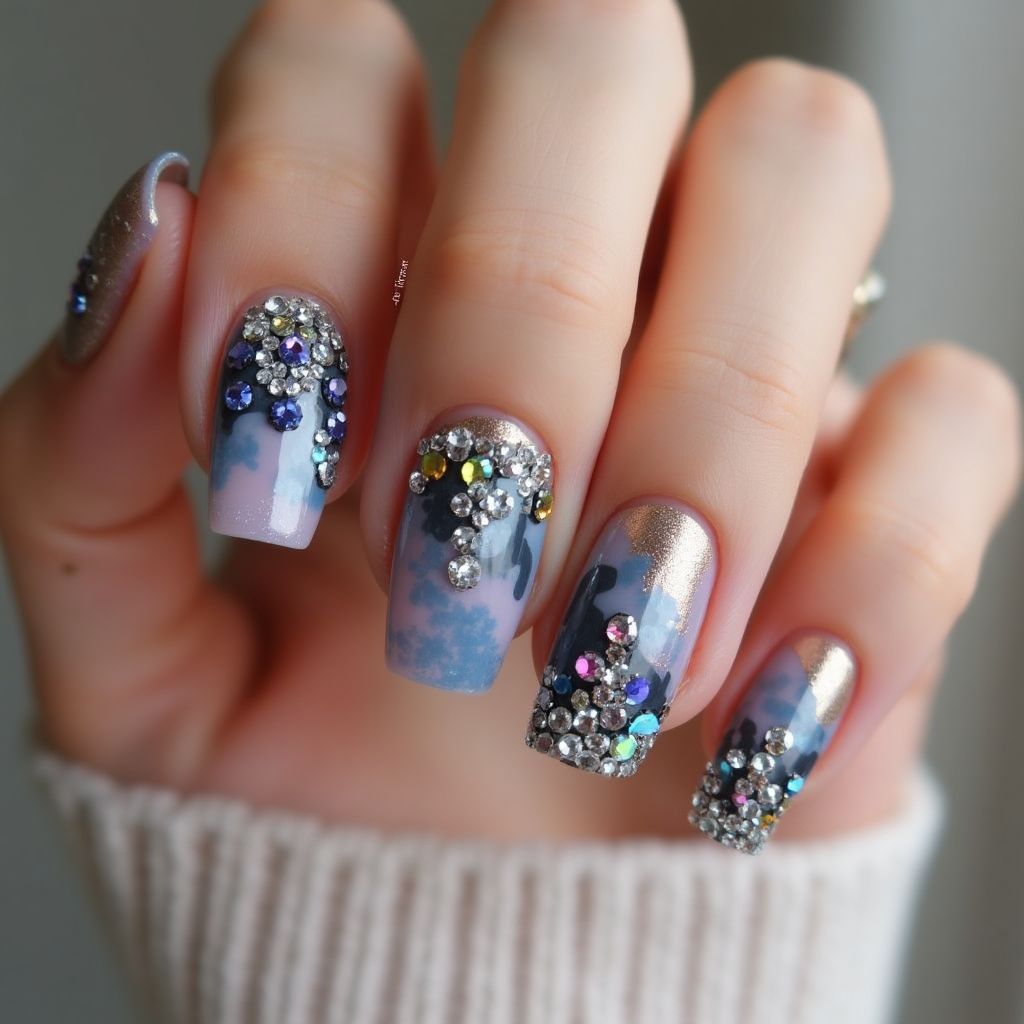
- 1The nail design features a blend of a glossy light blue base with darker navy and cloud-like patterns, creating a soft gradient effect.
- 2The tips are adorned with metallic gold polish that adds a chic contrast to the base colors.
- 3Rhinestones in various sizes and colors, including clear, blue, and iridescent accents, are strategically placed to create a luxurious and eye-catching effect.
Items Needed for this Design
Nail Preparation
- Nail file
- Buffer
- Cuticle oil
- Base coat
Nail Polish Colors
- Light blue nail polish
- Navy nail polish
- Metallic gold nail polish
- Top coat
Nail Art Tools
- Dotting tool or toothpick
- Rhinestone picker
- Nail art brush
Cleanup
- Nail polish remover
- Cotton pads
- Clean-up brush
Step by Step DIY(Do It Yourself) Guide
1
Prepare the nails for the design.
- File the nails to the desired shape.
- Buff the surface to create a smooth canvas.
- Apply cuticle oil and push back the cuticles.
- Apply a base coat to protect the nails.
2
Apply the base polish.
- Paint the nails with the light blue nail polish and allow it to dry.
- Using a makeup sponge, gently dab navy polish towards the tips to create a gradient effect.
3
Add the metallic gold.
- Once the gradient is dry, apply the metallic gold polish to the tips.
- Make sure to leave the sheer blue visible for contrast.
4
Apply rhinestones.
- Using a dotting tool or toothpick, apply a small amount of top coat to areas where you want to place rhinestones.
- Using a rhinestone picker, place the rhinestones on the wet polish, arranging them in a desired pattern.
5
Finish the design.
- Once all elements are in place, apply a top coat to seal the design and add shine.
- Clean up any excess polish around the nails with a clean-up brush and nail polish remover.
Pro Tips
Ensure each layer is completely dry before moving on to the next step to avoid smudging.
Use a clear top coat to enhance the shine and longevity of the design.
Experiment with different rhinestone placements for a unique look each time.