Design Details
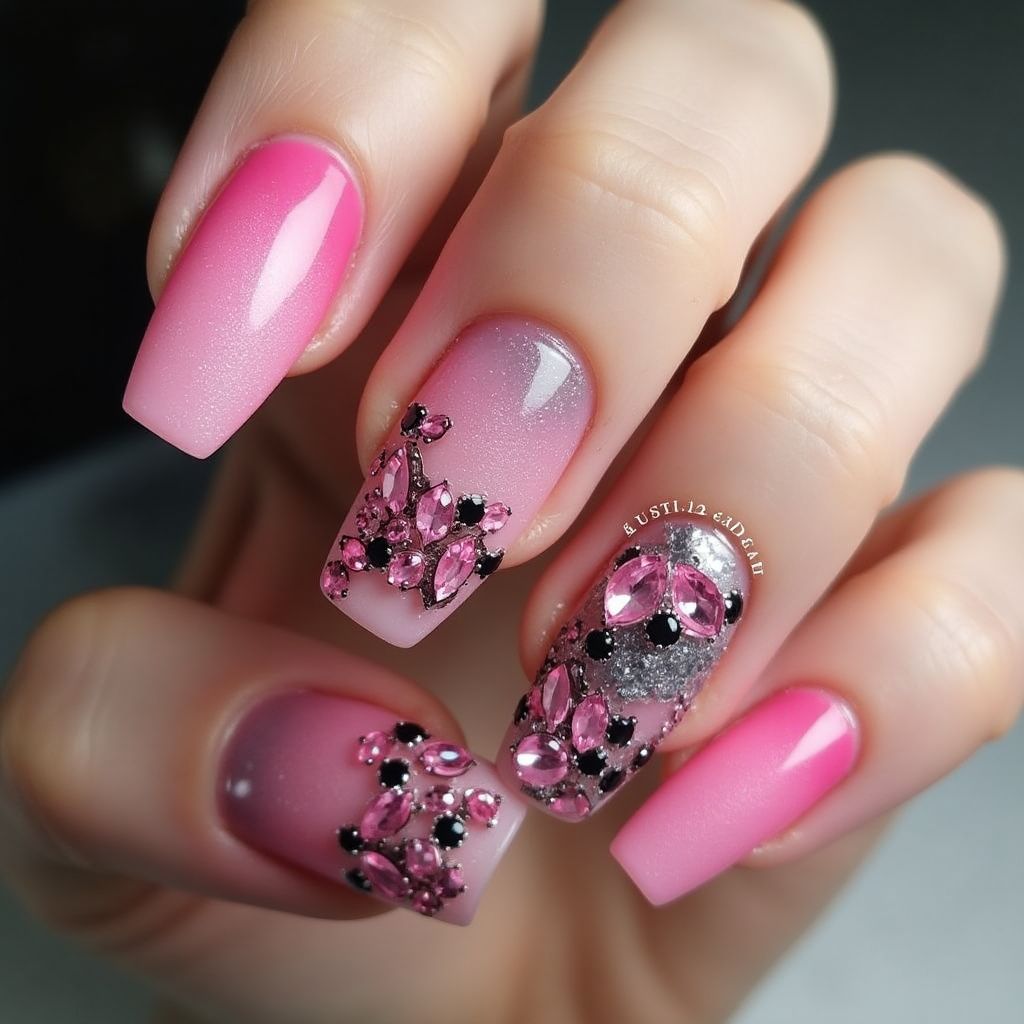
- 1This nail design features a beautiful ombre effect transitioning from a soft pink to a darker pink at the tips.
- 2The accent nails are adorned with intricate embellishments, including various sizes of pink rhinestones and black gems, creating a bold and glamorous look.
- 3The nails have a glossy finish with some matte textured elements, adding depth and contrast to the design.
Items Needed for this Design
Nail Preparation
- Nail file
- Buffer
- Base coat
- Top coat
Nail Polish Colors
- Soft pink nail polish
- Deep pink nail polish
- Clear nail polish
- Silver glitter polish
Nail Art Tools
- Nail art brush
- Dotting tool
- Toe separator or cotton pads
- Rhinestone picker tool
Cleanup
- Acetone or nail polish remover
- Cotton pads
- Small brush for cleanup
Step by Step DIY(Do It Yourself) Guide
1
Prep your nails
- File and shape your nails to desired length.
- Buff the nail surface lightly to promote polish adhesion.
- Apply a base coat to protect your nails.
2
Apply the base color
- Paint the nails in a soft pink polish as the base color.
- Allow the base color to dry completely.
- Apply a second coat for an even finish, if necessary.
3
Create the ombre effect
- Using a makeup sponge, dab the deep pink polish onto the tip and blend downwards.
- Apply a clear polish to blend and smooth the transition.
- Repeat until you achieve the desired ombre effect.
4
Add embellishments
- Apply a thin layer of clear polish or nail glue where you want to place the rhinestones.
- Use a picker tool to place the pink and black rhinestones on the accent nails.
- Ensure the gems are positioned securely and allow to set.
5
Finish with top coat
- Once the embellishments are in place, apply a top coat to seal everything.
- Carefully coat around the rhinestones for protection.
- Allow to dry fully before use.
Pro Tips
Always start with clean, dry nails for the best adherence.
Use a clear polish or nail glue to ensure rhinestones stay put.
If you're new to ombre, practice on a paper or practice nail before applying to your own nails.
For easier cleanup, keep cotton pads and acetone handy while working.
Allow adequate drying time between each step to avoid smudging.