Design Details
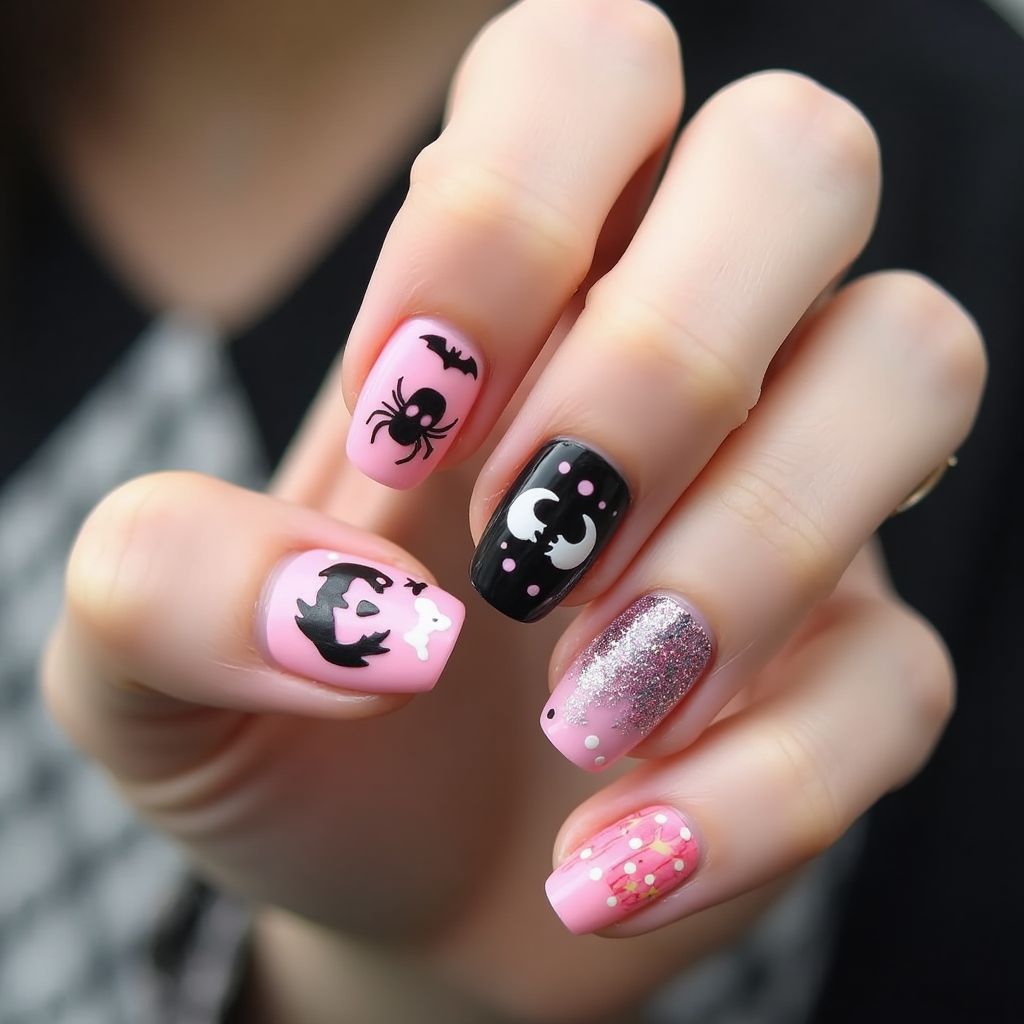
- 1The nail design features a Halloween theme with a combination of spooky elements such as bats, spiders, and a haunted pumpkin on a pink and black base.
- 2Each nail has a unique design, including glitter accents and polka dots for added texture and interest.
- 3The pink base color contrasts with the black elements to create a festive yet stylish look perfect for Halloween.
- 4Silver glitter is used on one nail to add a glamorous touch to the overall spooky design.
Items Needed for this Design
Nail Preparation
- nail file
- nail buffer
- cuticle pusher
- base coat
- top coat
Nail Polish Colors
- light pink polish
- black polish
- white polish
- silver glitter polish
Nail Art Tools
- thin nail art brush
- dotting tool
- nail stickers or stencils (bat, spider, pumpkin)
Cleanup
- nail polish remover
- cotton swabs
Step by Step DIY(Do It Yourself) Guide
1
Prepare your nails.
- File and shape your nails as desired.
- Buff the surface gently.
- Push back cuticles.
- Apply a thin layer of base coat and let it dry.
2
Apply the base colors.
- Paint two nails with light pink polish for the Halloween designs.
- Paint one nail with black polish for the moon design.
- Apply silver glitter polish to one nail as an accent.
- Let all nails dry completely.
3
Create the Halloween designs.
- Using a thin nail art brush, paint a black bat and spider on one pink nail.
- On the other pink nail, use black polish to draw a pumpkin and add white details for the eyes.
- On the black base nail, use a dotting tool with white polish to create eyes and pink dots around them.
4
Add final details and finish.
- Use the silver glitter polish to create ombre effects on the pink nails.
- Add small gold nuggets or polka dots on the pink polish for additional texture.
- Seal the design with a clear top coat.
Pro Tips
Ensure each layer of polish is completely dry before moving to the next step to avoid smudging.
Use a dotting tool for precise and consistent dot sizes in the design.
If freehand drawing is difficult, consider using nail stickers or stencils for the intricate Halloween designs.
Apply the top coat carefully to avoid smudging the design and ensuring a long-lasting finish.