Design Details
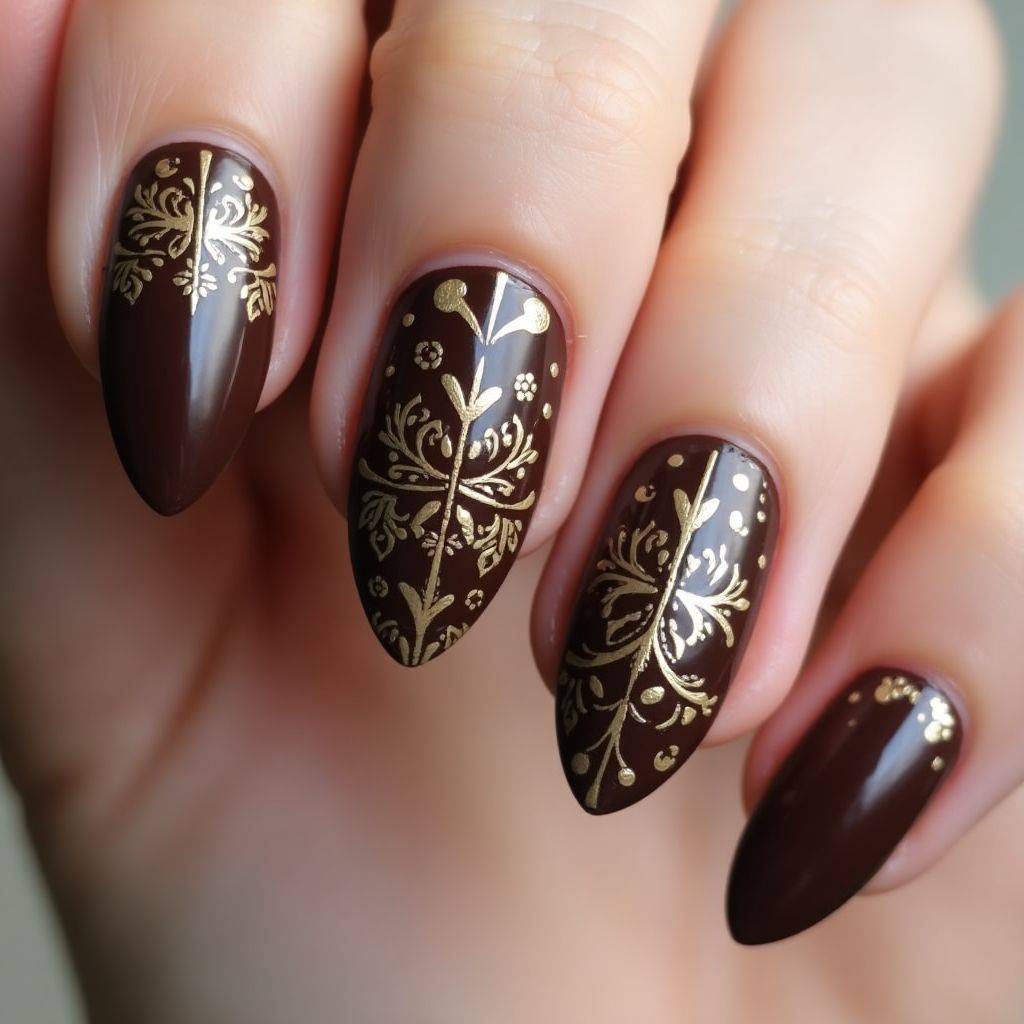
- 1This nail design features a rich chocolate brown base color which offers a warm and elegant backdrop for intricate gold detailing.
- 2The design incorporates floral patterns and delicate swirls, showcasing a mix of large and small designs to create visual interest.
- 3The glossy finish enhances the depth of the brown polish, while the metallic gold adds a luxurious touch, making the design suitable for various occasions.
Items Needed for this Design
Nail Preparation
- Nail file
- Nail buffer
- Cuticle oil
- Base coat
Nail Polish Colors
- Chocolate brown nail polish
- Gold nail polish or gold stamping polish
Nail Art Tools
- Detailing brush or nail art pen
- Stamping plate (if using stamping)
- Dotting tool
Cleanup
- Acetone or nail polish remover
- Cotton pads or swabs
Step by Step DIY(Do It Yourself) Guide
1
Prepare the nails
- Shape and file the nails to your desired length and shape.
- Gently push back cuticles and apply cuticle oil.
- Buff the nail surface lightly for better polish adhesion.
2
Apply the base coat
- Apply a thin layer of base coat to protect the nails.
- Allow the base coat to dry completely.
3
Paint the base color
- Apply two coats of chocolate brown nail polish.
- Ensure each coat dries completely before applying the next.
4
Create the gold design
- If using a stamping technique, apply gold polish to the stamping plate and press a stamp onto the nail.
- If hand painting, use a detailing brush or nail art pen to carefully create floral designs and swirls with gold polish.
- Allow the design to dry fully.
5
Finish with top coat
- Apply a top coat to seal the design and add shine.
- Clean up any excess polish around the nails with a cotton swab dipped in acetone.
Pro Tips
Practice the floral design on a piece of paper before applying it to your nails.
Use a light hand with the detailing brush for fine lines to avoid thick strokes.
Make sure to clean your tools with acetone after each use to maintain their condition.
Consider using a fast-drying top coat to speed up your overall nail art process.