Design Details
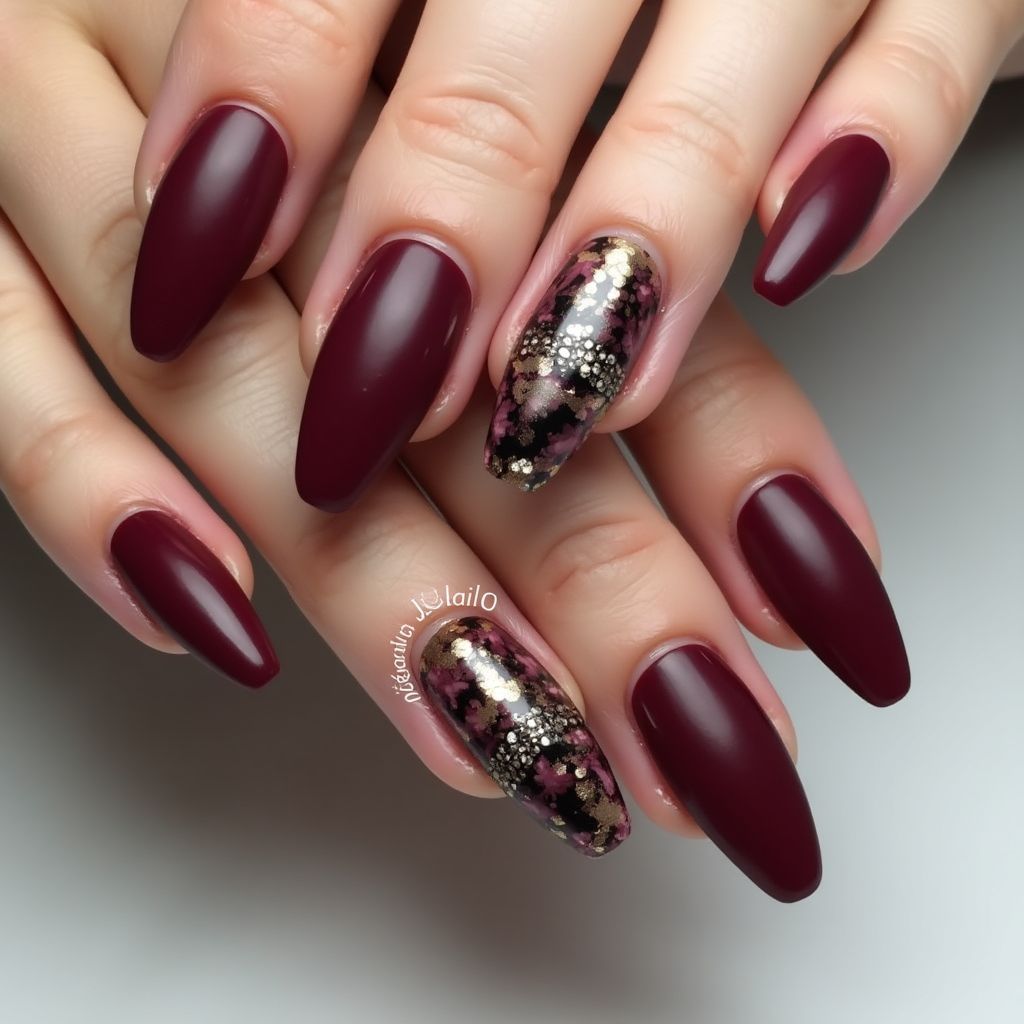
- 1The nail design features a deep burgundy base with a matte finish, giving it an elegant and sophisticated look.
- 2One accent nail stands out with a glossy finish, adorned with a blend of floral patterns and gold embellishments.
- 3The contrast between the matte and glossy textures enhances the overall visual appeal, making it suitable for both everyday wear and special occasions.
Items Needed for this Design
Nail Preparation
- Nail file
- Nail buffer
- Cuticle pusher
- Nail primer
Nail Polish Colors
- Deep burgundy nail polish (matte)
- Clear top coat (glossy)
- Black nail polish
- Gold nail polish
- Light pink or floral design polish
Nail Art Tools
- Dotting tool
- Nail art brush
- Sponges for blending
Cleanup
- Nail polish remover
- Cotton pads
- Small brush for clean-up
Step by Step DIY(Do It Yourself) Guide
1
Prepare your nails.
- File and shape your nails to your preferred length.
- Push back cuticles gently without damaging the skin.
- Buff the surface of your nails for better polish adhesion.
- Apply nail primer to ensure long-lasting wear.
2
Apply the base color.
- Choose the deep burgundy nail polish and apply a thin coat to all nails.
- Allow the first coat to dry completely before applying a second coat for opacity.
- Once dry, apply a matte top coat to all nails except one accent nail.
3
Create the accent nail design.
- For the accent nail, apply a clear top coat for a glossy finish.
- Using a nail art brush, create floral patterns with the light pink polish.
- Add small dots of black and gold polish to embellish the flowers.
- Finish with a final layer of clear top coat to seal the design.
4
Clean up and finalize.
- Use nail polish remover and a small brush to clean around the edges.
- Allow the nails to dry completely before using your hands.
- Apply cuticle oil for hydration and shine.
Pro Tips
Choose high-quality nail polishes for better coverage and longevity.
Allow each layer to dry completely to avoid smudging.
Practice the floral design on a piece of paper before applying it to your nails.
Keep nail art tools clean to ensure crisp and defined designs.