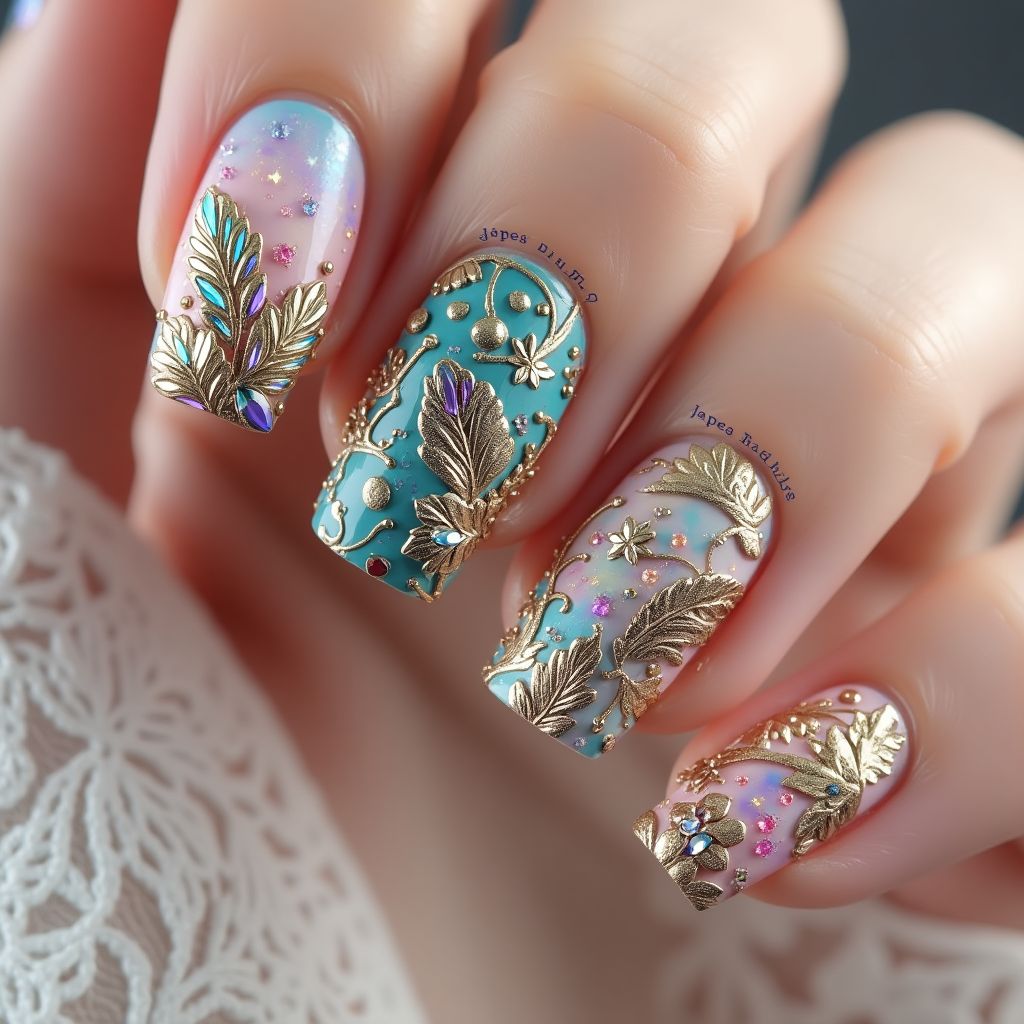
Design Details
- 1This nail design features a combination of pastel colors with intricate gold foil embellishments that mimic delicate leaves and floral patterns.
- 2The background consists of a gradient design with shades of blue and pink, enhanced by iridescent glitter for added sparkle.
- 3Each nail showcases unique elements, with some nails focusing more on detailed gold designs while others have a simpler approach to allow the colors to shine.
Items Needed for this Design
Nail Preparation
- Nail file
- Cuticle pusher
- Base coat
- Top coat
Nail Polish Colors
- Light blue polish
- Light pink polish
- White polish
- Gold foil or gold polish
- Iridescent glitter polish
Nail Art Tools
- Detailing brush
- Dotting tool
- Tweezers (for applying gold foil)
- Nail art rhinestones (optional)
Cleanup
- Acetone or nail polish remover
- Cotton balls or pads
- Cleanup brush
Step by Step DIY(Do It Yourself) Guide
1
Prepare the nails.
- File and shape the nails to your desired length.
- Push back cuticles gently.
- Apply a base coat to protect natural nails.
2
Create the base colors.
- Apply two coats of light blue polish on selected nails.
- On other nails, apply two coats of light pink polish.
- Allow to dry completely.
3
Apply the gradient and glitter.
- Use a makeup sponge to dab light blue and pink polishes together on the tips of gradient nails.
- Once dry, add a layer of iridescent glitter polish over the gradient area for sparkle.
4
Introduce gold foil details.
- Using a detailing brush or tweezers, carefully apply small pieces of gold foil in a leaf pattern on the nails.
- Seal the gold foil with a top coat to secure it.
5
Finish the design.
- Add any additional embellishments using rhinestones if desired.
- Apply a final layer of top coat over all nails to ensure longevity.
Pro Tips
Ensure each layer of polish is completely dry before applying the next to prevent smudging.
Use a small amount of top coat to seal the gold foil and avoid flooding the design.
Practice applying gold foil on a dummy nail first if you're new to the technique.